Mastering the art of removing cylinder heads involves understanding the importance of the task, mastering torque specifications, following a step-by-step tightening sequence, and replacing the head gasket. Additionally, it encompasses techniques such as cylinder head resurfacing to restore flatness, valve adjustment for precision, cam timing for synchronization, valve cover removal and installation for protection, spark plug replacement for maintenance, and injector removal and installation for efficiency.
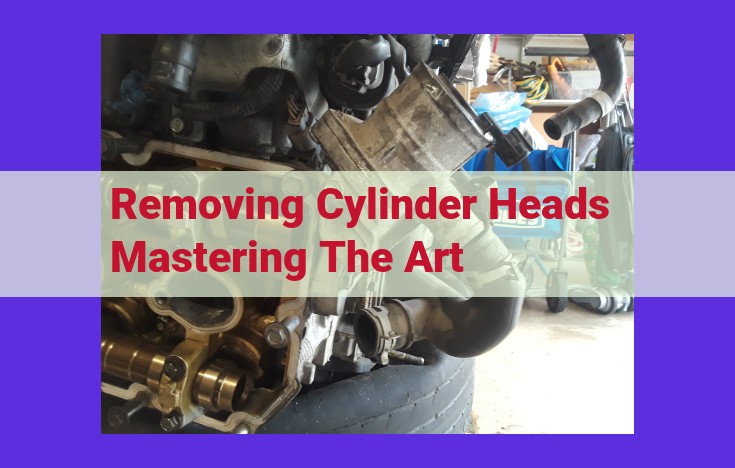
Cylinder Head Removal: A Comprehensive Guide to Mastering the Art
The cylinder head is a critical component of an engine, forming the top closure of the combustion chamber. Removing the cylinder head is often necessary for various reasons, including engine repairs, upgrades, or routine maintenance. Understanding the importance of cylinder head removal is essential for anyone looking to undertake such a task.
One of the most common reasons for removing a cylinder head is to repair or replace internal engine components. For instance, if the engine’s head gasket fails, causing coolant or oil leaks, the cylinder head may need to be removed to replace the gasket and reseal the head. Additionally, if the engine’s valves or valve train require servicing, such as repairing a burned valve or adjusting valve clearances, removing the cylinder head is typically necessary.
Another reason for removing a cylinder head is to upgrade or modify the engine’s performance. For example, installing a performance-oriented camshaft or larger valves may require removing the cylinder head to facilitate the modifications. In some cases, cylinder heads from different engines or aftermarket sources may be used as upgrades to improve airflow, compression, and power output.
Finally, cylinder head removal may be necessary for routine maintenance, such as cleaning carbon buildup from the combustion chambers or performing valve adjustments. By removing the cylinder head, mechanics can access the valves, pistons, and other internal components for thorough cleaning and inspection. This helps ensure the engine’s proper functioning and can extend its lifespan.
Mastering Torque Specifications: A Journey into the Precision of Engine Assembly
In the intricate world of engine maintenance, understanding torque specifications is paramount for ensuring the optimal performance and longevity of your mechanical marvel. Cylinder head bolts play a crucial role in securing the cylinder head to the engine block, creating a sealed combustion chamber. Tightening these bolts to the prescribed torque specifications is essential to distribute force evenly across the cylinder head, preventing warping or leakage.
Imagine your cylinder head as a symphonic orchestra, where each bolt acts as a musician, contributing to a harmonious performance. Torque specifications are the musical notes, guiding each bolt to its precise pitch, ensuring the proper symphony of forces. When bolts are tightened to the correct torque, they resonate together, creating a harmonious seal that keeps the combustion chamber intact. Conversely, when torque specifications are ignored, it’s like an orchestra playing out of tune, leading to disharmony and potential engine damage.
The tightening sequence is the meticulous roadmap that leads each bolt to its optimal torque. This sequence ensures that force is distributed evenly, preventing uneven stress concentrations that could lead to warping or breakage. It’s a delicate dance, where each step is critical in creating a balanced and stable foundation for the cylinder head.
By mastering torque specifications, you transform into a maestro of engine assembly, ensuring your mechanical masterpiece performs at its peak, mile after mile.
Step-by-Step Cylinder Head Bolt Tightening Sequence: A Precision Guide
Tightening cylinder head bolts to precise specifications is crucial for ensuring proper engine function. Ignoring the correct sequence or over/under-tightening can lead to catastrophic engine damage.
1. Preparation
Gather the necessary tools: a torque wrench, socket set, and cylinder head bolt sequence chart. Clean the bolt threads and seating surfaces to remove any dirt or debris.
2. Initial Torque
Hand-tighten the bolts using a socket wrench until they are snug. Avoid using excessive force as this can stretch or snap the bolts.
3. Sequence
Follow the manufacturer’s specified torque sequence diagram. Tighten the bolts in small increments, alternating between each bolt to distribute force evenly across the head.
4. First Pass
Using the torque wrench, tighten the bolts to the first torque specification. Typically, this is around 20-30 ft-lbs.
5. Second Pass
Wait for a few minutes to allow the head gasket to settle. Re-tighten the bolts to the final torque specification. This is usually around 60-80 ft-lbs.
6. Final Tightening
Double-check the torque of each bolt using the torque wrench. Ensure that all bolts are tightened to the correct specification.
7. Patience and Precision
Take your time and double-check every step. Rushing or skipping steps can compromise the head gasket seal and lead to costly repairs.
Head Gasket Replacement and Associated Concepts: A Comprehensive Guide
When it comes to engine maintenance, understanding the intricacies of cylinder head removal is crucial. One of the most critical aspects of this process involves replacing the head gasket, a vital component that ensures a proper seal between the cylinder head and engine block.
The function of the head gasket is twofold. Primarily, it prevents combustion gases and fluids (oil and coolant) from leaking between the cylinder head and the engine block. Additionally, it serves as a heat transfer barrier, dissipating heat from the cylinder head to the engine block.
Replacing a head gasket may become necessary due to various reasons, including engine overheating, blown gaskets, or major engine work that requires cylinder head removal. The process of head gasket replacement is complex, demanding meticulous attention to detail and adherence to manufacturer’s specifications.
Related Concepts to Head Gasket Replacement
Beyond replacing the head gasket, several related concepts play a significant role in ensuring optimal engine performance:
Cylinder Head Resurfacing: After removing the cylinder head, it’s often necessary to have it resurfaced. Resurfacing involves machining the mating surface of the cylinder head to restore flatness, ensuring a proper seal when it’s reinstalled.
Valve Adjustment: Proper valve clearance is critical for engine efficiency and performance. During cylinder head removal, it’s a good opportunity to inspect and adjust valve clearances, ensuring the valves open and close correctly.
Engine Head Cleaning: Removing the cylinder head provides an excellent chance to thoroughly clean the engine head. This includes removing any carbon buildup, oil residue, or other debris that can affect engine performance.
Cylinder Head Resurfacing: Restoring a Smooth Surface for Optimal Combustion
The cylinder head is a crucial component of your engine, acting as a lid to the cylinders and housing vital components like valves and spark plugs. However, over time, the cylinder head can become warped or damaged, leading to compression leaks and reduced engine performance. That’s where cylinder head resurfacing comes into play.
Benefits of Cylinder Head Resurfacing
Cylinder head resurfacing involves machining off a thin layer of material from the surface of the cylinder head to restore its flatness. This process offers several benefits:
- Eliminating warps and dips. Warped cylinder heads can cause uneven sealing between the head and the engine block, leading to compression leaks. Resurfacing removes these imperfections, creating a uniform mating surface.
- Preventing combustion chamber leaks. Combustion chamber leaks occur when the cylinder head is not properly sealed against the block. Resurfacing restores the flatness of the combustion chamber, ensuring a tight seal and preventing combustion gases from escaping.
- Improving performance. By restoring the proper sealing and compression, cylinder head resurfacing can boost engine power and efficiency.
The Resurfacing Process
Cylinder head resurfacing is a specialized process that requires precision equipment and skilled technicians. Here’s a brief overview of the steps involved:
- The cylinder head is removed from the engine and thoroughly cleaned.
- The cylinder head is placed on a resurfacing machine, which uses a rotating cutter to remove a thin layer of material from the surface.
- The amount of material removed is precisely controlled to ensure the head’s flatness is within specifications.
- Once resurfaced, the cylinder head is thoroughly washed to remove any remaining debris.
Important Considerations
When considering cylinder head resurfacing, there are a few important things to keep in mind:
- Never resurface a cylinder head more than once or twice. Excessive resurfacing can weaken the cylinder head and make it more susceptible to cracks or failure.
- Always have the cylinder head checked for cracks or other damage before resurfacing. Resurfacing a damaged cylinder head can worsen the problem and compromise its integrity.
- Use a qualified automotive machinist to perform cylinder head resurfacing. This ensures that the process is carried out accurately and to the highest standards.
By following these guidelines, you can extend the life of your cylinder head and ensure optimal engine performance for years to come.
Valve Adjustment: Precision Engineering for Engine Health
After meticulously removing your cylinder head, the next crucial step is ensuring the precise adjustment of your engine’s valves. Proper valve clearance is essential for optimal engine performance, fuel efficiency, and longevity. Here’s a comprehensive guide to help you master this precision engineering task:
Understanding Valve Clearance and Its Importance
Valve clearance refers to the gap between the valve stem and the rocker arm or camshaft lobe. Correct valve clearance allows the valves to open and close at the right time, ensuring proper airflow and combustion. Incorrect clearances can lead to performance issues, engine damage, or even catastrophic failure.
Methods of Valve Adjustment
There are two primary methods used to adjust valve clearances:
1. Feeler Gauges:
This traditional method involves using a set of thin gauges to measure the clearance between the valve stem and the rocker arm. By selecting the appropriate gauge that fits snugly into the gap, you can determine the valve clearance.
2. Torque Wrenches:
Modern engines often use hydraulic lifters to automatically adjust valve clearances. In this case, valve adjustment involves tightening the lifter’s adjustment screw to a specific torque specification. Refer to your vehicle’s service manual for the precise torque values.
Step-by-Step Valve Adjustment
1. Gather Necessary Tools:
Before you begin, gather all the required tools, including feeler gauges, torque wrench, spark plug wrench, and the appropriate socket set.
2. Locate Adjustment Points:
Identify the adjustment points on the valve train. This may involve removing the valve cover to access the rocker arms or camshaft lobes.
3. Measure or Adjust Clearances:
For feeler gauges, insert the appropriate gauge into the gap and feel for a slight drag. For torque wrenches, tighten the adjustment screw to the specified torque.
4. Follow the Valve Sequence:
It’s crucial to follow the manufacturer’s specified valve adjustment sequence to ensure even distribution of forces and proper engine operation.
5. Reassemble and Check:
Once all valves are adjusted, reassemble the valve train and double-check the clearances. Start the engine and listen for any unusual noises that may indicate incorrect adjustments.
Other Related Concepts
Valve adjustment is often accompanied by other essential maintenance tasks:
- Valve Resurfacing: Reshaping valve seats and valves to ensure a tight seal.
- Camshaft Timing: Aligning the camshaft with the crankshaft to ensure proper valve timing.
- Spark Plug Replacement: Inspecting and replacing spark plugs to ensure optimal ignition.
- Injector Inspection: Cleaning or replacing injectors to maintain proper fuel delivery.
By following these guidelines and using the appropriate tools, you can confidently adjust your valve clearances, restoring your engine to peak performance and ensuring its long-term health.
Cam Timing: Synchronization for Performance
In the symphony of an engine, the precise synchronization of valves and pistons is orchestrated by cam timing. This intricate dance, carefully choreographed by the relationship between the camshaft and crankshaft, ensures optimal engine performance and efficiency.
Cam timing refers to the specific alignment of the camshaft, which controls the opening and closing of the valves, with the crankshaft, which drives the pistons. When these components are in harmony, the valves open and close at precisely the right moments to allow the proper flow of air and fuel into and out of the engine’s cylinders.
Setting cam timing accurately requires specialized tools and techniques. The process typically involves aligning timing marks on the camshaft and crankshaft gears or using special tools such as timing chains or belts. By following precise instructions and utilizing the correct tools, mechanics ensure that the camshaft and crankshaft rotate in perfect synchrony.
Incorrect cam timing can lead to a range of issues, including reduced engine power, rough idling, and even engine damage. Therefore, it is crucial to have cam timing checked and adjusted as specified by the manufacturer or when certain engine components are replaced.
By understanding the concept of cam timing and its impact on engine performance, you can appreciate the precision and intricacy involved in automotive engineering. Remember, the rhythmic interplay of valves, pistons, and cam timing ensures that every beat of your engine is orchestrated with symphony-like precision.
Valve Cover Removal and Installation: Protecting the Engine
In the realm of automotive maintenance, the valve cover holds a crucial role in safeguarding the engine’s vital components. As a protective shield, it encloses the cylinder head, protecting it from external contaminants. But when circumstances demand, it becomes necessary to remove and reinstall the valve cover, a task that requires precision and care.
Step-by-Step Valve Cover Removal
-
Gather Your Arsenal: Before embarking on this mission, ensure you’re armed with the necessary tools, including a socket wrench, torque wrench, and a new valve cover gasket. Safety first! Wear gloves to protect your hands.
-
Unmasking the Valve Cover: Locate the valve cover, which typically resides atop the cylinder head. Detach all bolts or nuts securing the cover in place using the socket wrench.
-
Gasket Removal: Gently pry the old valve cover gasket away from the mating surfaces. Inspect the gasket for any signs of damage or wear, as its integrity is paramount for preventing leaks.
Installing the Valve Cover
-
Priming the Base: Thoroughly clean the mating surfaces on the cylinder head and valve cover to remove any residual oil or debris. Apply a thin bead of high-temperature gasket maker to the mating surface of the cylinder head.
-
New Gasket, New Beginning: Place the new valve cover gasket onto the cylinder head, ensuring it aligns perfectly.
-
Tightening the Grip: Carefully position the valve cover over the gasket and hand-tighten the bolts or nuts. Use the torque wrench to tighten them in a star pattern, following the manufacturer’s specified torque values to prevent overtightening or damage.
Related Concepts: Spark Plug Replacement and Injector Inspection
While accessing the valve cover, you may want to seize the opportunity to perform other related tasks, such as:
-
Spark Plug Replacement: If due for replacement, remove the old spark plugs and replace them with new ones, adhering to the specified torque values.
-
Injector Inspection: With the valve cover removed, you can inspect fuel injectors for any signs of clogging or damage. Clean or replace them as needed to ensure optimal fuel delivery.
Spark Plug Replacement: Essential Maintenance for Optimal Engine Performance
Maintaining a healthy engine involves ensuring its vital components are functioning at their best. Spark plugs, located atop each cylinder, play a crucial role in igniting the air-fuel mixture, propelling your vehicle forward. Recognizing their significance, it’s essential to know how to replace spark plugs effectively.
Understanding the Process:
Removing and replacing spark plugs requires attention to detail and the right tools. Begin by gathering a spark plug wrench, a gap gauge (if necessary), and appropriately sized new spark plugs. Locate the spark plugs, typically found on the engine’s top.
Unscrewing the Old Plug:
Using the spark plug wrench, carefully unscrew the old spark plug counterclockwise. Inspect the old plug’s condition, paying attention to signs of wear or damage. Compare it to the new plug to spot differences.
Preparing the New Plug:
Check the gap between the electrodes on the new spark plug. If needed, adjust the gap using a gap gauge. Align the gap to manufacturer specifications to ensure a proper spark.
Installing the New Plug:
Hand-tighten the new spark plug into the cylinder head. Once snug, use the spark plug wrench to further tighten it. Follow the specified torque for your vehicle to avoid over- or under-tightening.
Reassembly and Checking:
Connect the spark plug wire to the new plug. Double-check all connections to ensure they’re secure. Start the engine and listen for any unusual noises or vibrations. Use an OBD-II scanner or spark plug tester to confirm correct operation.
Importance of Correct Spark Plugs:
Using the right spark plugs is paramount. Refer to your vehicle’s manual or consult a professional for recommended spark plug specifications. Incorrect spark plugs can affect engine performance, fuel economy, and emissions.
Benefits of Regular Replacement:
Regular spark plug replacement enhances engine efficiency, reducing emissions and improving fuel consumption. It ensures optimal spark generation, leading to smoother engine operation and extended engine life. Replacing spark plugs is a relatively simple and cost-effective maintenance task that can significantly impact your vehicle’s overall performance.
Injector Removal and Installation: Fueling Efficiency
Fuel injectors are critical components in your engine’s combustion process, delivering the precise amount of fuel to each cylinder. Maintaining these injectors is essential for optimal engine performance and fuel economy.
Step 1: Safety First
Before starting, disconnect the battery to prevent any electrical hazards. Ensure your engine is cool, allowing ample time for the components to cool down.
Step 2: Locating the Injectors
Fuel injectors are usually mounted on the engine’s intake manifold. Remove any covers or shrouds that obstruct access to the injectors.
Step 3: Disconnecting the Injector
- Gently pry off the injector electrical connector using a flathead screwdriver or specialized removal tool.
- Caution: Avoid damaging the connector or its terminals.
Step 4: Removing the Injector
- Use a 10mm flare nut wrench to loosen the injector’s fuel line fitting.
- Pull the fuel line off the injector while cupping your hand to catch any residual fuel.
- Important: Inspect the O-rings on the fuel line and injector for signs of wear or damage before reinstalling.
Step 5: Injector Extraction
- Secure a fuel injector removal tool around the injector’s body, ensuring a firm grip.
- Gently twist and pull the injector straight up out of the engine block.
- Caution: Avoid twisting the injector body excessively, as this could damage the surrounding components.
Step 6: Fuel Line Inspection
- While the injectors are removed, inspect the fuel lines for any cracks, leaks, or blockages.
- Replace any damaged fuel lines before reinstalling the injectors.
Step 7: Injector Cleaning
- Inspect the injectors for any deposits or contamination.
- Clean the injector tips using approved cleaning solutions and specialized tools to remove debris.
- Tip: Ultrasonic cleaning is a highly effective method for thorough injector cleaning.
Step 8: Reinstallation
- Lubricate the injector O-rings with a thin layer of petroleum jelly or injector lubricant.
- Ensure the injector is seated correctly in its socket.
- Use the fuel injector removal tool to carefully guide the injector into place.
- Tighten the injector’s fuel line fitting to the specified torque.
Step 9: Electrical Reconnection
- Reattach the injector’s electrical connector by pressing it firmly until you hear a click.
Step 10: Final Touches
- Reinstall any covers or shrouds removed earlier.
- Reconnect the battery and start the engine.
- Check for any fuel leaks or abnormal engine noises.