- Locate & Open Reservoir: Identify the washer fluid reservoir using your owner’s manual, remove the cap by twisting counterclockwise.
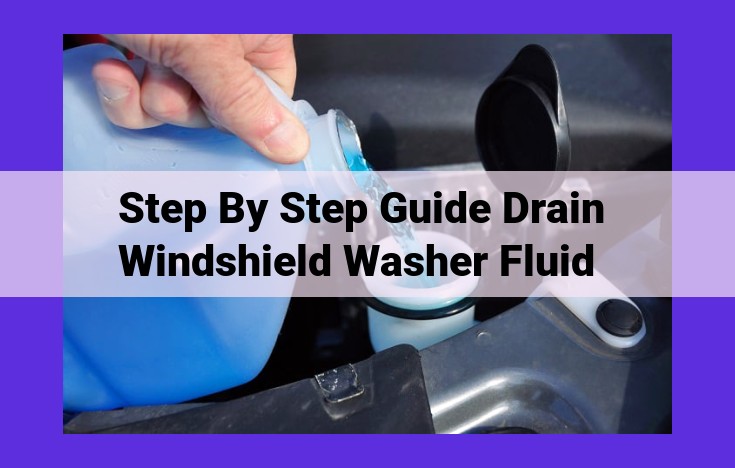
- Pour Fluid: Fill the reservoir to the indicated level, avoiding overfilling.
- Replace Cap: Align and twist the cap clockwise to secure it tightly.
Finding the Washer Fluid Reservoir: A Quick and Easy Guide
Maintaining your vehicle’s washer fluid is essential for optimal visibility and safety on the road. But before you can replenish the fluid, you need to locate the washer fluid reservoir—a seemingly simple task that can be tricky if you’re not familiar with your car’s anatomy.
Unlocking the Secrets of Your Owner’s Manual
The first step in finding the washer fluid reservoir is to consult your owner’s manual. This valuable resource holds a wealth of information specific to your vehicle, including the exact location of the elusive reservoir. Take a moment to flip through the pages until you find a diagram or section dedicated to maintenance fluids. Here, you should find a clear indication of where the washer fluid reservoir is situated.
Using Your Detective Skills
If you don’t have access to your owner’s manual, don’t despair. With a little detective work, you can still locate the washer fluid reservoir on your own. Begin by opening the hood and taking a good look around. Most reservoirs are made of translucent plastic and are conveniently positioned near the firewall or fender. They often have markings or symbols resembling windshield wipers or washer fluid bottles.
Identifying the Washer Fluid Cap: A Visual Guide
When the windshield wipers start splattering murky water instead of clearing your line of sight, it’s time to replenish your washer fluid. The first step in this straightforward task is to locate the washer fluid reservoir and its elusive cap.
The washer fluid cap is typically perched atop the reservoir, a translucent container usually hidden under the hood. Its presence may be betrayed by a blue or green tint—the color of the washer fluid itself. The cap typically features a circular or oval shape and may have a small handle or notch for easy gripping.
If the reservoir eludes your initial search, consult your owner’s manual for its precise location. This handy guide will provide a diagram and detailed instructions to help you zero in on the right spot.
Unlocking the Washer Fluid Secret: Removing the Cap Safely
Gear up for the next step in our washer fluid journey: removing the washer fluid cap. This simple yet critical task requires a gentle touch, so let’s delve into the details.
Step 1: Locate the Washer Fluid Cap
The washer fluid cap is usually perched atop the reservoir, easily identifiable by its color, often blue or yellow. It’s typically adorned with a symbol related to windshield wipers or washer fluid.
Step 2: Twist and Pull
Once you’ve spotted the cap, it’s time to gently twist it counterclockwise. You may encounter some resistance, but don’t force it. Apply a steady, firm pressure until you feel the cap loosen. Then, carefully pull it straight up to remove it completely.
Caution: Avoid Overtightening
When replacing the cap, avoid overtightening it. Excessive force can damage the cap or the reservoir itself. Tighten it snugly by hand, just until it feels secure. This will ensure a proper seal without causing any unnecessary stress.
There you have it! You’ve successfully removed the washer fluid cap, paving the way for refilling the reservoir and ensuring a clear view on your next drive. Congratulations on completing this essential step towards keeping your windshield sparkling clean.
Pouring the Washer Fluid: Essential Steps for Clear Visibility
Determining the Ideal Level:
Locate the fill line or max fill line indicator on the reservoir. Pour the washer fluid until it reaches the mark to ensure adequate windshield coverage. Avoid overfilling, as it can cause leaks or damage to the system.
Precautions to Observe When Pouring:
- Use the correct washer fluid: Choose a fluid specifically formulated for your vehicle to prevent any issues with compatibility or component damage.
- Wear gloves: Washer fluid contains chemicals that can irritate the skin.
- Avoid spills: Pour the fluid carefully to prevent any unnecessary mess or damage to surrounding surfaces.
- Keep away from pets: Washer fluid can be harmful to animals, so keep pets at a safe distance.
Replace the Washer Fluid Cap
Once you have poured the washer fluid into the reservoir, it’s time to replace the cap. This step is crucial to prevent the fluid from leaking or spilling.
Carefully align the cap with the reservoir opening. The cap usually has arrows or tabs that indicate the correct alignment.
Once aligned, firmly twist the cap clockwise until it is snug. Do not overtighten the cap, as this can damage the threads or the reservoir.
Check the cap to ensure it is securely fastened. You can gently tug on it to verify that it is not loose.
By following these steps, you will have successfully replaced the washer fluid cap and ensured that your windshield washer system is ready to keep your windshield clean and your visibility clear during your drives.