Egg hollowing encompasses numerous techniques and tools for removing egg contents. Methods include using compressed air, syringes, straws, hand pumps, balloons, vacuum cleaners, egg blowers, drills, hot glue guns, and Dremels, providing options for efficient hollowing and creative decoration of eggshells.
Tools and Techniques for Egg Hollowing: A Comprehensive Guide
Embarking on the art of egg hollowing requires a mastery of various tools and techniques. Here’s a comprehensive guide to help you achieve perfectly hollowed eggshells for your creative pursuits.
Air Compressor and Pneumatic Tools
- Pneumatic tools: Use an air compressor to power specialized tools like blow guns, which efficiently blow out egg contents.
- Air brush: Decorate hollowed eggs with intricate designs using an air brush powered by the compressor.
Syringe: Injecting and Aspirating
- Injecting: Inject a liquid solution into the egg to dissolve the yolk and albumen.
- Aspirating: Use the syringe to aspirate (suck out) the dissolved contents, leaving an empty eggshell.
Straw: Sipping and Sucking
- Piercing and blowing: Pierce a small hole in the egg and gently blow air into it using a straw, forcing out the contents.
- Sipping the yolk: Use the straw to carefully sip out the yolk and albumen, leaving the shell intact.
Hand Pump: Inflating and Deflating
- Inflating: Inject air into the egg using a hand pump, gradually increasing pressure to blow out the contents.
- Deflating: Slightly deflate the egg before emptying to prevent breakage.
Balloon: Inflating and Party Decorations
- Inflating with a balloon: Inflate a balloon and attach it to the egg’s hole, inflating the egg and pushing out the contents.
- Decorative remnants: Use the remnants of the balloon to create unique decorations on the hollowed eggs.
Vacuum Cleaner: Cleaning and Suction
- Suction power: Use a vacuum cleaner with a narrow nozzle to create suction that draws out the egg’s contents, leaving it clean and dry.
- Versatile cleaning: The vacuum cleaner can also be used to remove any remaining debris or egg yolk from the hollowed shells.
Egg Hollowing with Compressed Air: A Convenient and Efficient Technique
Blowing out egg contents can be a daunting task, but with the right tools, it becomes a breeze. Among the various methods available, compressed air offers an exceptionally efficient and convenient solution.
Air Compressor and Pneumatic Tools
An air compressor is a vital component of this technique. Its pressurized air provides the force necessary to blast the egg’s contents out through a small hole. Pneumatic tools, such as a blow gun or an airbrush, can be connected to the compressor and employed for precise and effortless hollowing.
Step-by-Step Guide to Using Compressed Air:
-
Safety First: Wear eye protection and gloves while working with compressed air.
-
Prepare the Egg: Gently tap the egg at both ends to identify the thicker and thinner shells. Using a sharp needle or awl, make a small hole at the thicker end.
-
Attach the Blow Gun: Connect a blow gun to the air compressor and adjust the pressure to a moderate level (around 20-30 PSI).
-
Insert the Blow Gun: Carefully insert the tip of the blow gun into the hole. The fit should be snug enough to create a seal but not so tight as to cause cracks.
-
Start Blowing: Turn on the air compressor and start gently blowing air into the egg. Gradually increase the pressure until the egg’s contents begin to be expelled through the opposite hole.
-
Collect the Contents: Place a bowl or container underneath the hole to collect the blown-out contents. Avoid aiming the air stream directly at yourself or others.
-
Rinse and Dry: Once the egg is emptied, use water to thoroughly rinse the inside and outside. Pat it dry with a clean cloth or paper towel.
Decorating with Pneumatic Tools
In addition to hollowing, compressed air can also be used for egg decorating. Using an airbrush, you can apply intricate designs, vibrant colors, and delicate patterns to your hollowed eggshells, enhancing their aesthetic appeal.
Unleashing the Artist Within: Hollowing Eggs with a Syringe
In the realm of egg artistry, hollowing eggs opens up endless possibilities for creativity and intricate designs. Among the various techniques, syringe injection offers a precise and efficient method for dissolving and aspirating egg contents. This guide will delve into the art of using a syringe to hollow out eggs, empowering you to transform humble eggshells into canvases for your imagination.
The Delicate Dance of Injection
The process begins with carefully injecting a liquid solution into the egg. This liquid, often a mixture of water and vinegar, gently dissolves the yolk and albumen, breaking down their chemical bonds. The key lies in precision; the syringe’s needle should be inserted into the air cell at the egg’s blunt end, ensuring minimal damage to the fragile shell.
Aspiration: Drawing Out the Dissolved Contents
Once the egg’s contents are dissolved, the syringe’s role shifts from injector to aspirator. Gently draw back the plunger, creating a vacuum that draws out the dissolved mixture, leaving the eggshell clean and ready for artistic expression. Repeat the injection and aspiration process as needed until the egg is completely hollow.
Tips for Success
- Use fresh eggs: Fresh eggs have a stronger shell, reducing the risk of breakage during hollowing.
- Chill the eggs: Chilling eggs prior to hollowing helps thicken the contents, making them easier to dissolve and aspirate.
- Inject slowly and carefully: Rushing the injection process can put pressure on the eggshell, causing cracks or breakage.
- Aspirate gradually: Avoid pulling the plunger too quickly, as this can rupture the eggshell.
- Rinse the syringe: Regularly rinse the syringe with water to prevent clogging and ensure proper functionality.
Beyond Hollowing: Decorative Possibilities
Hollowing eggs is not merely a technique for emptying their contents; it unlocks a world of decorative possibilities. Once the eggshells are clean and dry, they can be transformed into unique works of art:
- Painting: Paint the eggshells with vibrant colors and intricate patterns, creating miniature masterpieces.
- Carving: Use a sharp blade or Dremel tool to carve designs into the eggshells, revealing the delicate layers beneath.
- Decoupage: Adorn the eggshells with paper or fabric scraps, creating intricate and colorful mosaics.
By mastering the art of hollowing eggs with a syringe, you unleash your inner artist and embark on a journey of creativity. Whether for decorative displays or intricate crafts, hollowed eggs provide a canvas for your imagination to soar and create one-of-a-kind masterpieces.
Egg Hollowing with a Straw: A Simple and Gentle Approach
Hollowing eggs is a delicate art that requires patience and precision. Among the various techniques, using a straw offers a simple and gentle approach, suitable for beginners and experienced crafters alike. In this guide, we’ll walk you through the steps of this method, providing detailed instructions and tips to ensure successful egg hollowing.
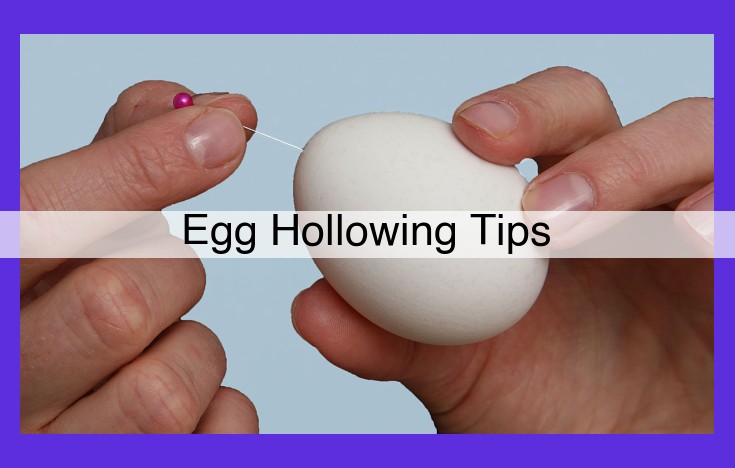
Piercing the Egg:
The first step is to carefully pierce a small hole in the egg. Choose a sharp needle or a thin nail and pierce a hole near the top of the egg. Avoid piercing too close to the center, as this can weaken the shell.
Inserting the Straw:
Gently insert a clean straw into the hole you’ve created. The straw should be long enough to reach the bottom of the egg.
Blowing Air:
Place your mouth over the other end of the straw and steadily blow air into the egg. As you blow, the air pressure inside the egg will increase, forcing the contents out through the hole.
Monitoring the Process:
Keep an eye on the egg as you blow. The contents should start to emerge from the hole as a foamy substance. Continue blowing until all the contents have been removed.
Finishing Touches:
Once the egg is empty, remove the straw and rinse the egg with cold water. This will remove any remaining yolk or albumen. You can now decorate the hollowed egg as desired.
Tips for Successful Egg Hollowing:
- Use fresh eggs. Older eggs may have a thinner shell, making them more prone to breakage.
- Pierce the hole slightly off-center to avoid weakening the shell.
- Blow steadily and gently. Avoid using too much pressure, as this can crack the egg.
- If the contents are not coming out easily, try wiggling the straw inside the egg to loosen them.
- Rinse the hollowed egg thoroughly to prevent any residual contents from spoiling.
Hollowing Eggs with a Hand Pump: A Step-by-Step Guide
Hollowing eggs is an art form that requires precision and patience. Among the various techniques available, using a hand pump is a reliable and effective method to achieve beautiful and intact hollowed eggs. Here’s a step-by-step guide to guide you through the process:
Preparing the Egg
Begin by carefully washing the egg to remove any dirt or debris. Gently pat it dry with a clean towel or paper towel. Locate the top and bottom of the egg. The top is typically slightly flatter than the bottom.
Injecting Air
Take the hand pump and insert the needle into the top of the egg. Slowly inject air into the egg, gradually increasing the pressure. As you inject air, you’ll feel the egg expanding slightly. Continue pumping until the egg feels firm but not hard.
Deflating the Egg
Once the egg is inflated, slightly deflate it by pressing gently on the egg’s sides. This will help to prevent the egg from breaking when you empty it.
Emptying the Egg
Pierce a small hole in the bottom of the egg with a needle or thin wire. Hold the egg over a bowl and tap the top of the egg to force the contents out through the hole. Rinse the inside of the egg with cool water to remove any remaining residue.
Finishing Touches
Leave the hollowed egg to dry thoroughly. You can decorate the egg with paint, markers, or other embellishments.
Tips and Tricks
- Use a sharp needle to create a clean hole in the bottom of the egg.
- Inflate the egg slowly to avoid over-pressurizing and cracking the shell.
- Deflating the egg before emptying reduces the risk of breakage.
- Rinse the egg thoroughly to remove any remaining egg contents.
- Experiment with different decorating techniques to create unique and personalized hollowed eggs.
Hollowing Eggs with Balloons: A Creative and Festive Twist
For those seeking an artistic and celebratory way to hollow eggs, the balloon method offers a whimsical and effective approach. This unique technique not only allows you to empty the eggs effortlessly but also transforms the discarded balloon remnants into vibrant decorations for your hollowed eggshells.
To begin, gently puncture a small hole in the bottom of the egg using a sharp needle or pin. Attach a slightly inflated balloon to the hole and secure it tightly with a piece of string or tape. Slowly and steadily inflate the balloon until it reaches the desired size, gently pushing the egg’s contents out through the hole.
Once the egg is completely empty, carefully deflate the balloon. The remnants of the deflated balloon can then be used to create eye-catching decorations for your hollowed eggs. Cut out shapes, patterns, or designs from the balloon material and secure them to the eggshell using a dab of glue or a few drops of water.
Thisballooning technique not only provides an efficient and fun way to hollow eggs but also adds a touch of creativity and festivity to your crafting experience. Let your imagination soar as you decorate your hollowed eggs with the colorful and versatile remnants of your balloons.
Using a Vacuum Cleaner: A *Clean and Efficient Way to Hollow Eggs*
In the realm of egg hollowing, where precision and ingenuity collide, a vacuum cleaner emerges as an unexpected yet effective tool. Harnessing its suction prowess, this household appliance offers a quick and clean method to evacuate egg contents, leaving behind an intact, ready-to-decorate canvas.
To embark on this unique endeavor, select a vacuum cleaner with a narrow nozzle, which will provide concentrated suction for optimal results. Carefully pierce a small hole in one end of the egg. Position the vacuum nozzle over the hole, ensuring a snug fit to prevent air leakage.
With a gentle touch, activate the vacuum. As the nozzle draws air through the hole, the internal pressure within the egg decreases, creating a suction effect. This effect gently pulls the yolk and albumen out of the shell, leaving it empty and dry.
Unlike other hollowing techniques, such as drilling or using an air compressor, the vacuum cleaner method minimizes the risk of damaging the eggshell. The delicate suction action applies no excessive force, preserving the structural integrity of the egg.
Additionally, this method eliminates the need for messy liquids or elaborate tools. The vacuum cleaner does all the work, leaving you with a pristine, hollowed egg, ready to unleash your creativity. Whether you choose to paint, engrave, or embellish your masterpiece, the clean canvas provided by the vacuum cleaner technique will ensure a flawless result.
Using an Egg Blower: Blowing Out Eggs and Egg Decoration
In the realm of egg art, hollowed eggs serve as exquisite canvases for intricate designs and vibrant expressions. Using an egg blower, a specialized tool designed for this delicate craft, we unlock a world of possibilities to transform ordinary eggs into extraordinary works of art.
An egg blower is a remarkable device that simplifies the process of blowing out eggs. Its precision nozzle gently inserts into the egg’s shell, creating a suction that effortlessly draws out the egg’s contents. This method ensures a clean and effortless hollowing process, preserving the eggshell’s delicate structure.
Once emptied, the transformed eggshells become a blank canvas for artistic exploration. Unleash your creativity with a palette of paints, markers, or other decorative materials. Let your imagination soar as you transform these empty vessels into vibrant masterpieces. Whether you prefer whimsical designs or intricate patterns, the egg blower’s precision allows for effortless decoration.
To harness the power of an egg blower, begin by carefully selecting your egg. Opt for fresh eggs with sturdy shells to ensure a successful blowing process. Using the egg blower’s needle, gently pierce a small hole in the egg’s larger end. This opening will serve as the entry point for the suction.
Insert the egg blower’s nozzle into the hole and apply gradual pressure. As the suction increases, the egg’s contents will be gently drawn out. Be patient and observant; excessive force may damage the eggshell. Once the contents are fully removed, carefully remove the blower nozzle.
With the egg now completely hollowed, prepare to unleash your artistic vision. Clean the eggshell thoroughly, removing any remaining albumen or yolk. Allow the shell to dry completely before applying your desired decorations.
Experience the joy and satisfaction of egg blowing with the help of an egg blower. This innovative tool empowers you to create stunning works of art, transforming ordinary eggs into extraordinary masterpieces. Embrace the magic of egg decoration and let your creativity take flight.
Egg Hollowing with a Drill: A Precise and Efficient Approach
When it comes to egg hollowing, precision and caution are paramount. Drilling offers a controlled method to carefully create holes and enlarge them for content removal, preserving the egg’s delicate structure.
Step 1: Preparation
Choose a small drill bit specifically designed for eggs. This will minimize the risk of cracking or shattering. Position the egg稳固地 secured in a holder or on a stable surface.
Step 2: Drilling the First Hole
Identify the air pocket at one end of the egg. Carefully drill a small hole about 1/16 inch in diameter. Keep the drill steady and apply gentle pressure.
Step 3: Expanding the Hole
Using a slightly larger drill bit, gradually widen the hole by drilling around the circumference. Continue expanding the hole until it is approximately 1/4 inch in diameter. This provides enough space to remove the egg’s contents.
Step 4: Creating an Exit Hole
Drill a similar-sized hole at the opposite end of the egg. This will allow air to escape and facilitate the removal of the contents.
Step 5: Content Removal
Gently blow air into the larger hole using a straw, syringe, or air compressor. This will force the egg’s contents out through the exit hole. Alternatively, you can use a hand pump to inject air and create pressure to push out the contents.
Step 6: Cleaning and Drying
Rinse the hollowed egg thoroughly with warm水. Use a cotton swab to gently remove any residual contents. Allow the egg to dry completely before decorating or further embellishing.
Tips:
- Use a sharp drill bit to prevent snagging and minimize the risk of cracking.
- Avoid drilling too deeply, as this can damage the egg’s structure.
- Work in a well-ventilated area if using an air compressor or hand pump.
Using a Hot Glue Gun: Bonding and Sealing
- Explain how to use hot glue to seal holes in the eggshells to prevent leakage and to attach decorative elements or other embellishments to the hollowed eggs.
Using a Hot Glue Gun for Egg Hollowing: Bonding and Sealing
In the realm of egg hollowing, the versatility of a hot glue gun extends beyond its mere ability to seal holes. With its arsenal of adhesive prowess, it transforms into a trusty companion, empowering you to embellish your hollowed eggs with finesse.
Harnessing the power of melted glue, seal those tiny perforations with precision, safeguarding your delicate egg from any unwelcome leaks. This adhesive bond ensures your masterpiece remains pristine and flawless, preserving its integrity for the artistic journey ahead.
But that’s not all! Unleash your creative flair by using hot glue to attach an array of decorative elements and embellishments. Whether it’s shimmering beads, vibrant feathers, or intricate fabric, let your imagination soar as you transform your hollowed egg into a canvas of artistic expression.
Step-by-Step Guide to Sealing and Embellishing
- Prepare your egg: Ensure your hollowed egg is clean and dry.
- Seal the holes: Apply a small amount of hot glue around the edges of the hole. Press gently to secure. Allow the glue to cool and harden.
- Attach embellishments: Once the holes are sealed, grab your desired decorative elements. Using a dab of hot glue, carefully attach them to your egg. Hold them in place briefly until the glue sets.
- Enjoy your masterpiece: Step back and admire your creation! The sealed holes prevent any messy spills, while the embellishments add a touch of personal flair to your hollowed egg.
Tips for Successful Bonding
- Use a high-quality hot glue gun: This ensures the glue will provide a strong and lasting bond.
- Practice on scrap paper: Before applying glue to your egg, try it out on a piece of scrap paper to get the hang of the technique.
- Allow the glue to cool: Once applied, give the glue sufficient time to cool and harden before handling or embellishing.
- Use a tweezer: If necessary, use tweezers to precisely place small embellishments or adjust their position.
With the magic of a hot glue gun, sealing holes and adorning your hollowed eggs becomes a seamless and enjoyable process. Embrace the transformative power of this versatile tool to create stunning works of art that will grace your home or inspire others. Unleash your creativity, experiment with different materials, and let your hollowed eggs become a testament to your artistic prowess.
Using a Dremel: Cutting, Engraving, and Sanding for Egg Art
When it comes to customizing hollowed eggs, a Dremel tool offers endless possibilities. Its versatility allows you to create intricate designs, cut out shapes, or smooth the egg’s surface for a polished finish.
Cutting and Engraving:
With a diamond cutting bit, you can precisely cut shapes or create designs on the eggshell. Carefully guide the tool along your desired path, ensuring not to press too hard or move too quickly to avoid breaking the delicate shell.
Sanding:
A sanding bit is perfect for smoothing out the egg’s surface or removing any imperfections. Gently guide the bit over the areas you want to smooth, avoiding prolonged contact to prevent overheating the shell. Start with a coarse-grit bit and gradually switch to finer grits for a smoother finish.
Polishing:
For a lustrous shine, use a polishing bit. Apply light pressure and move the bit in circular motions over the entire surface. Polish until the eggshell gleams, taking care not to overheat it.
Tips for Using a Dremel on Eggs:
- Wear safety glasses: Eggshells can shatter into tiny fragments.
- Use a steady hand: Patience and precision are key.
- Practice on a spare egg before working on the actual piece.
- Avoid overheating the shell: Keep the tool moving and take breaks as needed.
- Clean the tool regularly: Bits can dull quickly with eggshell residue.
Unleash your creativity with a Dremel tool and transform hollowed eggs into exquisite works of art. By carefully cutting, engraving, sanding, and polishing, you can create one-of-a-kind Easter decorations or unique gift items.


