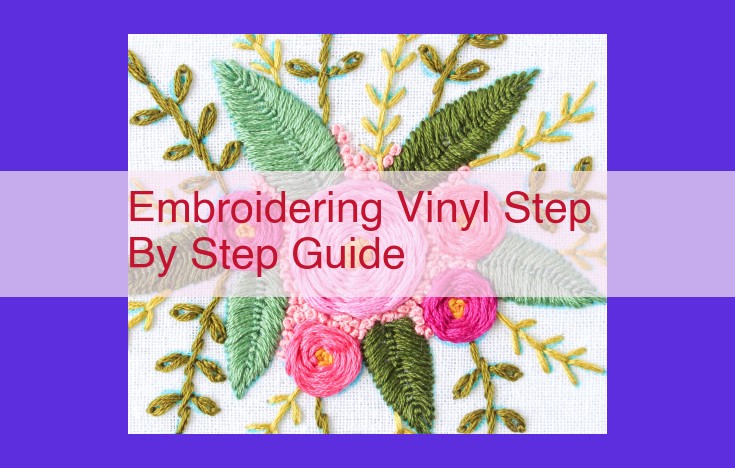
Embroidering Vinyl Step-by-Step Guide:
- Gather essential materials, including vinyl, stabilizer, thread, and needles. Hoop the vinyl securely using proper techniques.
- Select the appropriate needle size and thread based on vinyl thickness and design. Adjust embroidery settings for stitch density and speed, and choose suitable stitch types.
- Embroider the vinyl, ensuring proper thread tension. Trim excess thread and seal the edges for protection. Use heat or glue for secure adhesion.
Embroidery Essentials: Embark on Your Vinyl Embroidering Journey
Embroidering on vinyl adds a touch of uniqueness and personalization to your projects. Whether you’re a seasoned embroiderer or a novice just starting out, mastering the basics is crucial for successful vinyl embroidery.
Types of Vinyl:
Choose the vinyl that suits your project. Heat-transfer vinyl (HTV) comes in various colors and finishes, and is ideal for garments and accessories. Adhesive vinyl, with its self-adhesive backing, is great for creating decals and signs.
Fabric Stabilizer:
Stabilize your vinyl to prevent puckering and distortion. Tear-away stabilizer is used for designs that will be removed, while cut-away stabilizer provides more permanent support.
Embroidery Thread:
Select the thread that complements your vinyl. Polyester thread is durable and colorfast, while rayon thread provides a subtle sheen. Consider the thickness of the vinyl when choosing the thread weight.
Needles:
Choose the right needle for the thickness and density of your vinyl. Universal needles are suitable for most fabrics, while ballpoint needles are designed for knit fabrics and other delicate materials.
Weeding, Cutting, and Backing Vinyl:
Prepare your vinyl for embroidery. Use a weeding tool to remove excess vinyl. Cut the vinyl using a sharp blade or electronic cutter. Back your vinyl with a stabilizer to provide stability during embroidery.
Hooping Techniques: The Art of Securing Vinyl
In the realm of embroidery, proper hooping is akin to the foundation of a sturdy house, assuring your vinyl stays securely in place during the stitching process. Join us as we unravel the secrets of hooping techniques, guiding you through the types of hoops and the art of securing vinyl like a seasoned pro.
Types of Hoops
The embroidery hoop, the unsung hero of the embroidery world, comes in a variety of forms, each designed to cater to different embroidery needs.
-
Spring-loaded hoops: The most common type, these hoops utilize a spring mechanism for effortless hooping and removal. Perfect for beginners and quick projects.
-
Magnetic hoops: Boasting strong magnets that hold vinyl firmly, these hoops offer a convenient and secure solution, especially for delicate fabrics.
-
Scroll hoops: A classic design, scroll hoops provide adjustable tension, making them ideal for large or irregularly shaped projects.
Proper Hooping Techniques for Securing Vinyl
Securing vinyl in a hoop requires meticulous care to prevent puckering, shifting, or distortion. Follow these steps for a flawless hooping experience:
-
Choose the right hoop size: Select a hoop that is slightly larger than the design to ensure ample fabric for secure hooping.
-
Prepare the vinyl: Adhere a thin stabilizer to the back of the vinyl for added support. Use a small amount of spray adhesive to keep it in place.
-
Center the design: Position the vinyl in the middle of the hoop, aligning the stabilizer with the hoop frame.
-
Tighten the hoop: Gradually tighten the hoop screw until the vinyl is taut but not excessively stretched. Avoid overtightening, as this can damage the vinyl or distort the embroidery.
-
Smooth the edges: Gently smooth the edges of the vinyl around the hoop to eliminate any wrinkles or bubbles.
-
Double-check the tension: Once the hoop is tightened, give it a gentle tug to ensure the vinyl is securely held. Adjust the tension if necessary.
By mastering these hooping techniques, you’ll lay the groundwork for successful embroidery, ensuring your vinyl stays put throughout the stitching process, producing precise and stunning results that will elevate your projects to new heights.
Embroidered Vinyl: Choosing the Perfect Needle and Thread
Embroidery on vinyl requires careful consideration of needle size and type and thread weight and type. Selecting the right combination ensures optimal stitch quality, durability, and ease of use.
Needle Selection:
- Vinyl Thickness: Thicker vinyl requires a larger needle to penetrate without damaging the material. Use a needle with a sharpened point for smooth and precise piercing.
- Design Complexity: Intricate designs may require a smaller needle to avoid tearing or clumping the vinyl. Choose a needle with a fine point for delicate details.
Thread Weight and Type:
- Thread Weight: Thicker thread will create bolder stitches, suitable for larger designs or areas that require extra durability. Thinner thread produces more subtle stitches, ideal for intricate details or delicate fabrics.
- Thread Type: Polyester thread is durable and resistant to fraying, making it a popular choice for vinyl embroidery. Coated thread provides additional protection against wear and tear, extending the lifespan of your designs.
Recommendations:
- For thin vinyl with simple designs, use a #10 needle and 40-weight polyester thread.
- For medium-weight vinyl with moderate complexity, use a #11 needle and 60-weight polyester thread.
- For thick vinyl with intricate designs, use a #12 needle and 80-weight coated thread.
Additional Tips:
- Test different needles and threads on scrap vinyl to find the best combination for your project.
- Insert the needle into the vinyl perpendicularly to prevent damage.
- Adjust the thread tension to avoid thread breakage or puckering.
- Use a stabilizer to support the vinyl and prevent stretching or puckering during embroidery.
Embroidery Parameters: A Guide to Perfect Embroidery
Adjusting Embroidery Settings
Fine-tuning embroidery settings is crucial to achieve flawless results. Stitch density, measured in stitches per inch (SPI), influences the fullness and texture of your embroidery. For intricate designs, increase the SPI, while for bold outlines, opt for a lower SPI. Similarly, embroidery speed affects the smoothness and accuracy of your stitches. Experiment with different speeds to find the optimal balance between quality and efficiency.
Choosing Appropriate Stitch Types
The vast array of stitch types allows you to create unique and eye-catching designs. For fill stitches, satin stitch provides a smooth, glossy finish, while fill stitch gives a textured, dimensional effect. Outline stitches include zigzag stitch for crisp lines and chain stitch for a delicate touch. Experiment with different stitch combinations to achieve the desired aesthetics and durability.
Ensuring Proper Thread Tension
Proper thread tension is essential for successful embroidery. Too much tension can cause thread breakage or distortion, while too little tension can result in loose stitches. Consult your embroidery machine’s manual for recommended tension settings specific to the thread and fabric you are using. Adjust the tension dial carefully until the thread lays flat and evenly on the fabric without excessive looseness or pulling.
Embroidered Masterpiece: Finishing Touches for Flawless Vinyl Embroideries
Trimming Excess Thread
After your embroidery machine has diligently stitched your design onto the vinyl, there will be loose threads left behind. These threads can detract from the crispness and professionalism of your final product. The solution? Trim away the excess! Use a pair of sharp scissors to carefully snip off any loose ends, ensuring a clean and polished finish.
Sealing the Edges for Protection
Protecting your embroidered vinyl is paramount to ensuring its longevity. The edges of your design are especially susceptible to fraying and peeling, which can compromise the overall integrity of your artwork. To safeguard against this, consider using a fabric sealant. Apply a thin layer of sealant around the edges of your design, allowing it to dry completely. This will seal in the stitches and create a protective barrier against wear and tear.
Heat or Glue for Secure Adhesion
Depending on the intended use of your embroidered vinyl, you may need to ensure its permanent adhesion to the backing material. For a strong hold, apply heat using an iron or a heat press. This will fuse the vinyl to the backing, creating a durable bond that will withstand repeated use and washing. Alternatively, you can opt for a permanent glue. Apply a thin layer of glue to the back of the embroidered vinyl and press it firmly onto the backing material. Allow the glue to dry completely for a secure hold.
By following these finishing touches, you can elevate your vinyl embroideries to the next level. Your designs will not only be aesthetically pleasing but also durable and long-lasting. Embrace these techniques to create embroidered masterpieces that will stand the test of time.


