Craft a unique seashell bra with this step-by-step guide! Gather shells, fishing line, and tools. Clean and sort shells based on size and shape. Thread shells using pliers and connect them creatively. Measure and adjust for a comfortable fit, adding a clasp or tie closure. Embellish with beads or feathers for a touch of flair. Unleash your creativity and embrace the beauty of nature with your custom seashell bra!
- Introduce the concept of creating a seashell bra, highlighting its uniqueness and potential for customization.
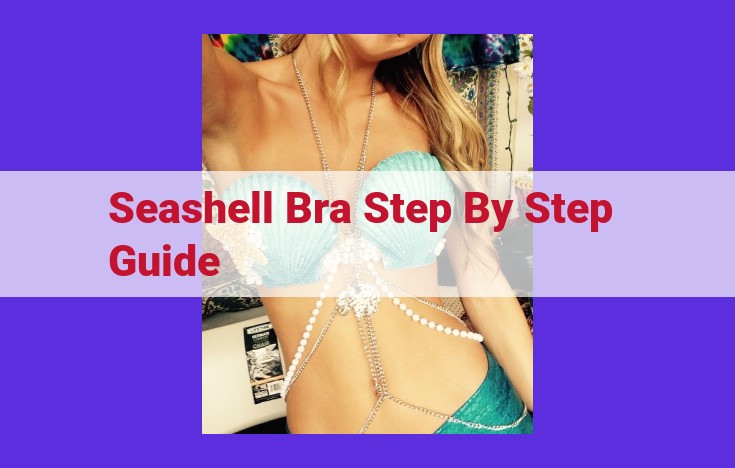
Prepare to be captivated by the allure of the seaside as we embark on an extraordinary adventure: crafting an exquisite seashell bra. This unique piece of wearable art is a testament to your creativity and the boundless beauty of nature’s treasures. Let us dive into the enchanting world of seashell bra making, where every step is a ripple of imagination and every finished creation a breathtaking masterpiece.
Materials and Tools
To begin this enchanting endeavor, gather your essential crafting companions:
- Seashells: The lifeblood of your bra, these treasures from the sea come in various shapes, sizes, and hues. Collect an assortment that speaks to your aesthetic vision.
- Fishing Line: The delicate thread that binds your seashells together, ensuring both strength and flexibility. Choose a line that complements the color of your shells.
- Pliers: Your trusty tools for manipulating fishing line and ensuring secure connections.
- Scissors: Sharpened instruments for trimming excess fishing line and refining your design.
- Ruler: Your guide for measuring and ensuring symmetry in your creation.
Materials and Tools: Gathering Essentials for Your Seashell Symphony
Embark on a captivating journey of artistry with the creation of your very own seashell bra, a testament to your creativity and connection with nature’s treasures. Step into a realm where the ocean’s whisperings inspire a symphony of seashells, each piece a unique melody in the harmonious tapestry of your custom-crafted attire.
To begin your enchanting escapade, gather the essential materials that will serve as your tools in transforming seashells into a wearable masterpiece:
-
Seashells: The heart and soul of your bra, these natural wonders hold the potential for endless variations in shape, size, and color. Seek out shells that call to your imagination, each one a blank canvas upon which you can paint your creative vision. Ensure their purity by cleaning and disinfecting them before embarking on the crafting process.
-
Fishing Line: The delicate thread that will weave your seashells together, fishing line serves as the backbone of your bra’s structure. Choose a line that is strong enough to support the weight of your seashells yet flexible enough to allow for movement and comfort.
-
Pliers: Your trusty companions in this crafting adventure, pliers will aid in the precise drilling of holes in your seashells. Their firm grip will ensure that each hole is the perfect size for threading your fishing line, creating a secure foundation for your seashell symphony.
-
Scissors: With the precision of a maestro’s baton, scissors will guide your every cut, trimming fishing line to the desired length and shaping your seashell masterpiece with meticulous care. Their sharp blades will become an extension of your imagination, allowing you to fine-tune every detail.
-
Ruler: A steadfast guide in the realm of measurements, a ruler will help you determine the perfect size for your bra, ensuring a comfortable fit. With its unwavering precision, you can measure your seashells and ensure that they harmonize seamlessly in their arrangement.
Seashell Bra Crafting: A Guide to Shell Preparation
Embark on an extraordinary journey of crafting a unique and eye-catching seashell bra, a captivating accessory that celebrates the beauty of nature. Before delving into the enchanting process, shell preparation is paramount to ensure the safety and longevity of your creation.
Cleaning the Shells
Collect seashells of various sizes, shapes, and hues. Rinse them thoroughly with clean water to remove any sand, sediment, or debris. Allow them to soak in a vinegar solution for 30 minutes to neutralize any salt or impurities. Rinse again and pat dry with a soft towel.
Disinfecting the Shells
To prevent bacterial growth and ensure the shells are safe to wear against your skin, it’s crucial to disinfect them. Mix a solution of 1 part bleach to 10 parts water. Submerge the shells in the solution for 5 minutes. Rinse thoroughly and air-dry completely.
Additional Tips
- Wear gloves during the cleaning and disinfecting process to protect your hands.
- For shells with intricate crevices, use a soft brush or toothpick to gently remove any stubborn debris.
- Avoid using harsh chemicals that may damage the shells.
- Allow the shells to dry completely before threading or connecting them to ensure they are secure and free of moisture.
Measuring and Sorting the Seashells: A Precise Art
As you embark on your seashell bra-crafting journey, measuring and sorting your seashells is a pivotal step towards a harmonious and aesthetically pleasing result. These steps lay the foundation for a bra that effortlessly complements your body and showcases the unique beauty of each shell.
To begin, carefully measure each shell using a ruler. This meticulous process ensures that you have the right sizes to create a bra that fits perfectly and flatters your figure. As you measure, pay attention to the width, length, and curvature of each shell. Note these measurements on a piece of paper or in a digital file.
Once you have the measurements, it’s time to sort the shells based on size and shape. Larger shells will form the main body of the bra, providing support and coverage. Smaller shells can be used to create intricate detailing, such as straps or decorative accents. Curved shells can add a touch of volume and interest, while flatter shells provide a more structured look.
By carefully measuring and sorting your seashells, you establish a solid foundation for the rest of your crafting endeavor. This meticulous preparation will empower you to create a seashell bra that is both customizable and flattering, allowing you to proudly showcase your creativity and the beauty of nature.
Threading Shells
- Provide a step-by-step guide to drilling holes in shells and threading fishing line through them using pliers.
Threading the Seashell Symphony
As you embark on the enchanting journey of crafting a seashell bra, the next crucial step is threading the individual seashells together. This process transforms the scattered fragments into a cohesive masterpiece.
To begin, gather your tools: a drill with a small bit, fishing line, and pliers. Choose a sturdy and non-porous fishing line to ensure the durability of your creation.
With steady hands, secure a shell on a flat surface. Carefully mark the spots where you want to drill holes, considering both the desired pattern and the shell’s natural shape. Don the safety glasses for protection and slowly drill tiny holes through the markings.
Take the fishing line and thread it through the holes, using the pliers to securely tighten the knots. It’s like threading a delicate pearl necklace, one bead at a time.
As you work your way through the shells, experiment with different patterns and designs. Let your creativity soar as you connect shells in intricate spirals, create cascading rows, or form whimsical clusters.
Remember to pay close attention to the tension of the fishing line. Too loose, and the shells may shift and become unbalanced. Too tight, and you risk breaking the line or damaging the shells.
With each shell gracefully threaded, you’ll feel a sense of accomplishment as your seashell bra takes shape. The once-separate pieces now dance in unison, creating a captivating tapestry of nature’s beauty.
Connecting the Seashells: A Creative Canvas for Design
In the realm of fashion, where creativity knows no bounds, the art of connecting seashells in a seashell bra offers boundless possibilities. Embark on a journey of expression as we explore the methods of intertwining threaded shells using fishing line. This process unveils a world of design where experimentation reigns supreme, allowing you to weave your unique patterns and manifest your artistic vision.
Arrange the shells in a pleasing pattern, experimenting with different **sizes and shapes. Dive into the depths of your imagination and create intricate designs, from delicate waves to bold geometric shapes.**
Using your pliers, deftly connect the threaded shells with the fishing line. Practice **different knots to achieve varying strengths and aesthetics. Allow your fingers to dance across the line, creating a tapestry of connections that will support the weight of your seashells.**
Play with the **orientation of the shells, alternating between facing up and facing down. This technique adds texture and depth to your bra, creating a mesmerizing interplay of light and shadow.**
Experiment with **different colors and types of fishing line to complement the hues and textures of your shells. Transparent line allows the shells to take center stage, while colored line adds an extra layer of visual intrigue.**
As you connect the shells, feel the energy of your creativity flowing through your fingertips. Each stitch becomes a brushstroke, painting a masterpiece that is uniquely yours. Allow the process to be a **meditative experience, where you lose yourself in the rhythm of creation.**
Bra Sizing and Adjustment: Ensuring a Comfortable Fit
Now that you have your shells threaded and connected, it’s time to tailor the bra to your unique body shape. Determining the correct bra size is crucial for a comfortable and supportive fit.
Measuring Your Bra Size:
To accurately measure your bra size, follow these steps:
- Use a soft measuring tape and wrap it around the widest part of your rib cage, directly under your breasts. This is your band size.
- Next, measure the fullest part of your breasts, while standing upright. This is your cup size.
Adjusting Strap Length:
Once you have determined your bra size, adjust the strap length for a comfortable fit.
- Put on the bra and adjust the straps so that the center of the bra cups rests on your breasts and the band lies snugly around your rib cage.
- The straps should be comfortable and not too tight, allowing for slight movement. Ensure that the bra stays in place when you move around.
Tips for a Perfect Fit:
- If the band is too loose, tighten the straps and snug it up around your rib cage.
- If the band is too tight, loosen the straps to relieve the pressure.
- If the cups are too small, consider using larger shells or adding additional rows of shells.
- If the cups are too large, adjust the strap length to reduce the space between the cups and your breasts.
Remember, a well-fitting bra supports your breasts and enhances your comfort throughout the day. Take the time to adjust the sizing properly for a personalized and comfortable fit.
Closure: The Finishing Touch
The closure of your seashell bra plays a crucial role in its fit and style. It’s the final piece that transforms a collection of shells into a wearable art piece. There are several closure options to consider, each offering unique benefits and aesthetic appeal.
Clasps: A Secure Fit
Clasps provide a secure and adjustable closure. They come in various designs, such as hook-and-eye, lobster claw, and magnetic clasps. Hook-and-eye closures are straightforward to use and offer a precise fit. Lobster claw clasps are robust and easy to maneuver, making them a popular choice for heavier bras. Magnetic clasps are a sleek and convenient option, ensuring a quick and secure connection.
To attach clasps, you’ll need to create a loop at the end of each bra strap using fishing line. Thread the loop through the clasp and secure it with a knot or bead. Ensure that the loop is large enough to allow for comfortable adjustment.
Ties: A Customizable Embrace
Ties offer a more flexible closure option that can be adjusted to your liking. You can use ribbons, cords, or even beaded strands to create unique and decorative ties. They provide a gentle and comfortable fit, making them ideal for bras worn for extended periods.
To create a tie closure, simply thread the fishing line through a bead or shell at the end of each bra strap. Leave enough length for tying and adjust to your desired fit. You can embellish the ties with beads or tassels to match the overall design of the bra.
Choosing the Right Closure
The best closure for your seashell bra depends on your personal style and preferences. If you prioritize security and a precise fit, clasps are an excellent choice. For a more adjustable and customizable fit, ties offer greater versatility. Consider the overall design and weight of your bra when making your decision.
No matter which closure option you choose, it’s important to ensure that it’s securely attached and provides a comfortable fit. With careful attention to detail, you can create a seashell bra that’s both stylish and functional, a testament to your creativity and passion for unique fashion.
Finishing Touches for a Unique Seashell Bra
Unleash Your Creativity with Embellishments
As you approach the final stage of your seashell bra creation, it’s time to add your personal touch with embellishments. Let your imagination run wild and incorporate elements that complement the bra’s design.
Pearls and Beads: Pearls and beads offer a touch of elegance and sophistication to your seashell masterpiece. String them together to create delicate accents or use them as connectors between shells.
Feathers and Tassels: For a bohemian vibe, consider adding feathers or tassels. They will create movement and add a playful touch to your bra. You can attach them to the straps, cups, or closure for a striking effect.
Other Embellishments: Don’t limit yourself to these suggestions. Crystals, sequins, or fabric scraps can also enhance the design. Experiment with different materials and find what resonates with your style.
Incorporating Embellishments
When incorporating embellishments, keep the following tips in mind:
- Balance: Avoid overwhelming the bra with too many embellishments. Choose a few key pieces and place them strategically.
- Cohesion: Ensure that the embellishments complement the overall design and color scheme of the bra.
- Secure Attachment: Use strong thread or glue to securely attach embellishments and prevent them from falling off.
By adding finishing touches, you not only enhance the aesthetic appeal of your seashell bra but also create a truly unique and personalized piece that reflects your style and creativity.


