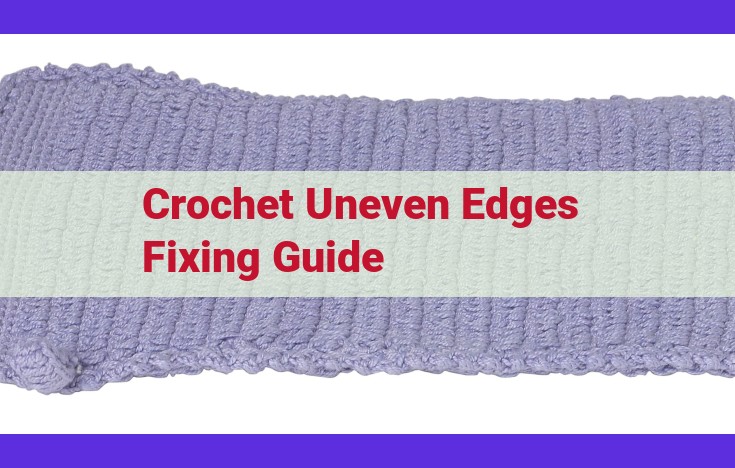
This comprehensive guide provides techniques to fix uneven edges in crochet, addressing causes and offering solutions using various stitches such as single crochet, slip stitch, double crochet, treble crochet, chain stitch, and picot stitch. It also covers binding off and blocking to shape and even out the fabric, ensuring a flawless finish.
Understanding Even and Uneven Edges in Crochet
Even Edges: A hallmark of meticulous crochet, even edges exude symmetry and precision. Each stitch aligns seamlessly with its neighbor, creating a visually pleasing and cohesive fabric.
Uneven Edges: The bane of every crocheter’s existence, uneven edges arise when stitches stray from their intended path. This can result in jagged or uneven fabric that detracts from the overall aesthetic.
Causes of Uneven Edges
Uneven edges can be attributed to several factors:
- Inconsistent Tension: Maintaining even tension is crucial for uniform stitches. Fluctuating hand pressure can lead to variations in stitch size and spacing.
- Counting Errors: Losing or gaining stitches can disrupt the pattern and create uneven edges. It’s essential to count stitches regularly to prevent this problem.
- Yarn Changes: Swapping yarn colors or types can introduce thickness variations that affect stitch height and width.
- Hook Size: Using the incorrect hook size for the yarn can result in stitches that are too loose or too tight, causing unevenness in edges.
Addressing Uneven Edges: A Comprehensive Guide
Crocheting can be a therapeutic and rewarding craft, but it can sometimes lead to uneven edges that can mar an otherwise beautiful finished piece. Don’t fret! With a few techniques up your sleeve, you can correct these imperfections and achieve flawlessly even edges in no time. Here’s a thorough guide to help you:
Single Crochet Stitch for Edge Correction
This is a versatile stitch that’s ideal for creating consistent and straight edges. Work a row of single crochets around the perimeter of the uneven section, inserting the hook into the top loop of each stitch. This technique gives a clean and tailored finish to your work.
Slip Stitch: A Discreet Solution for Gaps
Slip stitch is a nearly invisible stitch that’s perfect for filling small gaps in edges. It involves inserting the hook into the next stitch, grabbing the yarn, and pulling it through both loops on the hook. Repeat this along the uneven edge to seamlessly close any gaps.
Double Crochet Stitch: Adding Height and Texture
If you want to add some height and texture to your edges, reach for the double crochet stitch. This stitch creates taller stitches than single crochet, which can help to even out sections with height variations. Work a row of double crochets around the uneven area, inserting the hook into the same loop as you would for single crochet.
Treble Crochet Stitch: Significant Height Correction
For areas with significant height differences, consider using the treble crochet stitch. This stitch creates even taller stitches, providing a more dramatic correction. Work a row of treble crochets around the uneven section, inserting the hook into the specified number of loops according to the stitch pattern.
Chain Stitch: Decorative and Functional Edge Options
In addition to its decorative appeal, the chain stitch can also be used to correct uneven edges. Work a row of chain stitches around the perimeter of the uneven area, pulling up a loop through each stitch. This creates a raised and decorative edge that can enhance the overall look of your piece.
Correcting Uneven Edges with the Single Crochet Stitch
When crafting with yarn and hook, uneven edges can be a disheartening obstacle. However, with the right techniques, you can transform those imperfections into a thing of beauty. The single crochet stitch, a basic yet versatile tool, is an excellent choice for smoothing out those pesky edges.
The Magic of Single Crochet for Even Edges
The single crochet stitch is a fundamental stitch that involves inserting the hook into the next stitch, grabbing the yarn, and pulling it through. Its simplicity and versatility make it a great option for edge correction.
Benefits of Using Single Crochet for Even Edges:
-
Tight and secure: The single crochet stitch creates a firm and consistent edge that helps to hold the fabric together.
-
Invisible correction: When crocheted around the perimeter of the piece, the single crochet stitch can seamlessly blend in with the existing stitches, making the correction less noticeable.
Step-by-Step Instructions for Crocheting a Single Crochet Edge
To crochet a single crochet edge:
-
Insert your hook into the first stitch along the edge.
-
Yarn over the hook and pull it through the stitch.
-
Yarn over the hook again and pull it through both loops on the hook.
-
Repeat this process around the entire perimeter of the piece, maintaining an even tension.
-
Bind off when you reach the end of the round by cutting the yarn and pulling it through the final loop.
Transforming Uneven Edges into a thing of Beauty
With patience and precision, the single crochet stitch can transform uneven edges into uniform and visually appealing masterpieces. Its simplicity and effectiveness make it an essential technique for any crocheter. Embrace this versatile stitch and witness the wonders it can do for your crochet creations.
Slip Stitch: A Discreet Remedy for Uneven Edges in Crochet
In the realm of crochet, uneven edges can be a frustrating obstacle that tarnishes the beauty of your creations. However, fear not! Among the arsenal of techniques available to combat this issue, the slip stitch stands out as an understated yet effective solution for addressing minor unevenness.
The slip stitch is a simple but versatile stitch that can be used to discreetly correct small gaps in your crochet fabric. Its delicate nature allows it to blend seamlessly into the surrounding stitches, making it an ideal choice for subtle edge refinement.
To crochet a slip stitch, simply insert your hook into the next stitch on the edge and draw up a loop. Then, pull the loop through the stitch and off the hook. Repeat this process along the entire edge, crocheting into each stitch. The result will be a smooth and even edge that camouflages any imperfections.
The slip stitch can be used to correct uneven edges in a variety of crochet projects, including blankets, garments, and amigurumi. Its flexibility makes it suitable for both straight and curved edges, ensuring a professional-looking finish every time.
Tip: When crocheting a slip stitch edge, be sure to maintain consistent tension to avoid creating additional unevenness. Additionally, using a hook that is slightly smaller than the hook used for the main body of the project can help to create a tighter and more secure edge.
In conclusion, the slip stitch is an invaluable tool for any crocheter who wants to achieve pristine edges on their projects. Its simplicity, versatility, and discreet nature make it the perfect choice for addressing minor unevenness and elevating your crochet skills to the next level.
Double Crochet Stitch: A Taller and Textured Solution for Uneven Edges
Understanding the Double Crochet Stitch
The double crochet stitch is a versatile stitch that not only creates taller edges but also adds a beautiful texture to your crochet projects. It consists of two loops around the hook, making it an excellent choice for situations where you need to gain some height or correct uneven sections.
Applications for Double Crochet in Edge Correction
Double crochet is particularly useful for addressing uneven edges in the following scenarios:
- Significant height variations: When you encounter large differences in height along the edge of your fabric, double crochet can quickly build up the necessary height to even out the surface.
- Curved or irregular edges: The taller nature of double crochet makes it ideal for shaping curved or slightly uneven edges, adding a touch of elegance and refinement.
- Added texture and detail: Double crochet’s textured appearance can enhance the overall aesthetics of your project, adding a subtle yet stylish touch to borders, cuffs, or other edging details.
Tips for Using Double Crochet to Correct Uneven Edges
- Gauge consistency: Ensure a consistent gauge throughout the double crochet edge to maintain an even height.
- Reverse direction: When working around corners or uneven sections, reverse the direction of the double crochet to avoid creating gaps.
- Tension control: Maintain a uniform tension to prevent the stitches from becoming too tight or too loose, which can affect the overall height of the edge.
Remember to block your finished fabric after adding the double crochet edge to help shape and even out the stitches, ensuring a professional-looking result.
Treble Crochet Stitch: A Solution for Height Correction in Crochet
When crocheting, achieving even edges can be crucial for the overall appearance of your project. However, sometimes you may encounter sections with large height variations that can disrupt the flow of your work. Enter the treble crochet stitch, a lifesaver for addressing these uneven sections effectively.
Why Treble Crochet?
The treble crochet stitch is a taller stitch compared to its counterparts, making it ideal for correcting height discrepancies. Its height also adds a touch of texture and visual interest to your piece.
Instructions for Fixing Uneven Sections
-
Locate the uneven section. Determine which rows and stitches are affected by the height variation.
-
Insert your hook. Insert your hook into the next stitch along the uneven edge.
-
Yarn over. Bring the yarn over the hook twice.
-
Insert the hook into the next stitch. Yarn over again and insert the hook into the next stitch.
-
Yarn over and pull through. After inserting, yarn over the hook once more and pull the yarn through all three loops on the hook.
-
Double crochet. Perform a double crochet stitch into the same stitch.
-
Repeat for subsequent stitches. Continue crocheting in this manner until you reach the end of the uneven section.
By using the treble crochet stitch, you can effectively add height to uneven sections and create a more cohesive and visually appealing crochet piece.
Chain Stitch: Enchanting Edges for Crochet Creations
Amongst the versatile stitches in the crocheter’s arsenal, the humble chain stitch stands out for its decorative flair and practical edge-shaping abilities.
Adorning with Chain Stitch
The chain stitch, with its airy loops, is an embellishment par excellence. Scattered sparingly, they add a touch of whimsical elegance, like dew drops adorning a petal. Arrange them in clusters, and you have a charming lacework that evokes the delicate beauty of a spider’s web.
Heightening Uneven Edges
The chain stitch’s height-boosting potential makes it an invaluable tool for addressing uneven borderlines. By incorporating chain stitches into your edge work, you can effortlessly create an illusion of evenness, gracefully concealing any imperfections. This technique is particularly useful for adding extra height to rounded sections, such as the neckline of a garment.
Instructions
To add a chain-stitch edge, simply work a row of single crochets around the perimeter of your piece. At the desired intervals, insert your hook into the next stitch and make a chain of the desired length. Then, re-insert your hook into the same original stitch and resume crocheting in single crochets.
Embracing Creativity
The beauty of the chain stitch lies in its versatility. Experiment with different chain lengths and placements to achieve unique decorative effects. Combine it with other stitches, such as single or double crochets, to create textured borders that will elevate the appeal of your projects.
Whether you seek to add a touch of whimsy or address uneven edges, the chain stitch is a veritable treasure in the crochet realm. Embracing its versatility and exploring its possibilities will not only enhance your creations but also deepen your appreciation for the intricate artistry of crochet.
Picot Stitch: Adorning Edges with Intricate Elegance
The picot stitch emerges as a captivating embellishment in the realm of crochet, offering a touch of sophistication and aesthetics to otherwise ordinary edges. Its distinctive loop formation creates a delicate and airy effect, instantly elevating the visual appeal of crocheted pieces.
Benefits of Adorning Edges with Picot Stitch:
- Intricate Detail: Picot stitches introduce an element of intricate detail that enhances the overall beauty of the project.
- Elegant Touch: The delicate loops lend an elegant touch, perfect for formal or special occasion garments and accessories.
- Versatility: Picot stitches can be incorporated into various crochet patterns, adding a touch of charm to simple stitches and complementing more intricate designs.
- Decorative Functionality: While primarily decorative, picot stitches can also serve a functional purpose by adding a delicate edge to garments, preventing unraveling, and providing a secure and refined finish.
Adding Elegance to Edges with Picot Stitch:
Implementing picot stitches is a relatively simple technique that can be easily integrated into most crochet patterns. To create a picot stitch:
- Work the desired number of single crochet stitches (typically 3-5).
- Insert the hook into the next stitch and draw up a loop.
- Chain 1 or more (depending on the desired size of the picot).
- Insert the hook into the next stitch and pull through the loop on the hook, completing the picot stitch.
- Continue the pattern of single crochet stitches and picots to create the desired edge effect.
With practice, picot stitches become an effortless element to incorporate into your crochet creations. Experiment with different sizes and combinations of picot stitches to create unique and captivating edges that elevate your projects to the next level of elegance.
Binding Off: Securing the Final Touches
As your crochet creation nears completion, the final step of binding off is essential for ensuring the integrity and stability of your edges. This crucial technique seals the ends of your stitches, preventing them from unraveling and maintaining the desired shape of your project.
Importance of Binding Off:
- Prevents unraveling: Binding off secures the last stitches, preventing them from slipping out and compromising the integrity of your work.
- Maintains edge stability: By binding off, you create a sturdy and secure edge that will hold its shape over time.
- Prevents unsightly gaps: Properly binding off eliminates unwanted gaps between stitches, ensuring a neat and polished appearance.
Techniques for Binding Off Stitches:
There are several methods for binding off stitches, each suited to different types of projects:
- Slip Stitch: This method is simple and effective for creating a clean and invisible edge. Insert your hook into the next stitch, yarn over, and pull through. Repeat until all stitches are bound off.
- Single Crochet: Similar to slip stitch, single crochet creates a slightly more visible edge. Insert your hook into the next stitch, yarn over, and pull through both loops on your hook. Repeat until all stitches are bound off.
- Slip Stitch Bind Off with Overlap: This technique involves overlapping the last stitch over the previous one before binding off. It creates a stronger and more secure edge, ideal for heavier projects.
Binding off is a fundamental technique that plays a crucial role in the success of your crochet projects. By properly securing the final stitches, you ensure the durability, stability, and aesthetic appeal of your creation. Take the time to master this technique and give your crochet creations the finishing touch they deserve. Remember, a neatly bound off edge is the hallmark of a well-crafted piece that will be treasured for years to come.
Blocking: Enhancing Your Crochet Masterpiece
As a dedicated crocheter, crafting intricate designs that evoke admiration and awe is a testament to your skill and patience. However, even the most seasoned artisans can encounter the occasional uneven edge, a minor setback that can diminish the overall beauty of your creation. Fear not, for the transformative technique of blocking holds the key to restoring balance and shaping your crochet fabric into an impeccable work of art.
Blocking is akin to giving your crochet a luxurious spa treatment. This process involves gently wetting the fabric, meticulously pinning it into the desired shape, and allowing it to dry naturally. The magic of blocking lies in its ability to relax the fibers, allowing them to settle into a uniform and harmonious arrangement. As the fabric dries, it conforms to the shape you have created, resulting in even stitch distribution and a flawlessly smooth surface.
Step-by-Step Blocking Instructions:
-
Wetting: Immerse your crochet piece in lukewarm water. Gently press out any excess water without wringing or twisting. Avoid using hot water, as it can damage the fibers.
-
Pinning: Lay the damp fabric flat on a blocking board or a clean towel. Use T-pins or yarn needles to secure the edges and corners, shaping it into the desired size and form.
-
Drying: Allow the fabric to air dry completely. Do not place it in a dryer, as this can shrink or distort your crochet. Depending on the size and thickness of the fabric, drying may take several hours to a day.
Benefits of Blocking:
-
Even Stitch Distribution: Blocking helps to distribute stitches evenly, eliminating any unwanted gaps or unevenness.
-
Improved Shape: This technique allows you to mold your crochet into any desired shape, from curves to angles, ensuring a precise and aesthetically pleasing finished product.
-
Reduced Curling: Blocking helps to flatten curled edges, creating a smooth and polished appearance.
-
Increased Durability: By aligning the fibers properly, blocking strengthens the fabric, making it more resistant to wear and tear.
Embracing the art of blocking is an essential step in elevating your crochet skills. By following these simple instructions, you can transform your uneven edges into a thing of beauty, enhancing the overall quality and allure of your creations. Remember, patience and attention to detail are key, and the results will be well worth the effort. So, let’s grab our crochet hooks and embark on a journey of blocking perfection!


