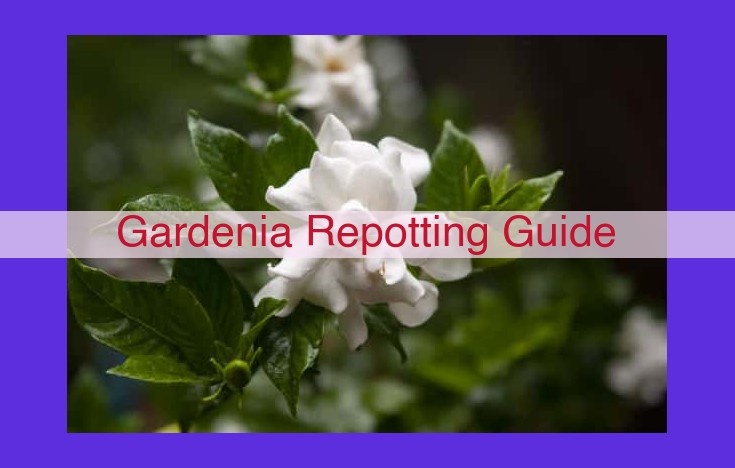
- Repot gardenias at the right time, choosing a suitable pot with proper drainage.
- Use an optimized potting mix and carefully remove the gardenia from its old pot.
- Trim roots as needed, plant the gardenia in the new pot, and provide proper watering and fertilizing.
- Troubleshoot common problems like transplant shock, root rot, wilting, and yellowing leaves.
The Perfect Time for Repotting: A Gardener’s Guide to Success
Every gardener understands the importance of repotting plants to ensure their health and growth. But when is the ideal time to do it? The answer lies in understanding your plant’s growth cycle and specific needs.
Spring into Action:
For most gardenias, spring is the prime time for repotting. As the days lengthen and temperatures rise, your plant is preparing for a growth spurt. This is the perfect opportunity to provide it with fresh soil and a larger home to accommodate its expanding roots.
Watch for Signs:
Pay attention to your gardenia’s appearance. If the roots are visible through the drainage holes or the plant looks crowded in its pot, it’s a clear sign it’s time for a bigger space. Don’t wait until the roots become root-bound, as this can restrict growth and damage the plant.
Choosing the Right Pot for Your Gardenia: A Crucial Step for Optimal Growth
When it comes to repotting your gardenia, selecting the right pot is paramount. The right pot can provide your plant with the support, drainage, and space it needs to thrive.
Material Matters
The material of your pot plays a significant role in its functionality. Terracotta pots are porous, allowing excess water to evaporate, which helps prevent root rot. However, they can dry out quickly, requiring more frequent watering. Plastic pots are lightweight, durable, and retain moisture well, making them suitable for plants that prefer moist soil.
Drainage is Key
Proper drainage is essential for preventing root rot. Ensure that your pot has drainage holes on the bottom to allow excess water to escape. Avoid using pots with no drainage holes or saucers without drainage holes, as this can trap moisture and lead to root problems.
Size Matters
The size of the pot you choose should accommodate the growth of your gardenia. Select a pot that is slightly larger than the current root ball, allowing for future root expansion. Avoid choosing a pot that is too large, as this can encourage excessive growth and waterlogging, which can be detrimental to your plant.
Remember, the right pot for your gardenia is the one that provides the optimal balance of support, drainage, and space for your plant to thrive.
Preparing the Perfect Potting Mix for Your Gardenia’s Thrive
When it comes to giving your gardenia the best possible start in its new home, preparing the potting mix is crucial. The right mix will provide the optimum environment for root development, nutrient availability, and water drainage.
Understanding Soil Types
Different soil types have varying characteristics that affect plant growth. For gardenias, a well-draining soil is essential. Avoid heavy clay soils that retain too much water, leading to root rot. Instead, opt for loamy or sandy soil that allows excess moisture to escape freely.
Enhancing Soil Quality
To further improve drainage and nutrient retention, amend the soil with organic matter such as compost, peat moss, or coconut coir. These materials not only increase the soil’s water-holding capacity but also provide a gradual release of nutrients. Additionally, consider adding perlite or vermiculite to enhance drainage and aeration.
Optimizing the Potting Mix
The ideal potting mix for gardenias should be loose, well-drained, and slightly acidic. A good starting point is a mixture of:
- 60% garden soil
- 20% compost or peat moss
- 10% perlite
- 10% vermiculite
Adjust the proportions as needed based on your soil type and the specific needs of your gardenia variety.
By carefully preparing the potting mix, you create the foundation for your gardenia to flourish. It will provide the necessary nutrients, drainage, and aeration to support healthy root growth and overall plant vigor.
Removing the Gardenia from Its Old Pot: Navigating Root-Bound Challenges
Repotting your gardenia is a crucial task for its health and growth. But before you can embark on the journey, you must gently remove it from its current home.
Carefully Extract the Root Ball:
Slide your fingers around the rim of the pot to loosen the soil. Then, gently tip the pot upside down and tap it on a surface to encourage the root ball to slide out. Avoid pulling or shaking, as this can damage the fragile roots.
Addressing Root-Bound Plants:
If you notice that the roots have become tightly tangled in a circular pattern within the pot, you’re dealing with a root-bound plant. To address this, use your fingers to gently loosen the roots, breaking up any thick clumps. You can also use a sharp knife to carefully cut away any circling roots, but proceed with caution to avoid excessive damage.
Additional Tips:
-
Water your gardenia thoroughly before removing it from the pot. This will help the soil loosen and reduce the risk of damaging the roots.
-
If the roots are stuck firmly in the pot, you can try soaking the pot in lukewarm water for a few minutes. This will help soften the soil and make it easier to remove the root ball.
-
Be patient and gentle throughout the process. Rushing or using force can compromise the health of your gardenia.
Trimming the Gardenia Roots: A Crucial Step for Healthy Repotting
As you embark on the repotting journey for your beloved gardenia, understanding the proper trimming techniques is essential for its success. Trimming the roots helps stimulate growth, removes damaged or overgrown roots, and ensures a healthy foundation for your plant.
Deciding the Pruning Method:
The most appropriate root pruning method for your gardenia depends on its age, the severity of root binding, and the potential for damage. For younger plants with mild root binding, a gentle circling cut around the outer edges of the root ball may suffice. However, older or severely root-bound gardenias may require more extensive pruning to remove matted or diseased roots.
Avoid Excessive Trimming:
While trimming overgrown roots is beneficial, it’s crucial to avoid excessive trimming. Remember, roots are the plant’s lifeline, responsible for nutrient and water uptake. Pruning too much can weaken the plant and hinder its ability to recover and thrive. Instead, focus on removing only the necessary roots while preserving as many healthy roots as possible.
Promoting Root Regrowth:
Once the necessary root trimming is complete, take steps to encourage root regrowth. Make clean cuts using sharp, sterilized pruning shears to prevent disease. Consider dipping the cut ends in a rooting hormone solution to stimulate new root formation. By carefully handling and trimming the roots, you lay the foundation for a thriving and healthy gardenia in its new home.
Planting Your Gardenia: A Guide to Nurturing Healthy Growth
In the journey of repotting your gardenia, planting it in its new home is a crucial step. Here’s how to ensure your precious plant thrives in its new environment:
Determining the Ideal Depth
When placing your gardenia in its new pot, the planting depth is paramount. The root ball should be positioned so that the top of the soil line is even with the rim of the pot. This allows for proper water drainage while preventing the roots from sitting in waterlogged soil.
Firming the Soil and Eliminating Air Pockets
After carefully placing your gardenia in the pot, gently but firmly press the soil around the roots. This firming process helps eliminate air pockets that can inhibit root growth. Use your fingertips or a small tool to gently press the soil around the base of the plant, being careful not to damage the delicate roots.
Positioning the Roots for Optimal Growth
As you firm the soil, pay attention to the position of the roots. Spread them out gently and ensure they are not bunched up or tangled. Proper root positioning promotes healthy growth and prevents root rot. Remember, a happy root system equals a happy gardenia.
Watering and Fertilizing After Repotting:
- Establish a regular watering schedule to prevent over- or under-watering.
- Provide the necessary nutrients for optimal growth and recovery.
- Understand the specific nutrient requirements of gardenias.
Watering and Fertilizing After Repotting
After repotting your gardenia, it’s crucial to establish a proper watering schedule to prevent both over- and under-watering. Over-watering can lead to root rot, while under-watering can stress the plant and hinder its recovery.
Watering:
Regular watering helps settle the roots into the new potting mix and ensures the soil remains moist but not soggy. Water deeply after repotting and allow the excess water to drain from the drainage holes. Avoid watering too frequently, as this can deprive the roots of oxygen.
Fertilizing:
Fertilizing your gardenia after repotting provides the essential nutrients it needs for optimal growth and recovery. Choose a balanced fertilizer that contains nitrogen, phosphorus, and potassium. Dilute the fertilizer according to the manufacturer’s instructions and apply it sparingly. Avoid over-fertilizing, as this can burn the roots.
Troubleshooting Common Repotting Problems
Repotting can sometimes be a stressful experience for plants, leading to a variety of issues that can hinder their health and growth. Here’s a guide to identify and manage some common problems that may arise after repotting a gardenia:
Transplant Shock
Transplant shock occurs when a plant experiences stress due to being moved to a new environment. Symptoms include wilting, yellowing leaves, and stunted growth. To manage transplant shock, provide plenty of water and keep the plant in a warm, humid environment out of direct sunlight. Do not fertilize until the plant has recovered.
Root Rot
Root rot is a fungal disease that can occur if the soil is too wet or the roots are damaged. Signs include yellowing leaves, wilting, and a soft, brown root system. To prevent root rot, ensure proper drainage by using a well-draining potting mix and a pot with drainage holes. Avoid overwatering, and if you suspect root rot, repot the plant into fresh soil and trim away any affected roots.
Wilting
Wilting after repotting can indicate either dehydration or root damage. To determine the cause, check the soil moisture. If it’s dry, water the plant thoroughly. If the soil is moist, carefully remove the plant from the pot and inspect the roots. Trim away any damaged or dead roots and repot the plant into fresh soil.
Yellowing Leaves
Yellowing leaves after repotting can be a sign of repotting stress or nutrient deficiency. If the plant shows other symptoms of transplant shock or root rot, address those issues first. If the plant appears healthy otherwise, it may need additional nutrients. Fertilize according to the manufacturer’s instructions, avoiding overfertilizing.


