- Safety gear and work area preparation are crucial. Locate the balancer bolt and lubricate it to ease removal.
- Apply heat to expand the metal and use an impact wrench for stubborn bolts. Consider the breaker bar and double-wrench method for additional leverage.
- Replace the bolt with a new one and tighten it to the proper torque using a torque wrench.
Safety First: Essential Precautions for Effective Bolt Removal
When it comes to tackling automotive repairs, safety should always be your top priority. Before embarking on any bolt removal task, it’s imperative to take the necessary precautions to safeguard yourself and ensure a successful outcome.
1. Personal Protective Gear:
Equip yourself with protective gloves, sturdy safety glasses, and earplugs to minimize the risk of injury. Gloves will shield your hands from sharp edges and chemical irritants, while safety glasses protect your eyes from flying debris. Earplugs are crucial for reducing the impact of loud noises generated by the removal process.
2. Proper Work Area Preparation:
Choose a well-lit and ventilated work area to ensure clear visibility and prevent the accumulation of hazardous fumes. Clear away any clutter that could obstruct your movements or pose a tripping hazard. Gather all the necessary tools and materials in advance to avoid distractions during the project.
Assemble Your Toolkit: Essential Tools for Success
Embarking on the arduous task of bolting duty requires an arsenal of trusty tools. Safety First: Personal protective gear and a well-prepared work area are paramount. With that foundation in place, let’s delve into the essential toolkit for effective bolt removal.
- Wrenches:
- Open-end wrench: A versatile tool for gripping bolts, especially in confined spaces.
- Box-end wrench: Encloses the bolt, providing more torque and preventing rounding.
- Combination wrench: A hybrid offering both open and box ends, adaptable to various situations.
- Sockets:
- Standard sockets: Fit onto a ratchet or impact wrench, providing a secure and precise fit over the bolt.
- Deep sockets: Designed for deeply recessed bolts, allowing access in tight spots.
- Impact Wrench:
- Powerful, air-powered tool that delivers high-torque bursts to break loose stubborn bolts.
- Choose an impact wrench with the appropriate torque range for the bolt being removed.
- Breaker Bar:
- Extends the reach of a socket wrench, providing additional leverage for loosening bolts.
- Combine it with a socket extension and cheater pipe for maximum force.
With this toolkit in your arsenal, you’re well-equipped to tackle any bolted challenge that comes your way. Remember to use the right tool for the job, and always prioritize safety for a successful and stress-free bolt removal experience.
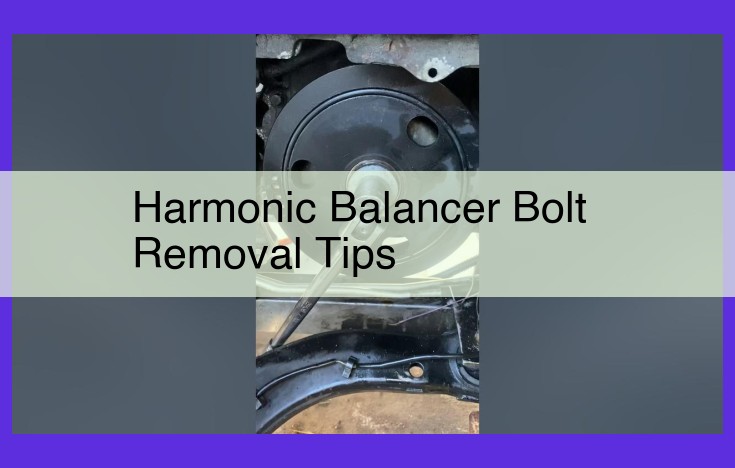
Locate the Balancer Bolt: Find Your Target
In the realm of automotive repairs, one of the most crucial tasks is removing a stubborn balancer bolt. But before you can tackle this formidable challenge, you need to know where to aim your wrench. Enter the art of locating the balancer bolt—a key step that sets the stage for a successful removal process.
If you’re not familiar with your engine’s anatomy, don’t fret. There are two ways to pinpoint the balancer bolt with ease:
-
Engine Diagrams: Delve into the intricate world of engine diagrams—the blueprints of your vehicle. These diagrams will provide a detailed map of your engine, including the exact location of the balancer bolt.
-
Balancer Pulley: Take a closer look at the front of your engine. Spot the large, grooved pulley that drives the belts? That’s your balancer pulley. Right behind it, you’ll find the elusive balancer bolt, ready to be conquered.
Lubricate the Bolt: Penetrate the Problem
In the realm of bolt removal, where stubborn bolts stand as formidable adversaries, lubrication emerges as a potent weapon in our arsenal. It’s like a magic potion that seeps into the deepest recesses of corrosion, loosening its grip and paving the way for effortless extraction.
Penetrating lubricants, like knights in shining armor, wield their molecular swords to dissolve rust, break down grime, and penetrate the intricate crevices that hinder bolt removal. They lubricate the microscopic surfaces, reducing friction and allowing the bolt to turn with newfound ease.
Applying a generous amount of penetrating lubricant around the bolt’s threads is akin to giving it a much-needed bath, allowing the lubricant to soak in and work its wonders. Patience is key, as the lubricant needs time to work its magic. Let it dwell for a few minutes or even overnight for particularly stubborn bolts to fully penetrate and weaken the corrosion.
Remember, safety should always be our guiding star. Wear appropriate safety gear, including nitrile gloves to protect your hands from harsh chemicals. By providing your bolt with the gift of lubrication, you’re not only making your life easier but also extending the life of your tools.
Apply Heat: Expand the Possibilities
In the realm of stubborn bolts, heat emerges as a formidable ally. Its power lies in its ability to expand metal, thereby loosening the bolt’s grip. This technique, known as thermal expansion, is particularly effective in combating rusted or seized bolts.
While heat can work wonders, it’s crucial to avoid overheating. Excessive heat can damage the bolt, its surroundings, and even pose a safety hazard. Employ a controlled approach, using a heat gun or torch, and monitor the temperature closely.
To achieve optimal results, focus the heat directly on the bolt head, avoiding other components. The goal is to create a localized expansion that loosens the bolt while minimizing the risk of damage. Patience is key; allow the heat to penetrate for several minutes, allowing the metal to expand fully.
Once the bolt has cooled slightly, attempt to remove it using your chosen method. If it remains stuck, repeat the heating process and increase the temperature gradually. Remember to exercise caution and take necessary safety precautions to avoid burns or injury.
By harnessing the power of heat and applying it strategically, you can effectively tackle stubborn bolts and restore your engine to its former glory.
Harness the Power of Impact: Using an Impact Wrench
When it comes to removing stubborn bolts, nothing beats the brute force of an impact wrench. This powerful tool delivers a series of rapid, high-torque impacts that can effortlessly break loose even the most seized bolts.
How Does an Impact Wrench Work?
Unlike regular wrenches that rely on steady pressure, impact wrenches use a series of rapid hammer blows to loosen bolts. This impact action creates a powerful shock that momentarily breaks the bond between the bolt and its threads.
Choosing the Right Impact Wrench
The effectiveness of an impact wrench depends on its torque output, measured in ft-lbs (foot-pounds). For removing balancer bolts, you’ll need a wrench with at least 200 ft-lbs of torque.
Using an Impact Wrench Safely
While impact wrenches are incredibly powerful, they can also be dangerous if not used properly. Always wear gloves and safety glasses when using an impact wrench. Also, make sure that the impact socket is securely attached to the bolt before pulling the trigger.
Proper Impact Socket Selection
It’s essential to use the correct impact socket for the size of the bolt you’re removing. If the socket is too small, it can slip off the bolt and cause injury. If it’s too large, it may not fit properly and reduce the effectiveness of the wrench.
Additional Tips for Using an Impact Wrench
Use a cheater pipe to increase leverage if the bolt is particularly stubborn.
Apply heat to the bolt to expand the metal and loosen its grip.
Try the double-wrench method by holding one wrench on the bolt while using another to turn it. This provides additional control and prevents the bolt from spinning.
Leverage the Breaker Bar: Brute Force with Control
In the realm of stubborn bolts, the breaker bar emerges as a formidable tool, wielding the brute force necessary to break their obstinate grip. This rugged extension of your trusty wrench grants you additional leverage, empowering you to overcome the most defiant bolts.
Imagine a scenario where a rusted, corroded balancer bolt stubbornly refuses to budge. Donning your trusty gloves and safety glasses, you carefully equip your breaker bar with an appropriate socket extension. To amplify your leverage even further, you may enlist the aid of a cheater pipe.
With a firm grip on the breaker bar and its extension, you align the socket precisely over the bolt. Summoning your inner Hercules, you exert steady, unwavering force, gradually turning the bolt clockwise. The bolt, once seemingly immovable, begins to reluctantly yield, its rusty grip slowly weakening.
As you continue to apply force, a surge of satisfaction courses through your veins. You have tamed the beast, subdued the stubborn bolt with the raw power of the breaker bar. However, remember that excessive force can be detrimental, so approach this task with caution.
Double-Wrench Method: A Dance of Teamwork
Remember that stubborn bolt that refuses to budge? Enter the double-wrench method, a dance of teamwork that will have that bolt loosening its grip in no time. Picture this: two wrenches, one holding steady while the other twirls the bolt skillfully. It’s like a ballerina and her partner, one providing unwavering support while the other glides into action.
And here’s a secret weapon that seals the deal: locking pliers. These fearless warriors clamp down on the holding wrench, ensuring it doesn’t succumb to the bolt’s stubbornness. It’s a three-pronged alliance that will make the bolt surrender with grace.
Step 1: Hold Your Ground
The first wrench, the steadfast guardian, grips the bolt with an unwavering hold. It anchors the situation, providing stability like a mountain.
Step 2: The Delicate Dance
The second wrench, the graceful dancer, takes center stage. With gentle yet firm twirls, it persuades the bolt to loosen its grip. It’s a dance of precision, each movement calculated to ease the bolt free.
Step 3: The Pliers’ Embrace
Locking pliers, the unsung heroes, wrap their jaws around the holding wrench. They hold their grip with a tenacity that would make a bulldog proud, preventing any unwanted spinning that could jeopardize the operation.
Step 4: Surrender, Bolt, Surrender
As the two wrenches and their loyal companion work in unison, the bolt begins to yield. The holding wrench remains steadfast, while the dancing wrench coaxes it ever so gently. The lock pliers ensure that not a single millimeter of resistance is gained.
Step 5: Triumphant Removal
With a final twist of the dancing wrench, the bolt reluctantly gives way. It’s a moment of triumph, a testament to the power of teamwork and unwavering determination.
Replace the Balancer Bolt: Seal the Deal
Once the stubborn balancer bolt has been removed, it’s crucial to replace it with a brand-new one to ensure the longevity and safety of your vehicle. Using an old or damaged bolt can compromise the integrity of the balancer, potentially leading to costly repairs down the road.
Before installing the new bolt, apply a thread-locking compound to its threads. This will prevent it from loosening due to vibrations while the engine is running. Once the bolt is in place, it’s essential to tighten it to the correct torque specification using a torque wrench.
Using the proper torque ensures that the bolt is securely tightened but not overtightened, which could damage the threads or the balancer itself. Refer to your vehicle’s repair manual for the specific torque value.
By following these steps, you can confidently replace the balancer bolt and ensure that your engine operates smoothly and efficiently for years to come.