Lacquering jewelry involves applying a protective and decorative coating to enhance its durability and aesthetic appeal. Essential materials include lacquer, brushes, solvents, and primers. Proper preparation, including cleaning and sanding, is crucial for adhesion. Lacquer can be applied via spraying, brushing, or dipping, followed by drying techniques such as oven curing or air drying. Polishing techniques like buffing or burnishing create a desired finish. Maintenance practices like waxing and cleaning ensure longevity. Lacquering complements painting, varnishing, enameling, and gilding, enhancing jewelry’s beauty and functionality.
The Art of Lacquering: Elevate Your Jewelry with a Protective and Aesthetic Layer
In the world of jewelry making, lacquering stands out as an invaluable technique that transforms ordinary pieces into extraordinary masterpieces. By applying a thin layer of lacquer to your jewelry, you not only enhance its durability and longevity but also impart it with an exquisite finish and stunning visual appeal.
Lacquering shares a close kinship with other embellishment techniques, such as painting, varnishing, enameling, and gilding. Each method contributes unique qualities to the final outcome, allowing you to express your creativity in countless ways. By mastering these related techniques, you can create multidimensional and eye-catching jewelry pieces that captivate all who behold them.
Materials for Lacquering Jewelry: A Comprehensive Guide
In the realm of jewelry making, lacquering stands as a transformative technique, bestowing upon your creations an exquisite sheen and enduring protection. Embark on this journey of lacquering with an understanding of the materials that will guide your path.
Lacquer: The Heart of the Matter
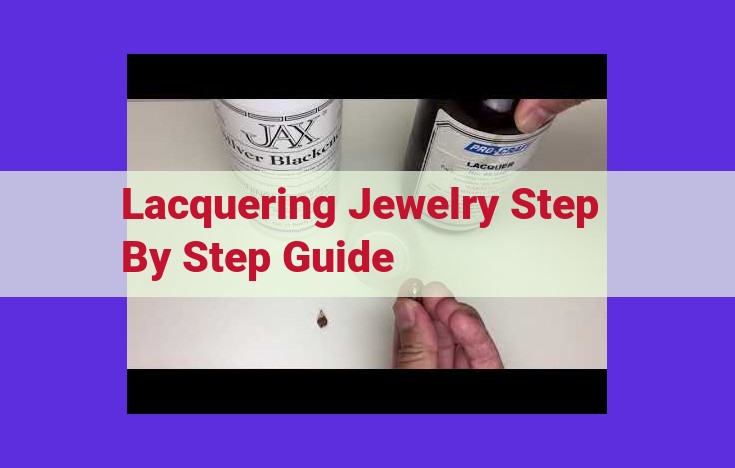
Lacquer, the lifeblood of this process, is a natural resin or synthetic compound that imparts an impervious seal upon your jewelry. Available in a myriad of colors and finishes, lacquer offers endless possibilities for customization.
Brushes: Precision and Artistry
For meticulous application and control over your lacquer, brushes emerge as essential tools. Opt for brushes with natural hair or synthetic bristles that are compatible with your chosen lacquer. Round, flat, and filbert brushes are commonly employed for different techniques and areas of your jewelry.
Solvents: Dissolving the Boundaries
Solvents, the unsung heroes of the lacquering process, perform the crucial task of thinning lacquer and cleaning brushes. Choose a solvent that is specifically formulated for the lacquer you are using, ensuring optimal results. Acetone and mineral spirits are prevalent options for this purpose.
Primers: A Solid Foundation
Primers, the often-overlooked foundation of a flawless lacquering job, prepare your jewelry’s surface for the lacquer’s embrace. They promote adhesion, minimize porosity, and enhance the durability of your final finish. Choose a primer that is designed to complement your chosen lacquer.
Preparation: A Crucial Step for Flawless Lacquered Jewelry
The Imperative of Cleaning
Before applying lacquer to your prized jewelry, meticulous cleaning is paramount. Dirt, oils, and other contaminants can hinder the lacquer’s adhesion, compromising the durability and aesthetics of your finished piece. Use a gentle detergent and soft brush to thoroughly cleanse your jewelry, removing any trace of impurities.
Sanding for a Smooth Canvas
Smooth the surface of your jewelry by sanding it lightly with fine-grit sandpaper. This step is particularly crucial for removing scratches, bumps, or imperfections that could be amplified by the lacquer. Sanding creates a smooth and uniform surface, ensuring that the lacquer adheres seamlessly and enhances the overall appearance of your jewelry.
Masking for Precision
To protect areas of your jewelry that should not be lacquered, masking is essential. Use painter’s tape or masking fluid to carefully cover any areas that you wish to remain uncoated. This technique ensures that the lacquer is applied only where desired, preventing unwanted spills or smudges.
Lacquer Application: Techniques for Enhancing Jewelry
Methods of Application
Lacquering, the art of applying a protective and decorative coating to jewelry, offers a range of application methods to suit different needs and preferences.
Spraying
Spraying lacquer involves using a specialized spray gun to evenly distribute fine droplets of lacquer onto the jewelry surface. This technique is ideal for achieving a smooth, professional finish, particularly on intricate pieces.
Brushing
Applying lacquer with a brush allows for more control over the thickness and texture of the coating. Using a soft-bristled brush, lacquer is gently brushed onto the jewelry, creating a stroke-like appearance. This technique is suitable for adding depth and texture to designs.
Dipping
Dipping the jewelry into a bath of lacquer is a straightforward method that ensures an even and consistent coating. The jewelry is immersed in the lacquer solution for a specific duration, then removed and allowed to drain. This technique is commonly used for large or complex pieces.
Regardless of the method chosen, proper preparation, including cleaning, sanding, and masking, is crucial for optimal results.
Drying Techniques for Lacquered Jewelry
When the lacquer has been meticulously applied, it’s time to dry it. This crucial step determines the durability, finish, and overall quality of your lacquered jewelry. Let’s explore the different drying techniques available:
Oven Curing
- Benefits: Oven curing provides a controlled environment, allowing for thorough and even drying.
- Process: Place the lacquered jewelry in a preheated oven at the recommended temperature and duration. Carefully follow the lacquer’s instructions to ensure optimal results.
Air Drying
- Benefits: Air drying is a convenient and cost-effective method.
- Process: Allow the lacquered jewelry to dry in a well-ventilated, dust-free area. The drying time may vary depending on the lacquer used and the surrounding temperature.
UV Curing
- Benefits: UV curing is a fast and efficient method that uses ultraviolet light to instantly harden the lacquer.
- Process: Use a UV curing lamp or a UV oven to expose the lacquered jewelry to controlled doses of ultraviolet radiation. The drying time is typically short, providing immediate results.
Choosing the Right Technique
The drying technique you choose depends on the type of lacquer used, the desired finish, and your available resources. For professional-grade finishes with precise control, oven curing is recommended. For smaller projects or air-dryable lacquers, air drying is a convenient option. UV curing offers quick turnaround times, but may require specialized equipment.
Polishing: Achieving the Perfect Finish
Once your lacquered jewelry has dried, it’s time to polish it to a gleaming finish. Polishing not only enhances the aesthetic appeal of your creation but also protects it from scratches and wear.
Methods of Polishing
There are several methods of polishing lacquered jewelry:
Buffing: Using a buffing wheel with a soft cloth or felt pad, apply a polishing compound and move the jewelry across the wheel. This technique is ideal for achieving a high-gloss finish.
Tumbling: Place your jewelry in a tumbling machine along with polishing media (such as ceramic or steel shot). The tumbling action will gently polish the surface, creating a smooth and even finish.
Burnishing: Use a burnishing tool to rub the surface of the jewelry. This method produces a satiny, matte finish.
Choosing the Right Technique
The best polishing technique depends on the desired finish and the type of lacquer used. High-gloss lacquers respond well to buffing, while matte lacquers benefit from burnishing. Experiment with different techniques to find the one that suits your project.
Tips for Polishing
- Start with fine-grit polishing compounds and gradually move to finer grits. This will help avoid scratches.
- Use a light touch to prevent damaging the lacquer.
- Do not over-polish, as this can dull the finish.
- Clean the polishing tools regularly to prevent contamination.
By following these steps, you can achieve a professional-quality polished finish on your lacquered jewelry. Remember to experiment with different techniques to find the one that best complements your creation.
Maintenance of Lacquered Jewelry: Preserving Its Beauty and Luster
Lacquered jewelry holds an allure that transcends time, but like any prized possession, it requires proper care to maintain its radiant beauty. To ensure your lacquered pieces continue to shimmer and gleam, understanding the nuances of their maintenance is paramount.
Waxing: A Shield Against Elements
Waxing your lacquered jewelry is a crucial step in extending its lifespan. A thin layer of beeswax or microcrystalline wax acts as a protective barrier, shielding it from moisture, dirt, and scratches. Apply a small amount of wax with a soft cloth and buff gently to restore its iridescent glow.
Cleaning: Gentle Touch, Dazzling Results
Cleaning lacquered jewelry requires a delicate touch. Avoid harsh chemicals and abrasive cleaners, as they can compromise the lacquer’s finish. Instead, opt for a gentle solution of warm water and mild dish soap. Use a soft brush or cloth to gently remove any dirt or debris, then rinse thoroughly with clean water.
Repairing: Restoring Pristine Condition
Accidents happen, and even the most meticulously cared for jewelry can sustain damage. Chips or cracks in the lacquer can be repaired, allowing you to restore your beloved pieces to their former glory. Seek the expertise of a professional jeweler who specializes in lacquer repair to ensure seamless restoration.
Related Concepts: Lacquering and Its Complementary Techniques
Lacquer, a protective and decorative coating, not only enhances the beauty of jewelry but also offers remarkable durability. In the realm of jewelry making, lacquering is often complemented by other techniques, each contributing unique aesthetics and protective qualities.
Painting
Painting can add a layer of intricate designs and vibrant colors to lacquered jewelry. Oil paints, acrylics, and watercolors offer endless possibilities for artistic expression, allowing you to create personalized pieces that reflect your style.
Varnishing
Varnishing provides an additional layer of protection to lacquered jewelry. Clear or colored varnishes create a shiny or matte finish that enhances the depth and luster of the lacquer, further safeguarding it from wear and tear.
Enameling
Enameling involves fusing powdered glass onto metal, resulting in a vibrant and durable surface. When combined with lacquering, enameled jewelry gains added protection against scratches and chemicals, ensuring its longevity.
Gilding
Gilding adorns jewelry with a thin layer of gold or other precious metals. This technique creates a luxurious and elegant appearance, complementing the richness of lacquer and enhancing its protective qualities. Gilded and lacquered earrings or pendants make stunning statement pieces that will turn heads.
Tips and Tricks for Lacquering Jewelry
Elevate your lacquering skills with these insider insights and advanced techniques. Embellish your jewelry with a professional-looking finish while expressing your unique style.
-
Master the Art of Thin Layers: Patience is key when applying lacquer. Build up thin layers gradually to prevent smudging or drips. Each layer should be slightly thinner than the previous one, ensuring an even and durable coating.
-
Embrace the Power of Heat: Lacquer dries faster and harder under heat. Consider using a hairdryer or oven to accelerate the drying process. Be sure to monitor the temperature closely to avoid overheating.
-
Explore Unique Application Methods: Try experimenting with different ways of applying lacquer. A spray gun offers precise control and a uniform finish, while brushing allows for intricate brushstrokes. Dipping the jewelry into lacquer creates a thick, protective layer.
-
Achieve a Glossy Gleam: Sand and polish lacquered jewelry with fine-grit sandpaper and a polishing compound. This step removes imperfections and enhances the luster of the finish.
-
Customizing with Color and Texture: Mix pigments into the lacquer to create custom colors. Add glitter or other decorative elements for a textured effect. Let your creativity shine through.
-
Protect and Preserve Your Creations: Apply a final coat of clear lacquer to seal and protect the lacquered surface. Regular cleaning and maintenance will keep your jewelry looking its best for years to come.


