Master the art of cutting bead board with this comprehensive guide. Learn how to tackle any project, from paneling and wainscoting to decorative trim. Follow step-by-step instructions, covering straight, angled, and curved cuts. Explore related concepts such as trim, molding, and carpentry. Gain insights into woodworking principles and safety considerations. Troubleshooting tips and additional resources empower you to overcome challenges and achieve precision cuts like a pro.
- Define bead board and its purpose in home improvement projects.
- Explain the importance of cutting bead board accurately for a professional finish.
A Journey into Precision and Crafting
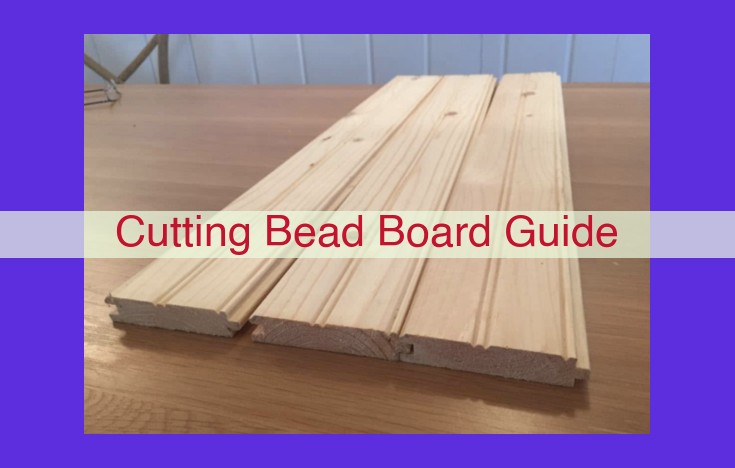
Imagine a home adorned with elegant bead board walls, wainscoting that adds timeless charm, or custom trim that transforms ordinary spaces into extraordinary ones. Bead board, with its classic bead-and-groove design, plays a pivotal role in these enchanting home improvement projects.
However, achieving the perfect look requires precision cutting. Accurate cuts are the cornerstone of a professional finish, ensuring your bead board installations are seamless, aesthetically pleasing, and structurally sound.
Embarking on the Adventure
Before we delve into the intricate techniques of bead board cutting, let’s understand its significance in home decor. Bead board is a versatile material that can be utilized for various purposes:
- Trim: Enhance windows, doors, and walls with decorative trim that complements the bead board’s design.
- Paneling: Create stunning wall coverings by installing bead board as paneling, using trim and molding to accentuate its beauty.
- Wainscoting: Bring a touch of elegance to lower walls with bead board wainscoting, seamlessly blending it with trim and paneling.
- Molding: Frame, highlight, and create custom bead board designs using different molding types, adding depth and character.
- Carpentry: Hone your carpentry skills by cutting bead board with precision, utilizing specialized tools and techniques while observing safety precautions.
- Home Improvement: Plan and execute home improvement projects that incorporate bead board cutting, transforming your living spaces with stunning results.
- Woodworking: Unleash your inner woodworker by applying principles and techniques to bead board cutting, mastering the tools and materials for precision and craftsmanship.
Related Concepts to enhance Bead Board Projects
a. Trim: The Perfect Compliment
Trim adds an elegant touch to bead board designs, whether it’s crown molding to accentuate ceilings or baseboard to define the space. Combining bead board with trim emphasizes its beauty and creates a cohesive, refined look in any room.
b. Paneling: A timeless and versatile choice
Bead board offers a classic yet versatile solution for paneling, providing a rich texture and warmth to walls. Whether you opt for full wall or half wall paneling, incorporating trim and molding adds depth and character.
c. Wainscoting: A touch of sophistication
Wainscoting is a popular application of bead board, creating a sophisticated and stylish accent in foyers, hallways, and dining rooms. It elevates the space by adding height and interest while protecting walls from damage.
d. Molding: Framing and Accenting
Molding is an essential element in bead board designs, framing and accentuating the panels to create a custom, tailored look. Chair rail molding adds sophistication, while picture frame molding transforms bead board walls into elegant works of art.
e. Carpentry: The Foundation of Accuracy
Basic carpentry skills are crucial for successful bead board cutting. Beginners can dive into measuring, cutting techniques and safety protocols to ensure precise cuts and a professional finish.
f. Home Improvement: A DIY Delight
Bead board cutting is a rewarding home improvement project that adds value and beauty to your space. Whether you’re a seasoned DIYer or just starting out, planning and execution tips can guide you towards a successful outcome.
g. Woodworking: Precision and Craftsmanship
For those with a passion for woodworking, bead board cutting offers an opportunity to showcase their skills. Understanding woodworking principles, materials, and techniques allows you to create intricate designs that transform your home into a masterpiece.
Master the Art of Bead Board Cutting: A Step-by-Step Guide
Welcome to the world of bead board cutting, where precision and craftsmanship meet home improvement dreams! Bead board, those beautiful and versatile wood panels, can elevate your home’s aesthetics and functionality. But cutting them accurately is key to achieving a professional finish.
In this comprehensive guide, we’ll take you through each step, from choosing the right tools to making pristine cuts. Get ready to transform your space with the confidence of a seasoned pro!
Step 1: Gather Your Arsenal
Before embarking on the cutting adventure, ensure you have the following tools:
- Circular Saw or Miter Saw: For making straight and angled cuts
- Jigsaw: For intricate curved cuts
- Measuring Tape: For precise measurements
- Clamps: To hold the bead board securely
- Chalk Line or Pencil: For marking cutting lines
- Safety Glasses and Gloves: For your protection
Step 2: Measure and Mark
Meticulous measuring is essential. Use your measuring tape to determine the desired length and mark it on the bead board using a chalk line or pencil. Double-check your measurements for accuracy.
Step 3: Straight Cuts
For straight cuts, use a circular saw or miter saw. Set the blade depth to slightly more than the bead board’s thickness. Secure the board with clamps and guide the saw along the marked line. Maintain a steady hand and apply even pressure to prevent splintering or ragged edges.
Step 4: Angled Cuts
Angled cuts add a touch of sophistication to your bead board designs. Adjust the blade angle on your miter saw to the desired degree. Clamp the board securely and follow the same cutting technique as for straight cuts. Ensure the saw blade is parallel to the marked line for a precise angle.
Step 5: Curved Cuts
Curved cuts require a jigsaw. Insert the blade into the jigsaw and set the cutting speed to match the bead board’s thickness. Guide the jigsaw along the marked line, applying gentle pressure to avoid overcutting or splintering. Keep your eyes on the line and make smooth, controlled movements.
Step 6: Safety First
Always prioritize safety when cutting bead board. Wear safety glasses and gloves to protect yourself from sawdust and blade fragments. Keep your fingers away from the cutting path and ensure your workspace is well-ventilated. Never operate power tools under the influence of alcohol or drugs.
Step 7: Fine-Tune Your Skills
With practice, you’ll develop the confidence to handle more intricate cuts and complex designs. Experiment with different cutting techniques, and don’t be afraid to ask for guidance from experienced craftsmen or consult online resources. Remember, patience and precision pay off in the end.
Mastering bead board cutting isn’t just about the steps but about the passion and dedication you put into each project. By following these instructions carefully, you’ll be well on your way to creating stunning bead board masterpieces that will enhance your home’s character and value. Remember, practice makes perfect, so grab your tools and let your creativity flow!


