Embark on a culinary adventure with our comprehensive guide to crafting homemade nata de coco. Learn the secrets of this delectable treat, from the essential ingredients to the step-by-step instructions. Discover time-saving tips, flavor-enhancing techniques, and storage methods to preserve its freshness. Explore creative variations to indulge in a symphony of flavors and textures.
Prepare to be captivated by the delectable world of nata de coco, a unique and versatile treat with a rich history. Originating in the lush tropics of the Philippines, this chewy and translucent delicacy has become a beloved ingredient in cuisines and cultures around the globe. Its distinct texture and mild flavor make it a perfect complement to a wide range of desserts, beverages, and savory dishes.
Beyond its culinary appeal, nata de coco holds significant cultural significance in its native land. It is often served as a refreshing snack or dessert during festive gatherings and celebrations, symbolizing community and joy. Join us as we embark on a journey into the realm of nata de coco, exploring its origins, versatility, and the secrets behind its tantalizing taste and texture.
Crafting Your Own Nata de Coco: A Comprehensive Guide
Embark on a culinary adventure as we delve into the delightful world of Nata de Coco. This unique delicacy, originating from the Philippines, tantalizes taste buds with its gelatinous texture and versatility. Its popularity has soared worldwide, and now, you can experience the joy of crafting your own homemade Nata de Coco.
Preparation: Laying the Foundation
The journey begins with gathering essential ingredients: fresh coconut water, sugar, and a touch of vinegar or lemon juice. Combine these elements in a large pot and bring them to a rolling boil. Once the mixture thickens slightly, it’s time to inoculate it with a Nata de Coco starter culture. This precious ingredient kick-starts the fermentation process, transforming the liquid into a translucent, gelatinous delight.
Fermentation: The Art of Patience
The fermentation process is a delicate dance between time, temperature, and patience. Pour the inoculated mixture into a shallow container, cover it with a breathable cloth, and let it rest in a warm, dark place. The fermentation time varies depending on the ambient temperature, but typically ranges from 5 to 14 days. During this period, the nata culture thrives, converting the sugars into delicious Nata de Coco.
Troubleshooting: Overcoming Fermentation Challenges
If your Nata de Coco fermentation doesn’t proceed as expected, don’t despair. Common issues and their troubleshooting tips include:
- Slow fermentation: Increase the temperature slightly or reduce the amount of sugar in the mixture.
- Mold formation: Discard the affected batch, sterilize the container, and start a new fermentation with a fresh starter culture.
- Gas bubbles: Stir the mixture gently to release trapped air bubbles.
Harvesting Your Culinary Treasure
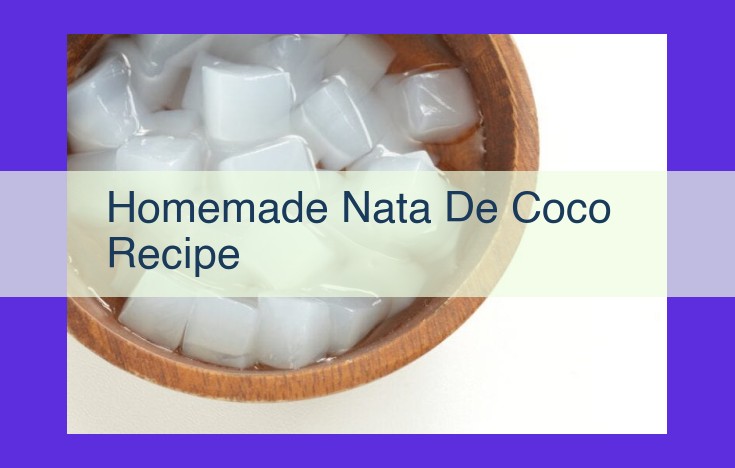
After the fermentation is complete, you’re rewarded with the gelatinous, QQ texture that defines Nata de Coco. Gently scoop it out of the container and rinse it thoroughly with water to remove any excess fermentation liquid. Your homemade Nata de Coco is now ready to indulge in or share with loved ones.
Essential Ingredients: The Secret Blend for Nata de Coco Delights
Nata de coco, a delectable treat originating from the Philippines, tantalizes taste buds with its unique texture and versatility. Beyond its culinary appeal, it holds cultural significance, woven into the fabric of various cuisines. To craft this culinary masterpiece, a secret blend of ingredients serves as the foundation.
1. Coconut Water: A Liquid Oasis
- Coconut water, the lifeblood of the coconut, provides the essential liquid medium for fermentation. Its sweet and slightly acidic nature promotes the growth of acetobacter xylinum, the friendly bacteria that transforms sugar into nata de coco.
2. Sugar: The Sweet Catalyst
- Sugar serves as the primary food source for the acetobacter. White sugar is the traditional choice, but brown sugar and honey can also be used, imparting subtle flavor nuances. The amount of sugar added directly influences the thickness and texture of the finished nata de coco.
3. Vinegar: The Acidic Balance
- A touch of vinegar creates the acidic environment necessary for fermentation. It helps control the growth of unwanted bacteria and supports the production of cellulose, the building block of nata de coco.
4. Acetobacter xylinum: The Miracle Worker
- Acetobacter xylinum is the key player in the fermentation process. This beneficial bacteria converts sugar into cellulose, forming the jelly-like matrix that characterizes nata de coco.
5. Nitrogen Source: A Vital Nutrient
- Yeast extract or ammonium sulfate provides a nitrogen source essential for bacterial growth. Without adequate nitrogen, the fermentation process would struggle.
6. Trace Minerals: Completing the Picture
- A few trace minerals, such as calcium chloride and magnesium sulfate, further enhance the fermentation process, ensuring the formation of a sturdy and cohesive nata de coco structure.
Understanding the secret blend behind nata de coco is crucial for successful home preparation. By carefully measuring and combining these ingredients, you can unlock the wonders of this delectable treat, delighting your senses with its unique texture and remarkable versatility.
Equipment Essentials: Your Culinary Toolkit for Nata de Coco Mastery
When embarking on your nata de coco-making adventure, assembling the right equipment is crucial for success. A well-equipped kitchen will streamline the process, ensuring flawless results.
Core Components
-
Large Glass Jar: A clear glass jar with a capacity of at least 2 quarts (1.9 liters) is essential for housing the fermentation process. Its transparency allows you to monitor progress and prevent contamination.
-
Cheesecloth or a Fine-Mesh Sieve: This will serve as a filter to separate the nata de coco from the fermentation liquid. Cheesecloth is a great option for larger batches.
-
Stirring Utensils: You’ll need long-handled, heat-resistant stirring utensils to gently agitate the mixture during preparation and fermentation.
Specialized Tools
-
pH Meter: A pH meter is a specialty tool that measures the acidity of the fermentation liquid. Maintaining an optimal pH level is vital for successful nata de coco formation.
-
Fermentation Thermometer: This thermometer helps you monitor the temperature of the fermentation liquid, ensuring it stays within the ideal range of 28-30°C (82-86°F).
Affordable Substitutes
-
Instead of a pH meter: Use pH strips to approximate the acidity level.
-
Instead of a fermentation thermometer: Place a kitchen thermometer in the fermentation liquid and monitor it regularly.
-
Instead of a stainless steel sieve: Use a plastic colander lined with cheesecloth.
By gathering these essential tools, you’ll lay the foundation for a successful nata de coco-making journey. Embrace the process and savor the delectable delights you create!
Step-by-Step Instructions: A Visual Guide to Nata de Coco Success
Embark on a culinary adventure as we guide you through the enchanting process of crafting your own nata de coco. Prepare to unravel the secrets of this beloved treat, transforming simple ingredients into a delectable delicacy.
1. Preparation:
- Acquire fresh coconut water: Seek out young coconuts brimming with clear, sweet water. Avoid using milky water from mature coconuts.
- Sanitize your equipment: Ensure a germ-free environment by thoroughly washing and sterilizing all utensils and containers.
2. Fermentation:
- Incorporate the starter culture: Gently stir in a starter culture (already fermented nata de coco) into the coconut water. This magical ingredient kick-starts the fermentation process.
- Create an incubator: Allow the mixture to rest in a warm, dark place for 5-7 days. A temperature of 30-35°C (86-95°F) is ideal.
3. Monitoring and Harvesting:
- Witness the transformation: As the mixture ferments, a white gelatinous layer forms on top. This is the nascent nata de coco.
- Harvest gently: Once the layer reaches about 1-2 inches thick, carefully remove it from the surface. Handle it with care to prevent tearing.
4. Rinsing and Storing:
- Rinse thoroughly: Rinse the harvested nata de coco under cool running water to remove any excess starter culture.
- Storage: Store the nata de coco in a clean, airtight container in the refrigerator for up to 2 weeks.
Troubleshooting Tips:
- No formation: If the white layer fails to form, check the temperature of the incubator. It should be within the optimal range.
- Mold formation: If mold appears, discard the batch and thoroughly clean your equipment.
- Overfermentation: If the nata de coco becomes too thick and rubbery, it has overfermented. Adjust the fermentation time accordingly.
Tips for Perfection: Enhancing Flavor and Texture
In the realm of culinary creations, where flavor and texture dance in harmonious delight, perfecting your nata de coco journey requires an artist’s touch. Let us embark on a voyage of tips and secrets to elevate your nata de coco to tantalizing heights:
Time-Saving Hacks
Embrace the mantra of efficiency! Soak your coconut shreds overnight to tenderize them, reducing fermentation time. Use a large container for ample room during fermentation, minimizing the risk of overflow. For a speedy kickstart, consider inoculating your mixture with pre-made vinegar.
Flavor Revelations
Unleash your inner alchemist! Sweeten your nata de coco with honey or coconut sugar for a natural sweetness. Infuse exotic flavors like pandan leaves or vanilla beans during fermentation to create aromatic masterpieces. Add a splash of lime juice for a refreshing twist that complements the delicate flavor profile.
Presentation Perfection
Let your nata de coco shine as the star of your culinary canvas! Cut the cubes into uniform shapes for an aesthetically pleasing presentation. Arrange them in colorful layers with contrasting colors, such as mango and pineapple. Drizzle a glossy glaze made from honey and water to enhance the visual appeal.
By mastering these techniques, you will transform your nata de coco from a simple treat to an extraordinary culinary masterpiece. So dive into the realm of flavor and texture, and let your creativity soar to new heights!
Storage Secrets: Preserving Delectable Delights
- Explain the optimal storage methods for preserving freshness and quality.
- Provide guidelines for shelf life and safe consumption.
- Discuss the importance of maintaining ideal temperatures.
Storage Secrets: Preserving Nata de Coco’s Delectable Delights
To savor the lusciousness of your homemade nata de coco for days, mastering proper storage techniques is paramount. Like any culinary creation, nata de coco has storage requirements that ensure its freshness, quality, and safety.
After the fermentation process has worked its magic, it’s crucial to transfer the nata de coco into an airtight container. This will prevent contamination and maintain its moisture content, ensuring it remains plump and succulent. Glass jars or BPA-free plastic containers are ideal for this purpose.
The temperature at which you store nata de coco plays a significant role in its longevity. Ideally, nata de coco should be refrigerated at 40-45°F (4-7°C). This cool environment slows down bacterial growth, maintaining the textural integrity and flavor of the nata de coco.
Additionally, the shelf life of refrigerated nata de coco is influenced by the type of syrup it’s submerged in. Nata de coco stored in a sugar syrup has a longer shelf life of 3-4 weeks, while nata de coco kept in fresh coconut water or fruit juice should be consumed within 1-2 weeks.
Monitoring the appearance and odor of your nata de coco is vital. If you notice any discoloration, slimy texture, or unpleasant smell, discard it promptly to avoid foodborne illness.
By following these simple storage guidelines, you can extend the enjoyment of your homemade nata de coco delights, savoring their luscious texture and delicate flavors for days to come.
Variations: A Symphony of Flavors and Textures
Indulge in a culinary adventure as we delve into the myriad ways to transform nata de coco from a simple treat to a delectable masterpiece. Unveil a kaleidoscope of flavors and textures, inviting you to let your creativity soar.
Embark on a Flavorful Journey
Infuse your nata de coco with an array of delightful flavors. Experiment with fruit juices, such as vibrant strawberry or tropical pineapple, to imbue your creation with a burst of natural sweetness. For a touch of elegance, steep in fragrant tea blends, such as delicate jasmine or soothing chamomile, to impart subtle yet captivating notes.
Elevate with Toppings and Fillings
Elevate your nata de coco creations with an array of delectable toppings and fillings. Sprinkle on a dusting of cinnamon sugar for a comforting warm embrace. Drizzle with creamy caramel sauce for an indulgent treat. Fold in fresh fruits like juicy strawberries or plump blueberries for a refreshing burst of flavor and vibrant color.
Encourage Culinary Exploration
The world of nata de coco variations is boundless. Don’t be afraid to experiment with different combinations of flavors and textures. Create your own signature creations, tailored to your unique palate. Whether it’s a tangy mango filling or a spicy chili-lime twist, the possibilities are endless.
Benefits Beyond Taste: Unveiling Nata de Coco’s Virtues
- Highlight the health benefits and nutritional value of nata de coco.
- Provide a detailed breakdown of its macronutrients and micronutrients.
- Discuss the potential health-promoting properties of nata de coco.
Benefits Beyond Taste: Unveiling Nata de Coco’s Virtues
In the realm of culinary delights, nata de coco stands out not only for its unique texture and versatility but also for its hidden benefits that extend beyond mere taste. This translucent, jelly-like treat boasts a treasure trove of nutrients and health-promoting properties, making it a worthy addition to a balanced diet.
Macronutrients and Micronutrients: A Nutritional Powerhouse
Nata de coco is predominantly composed of dietary fiber, with a substantial amount of carbohydrates and negligible protein and fat content. Its dietary fiber content contributes to digestive well-being by promoting regularity and maintaining a healthy digestive system. The carbohydrates in nata de coco provide a moderate source of energy, while its low protein and fat content make it suitable for various dietary restrictions.
Furthermore, nata de coco is a rich source of essential micronutrients. It contains notable amounts of potassium, which is vital for regulating blood pressure and fluid balance. It also provides some iron, essential for red blood cell production, and calcium, which supports strong bones and teeth.
Potential Health-Promoting Properties
The health benefits of nata de coco extend beyond its nutritional value. Studies have suggested that this fermented food may possess several health-promoting properties. It is believed that the beneficial bacteria involved in fermentation may:
- Support gut health: Nata de coco contains probiotics, which are beneficial bacteria that support a healthy gut microbiome. A healthy gut microbiome is associated with improved immune function, reduced risk of gastrointestinal issues, and better overall well-being.
- Boost immunity: The probiotics in nata de coco may help strengthen the immune system and protect against infections. A strong immune system is essential for maintaining overall health and reducing the risk of illness.
- Lower cholesterol levels: Some studies have indicated that nata de coco may help lower cholesterol levels. The dietary fiber in nata de coco may bind to cholesterol in the digestive tract, preventing its absorption into the bloodstream.
- Control blood sugar: The high fiber content of nata de coco may help regulate blood sugar levels by slowing down the absorption of glucose into the bloodstream. This makes it a suitable food for individuals with diabetes or prediabetes.
While these health benefits are promising, more research is needed to confirm the specific mechanisms and extent of nata de coco’s effects on human health. Nevertheless, its nutrient profile and potential health-promoting properties make it a valuable addition to a balanced diet.