Trussing, the art of preparing a turkey for optimal cooking, involves securing its legs, wings, and wingtips with kitchen twine using a trussing needle. Start by crossing the legs and tying them together. Tuck the wings under the body and tie them in place. Cross-tying stabilizes the turkey. Oil the twine to prevent sticking. Allow the trussed turkey to rest before cooking for even cooking. After roasting, safely remove the trussing for a perfectly presented dish.
- Significance of trussing for optimal cooking and aesthetics
- Essential materials and tools (kitchen twine, trussing needle)
Trussing: The Art of Elevating Your Roast
When it comes to achieving culinary excellence, especially during the festive season, the art of trussing holds a pivotal role. Trussing is not merely a technical skill; it’s a transformative process that enhances both the cooking quality and the aesthetic appeal of your roast.
In this comprehensive guide, we’ll embark on a culinary journey, unraveling the secrets of trussing. We’ll delve into the essential materials and tools you need, and provide a step-by-step guide to trussing your roast like a seasoned professional.
Essential Materials and Tools
Before we delve into the art of trussing, let’s gather the necessary materials:
- Kitchen Twine: Opt for unwaxed, natural twine that will withstand the heat of the oven.
- Trussing Needle: A specialized needle designed to pierce through meat easily, making trussing a breeze.
With these tools at your disposal, you’re ready to embark on the trussing adventure!
Trussing for the Perfect Thanksgiving Turkey
Step-by-Step Trussing Guide:
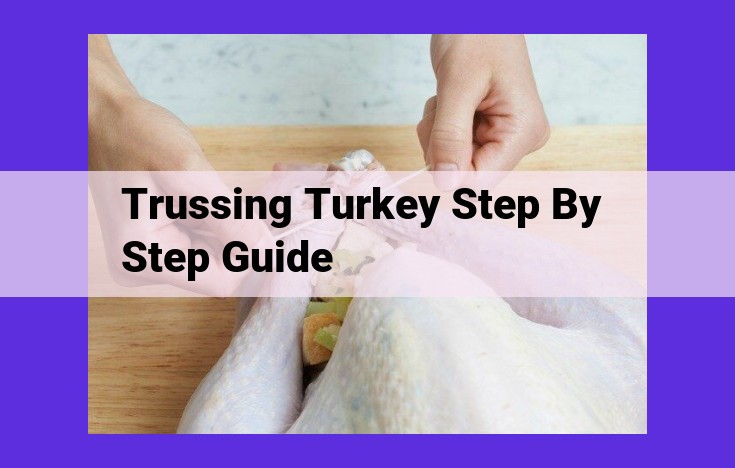
Preparing your turkey for roasting is essential for achieving even cooking and a visually appealing presentation. Trussing, the art of securing the bird’s limbs and tucking them neatly, plays a crucial role in this process. Follow these simple steps to master the technique:
Leg Truss:
- Secure the drumsticks: Place the turkey on its back and cross the drumsticks over each other. Use a sharp trussing needle and kitchen twine to tie the ankles together snugly.
- Create an X-pattern: Bring the twine up and over the first drumstick, then across the body and under the opposite drumstick. Repeat this step to create an X-pattern, ensuring the legs are held firmly together.
Wing Truss:
- Tuck the wings under the body: Hold each wing and fold it under the turkey, placing the wingtips close to the body. Secure the wings by wrapping the kitchen twine around them and tying a knot.
- Tighten the wings: Pull the twine tightly to bring the wings closer to the body, ensuring they are tucked in securely. This promotes even heat distribution throughout the turkey.
Cross-Tie:
- Connect the leg and wing twine: Cross the leg twine over the wing twine on one side of the turkey. Bring the wing twine up and over the leg twine on the other side.
- Tie a secure knot: Tighten the twine and tie a secure knot to stabilize the turkey. This cross-tie helps prevent the turkey from collapsing during roasting.
Trussing Techniques: Enhancing Flavor and Presentation
When it comes to roasting a poultry masterpiece, trussing is an essential step that not only elevates the aesthetics of your dish but also optimizes its cooking performance. It’s like putting on a tailored suit for your turkey, ensuring it looks its best while also maximizing its potential.
For this culinary transformation, you’ll need a few key materials: kitchen twine, a sturdy trussing needle, and possibly some oil to keep the twine from clinging. With these tools in hand, let’s dive into the art of trussing.
Tucking Wing Tips
To achieve a compact and professional presentation, tuck those wing tips under the body of your turkey. This neatens up the appearance and also prevents the wings from burning during roasting. It’s a simple yet effective step that elevates your culinary creation.
Sharp Trussing Needle
A sharp trussing needle is your best friend in this process. It effortlessly pierces through the tough skin of the turkey, ensuring a secure hold. Don’t settle for a dull needle that will tear or drag the skin, compromising the trussing. A sharp needle makes the task smooth and efficient.
Applying Oil to Twine
A final touch that might surprise you: apply a little oil to your kitchen twine. This clever trick prevents the twine from sticking to the meat, making it easier to remove after cooking. It also adds a subtle sheen to the twine, enhancing the overall presentation.
Resting and Removal: The Final Touches
Resting for Even Cooking
After meticulously trussing your turkey, it’s crucial to let it rest before roasting. This allows the heat to distribute evenly throughout the bird, resulting in succulent and perfectly cooked meat. The resting time depends on the size of your turkey; for a 12-14 lb bird, resting for 30 minutes is ideal.
Safely Removing the Trussing
Once your turkey is cooked to perfection, carefully remove the trussing before carving. Using a sharp knife or poultry shears, cut the twine that holds the legs and wings together. Remove the needle that was used for trussing. Be cautious not to tear the turkey’s skin while removing the trussing.
Tips for Successful Removal:
- Wait until the turkey has cooled slightly to make the removal process easier.
- Use a sharp knife to avoid damaging the turkey’s meat.
- Pull the twine gently to avoid tearing the skin.
- Discard the twine and needle after removing them.
By following these steps, you can ensure a perfectly trussed turkey that will impress your dinner guests with its appearance and delectable flavor.


