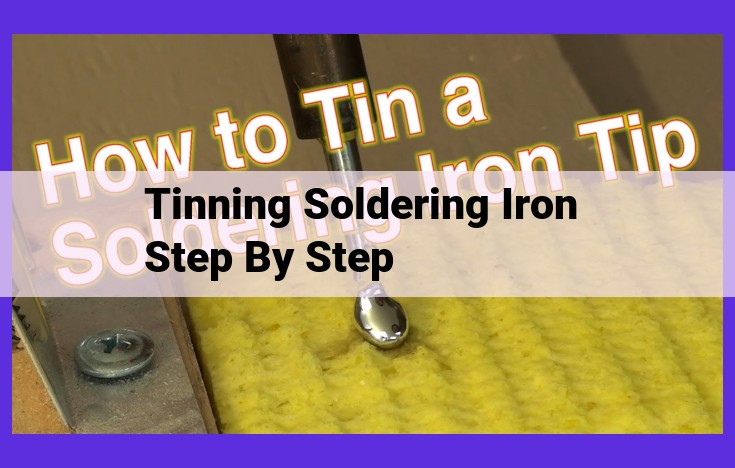
- Importance: Tinning enhances heat transfer, solder flow, and joint strength.
- Materials: Rosin-core solder and a soldering iron.
- Process: Clean the iron, heat it, apply flux, melt solder onto the tip, remove excess, and shape the tip.
The Secret to Successful Soldering: The Importance of Tinning
Every seasoned solderer knows that a properly tinned soldering iron is the key to a successful soldering project. Tinning, the process of coating the iron’s tip with solder, may seem like a minor step, but it plays a pivotal role in ensuring an optimal soldering experience.
The Magic of Tinning: Unlocking Soldering Success
When you tin your soldering iron, you are essentially creating a sacrificial layer that protects the copper tip from oxidation. Oxidation forms a barrier that inhibits solder from adhering to the tip, resulting in poor heat transfer, weak solder flow, and unreliable connections.
Tinning counteracts this by providing a clean and wettable surface for solder to flow effortlessly. It enhances thermal conductivity, ensuring even heat distribution throughout the tip for precise soldering. Moreover, the tinned tip prevents solder from balling up, leading to smoother application and cleaner solder joints that withstand the test of time.
Materials and Tools for Tinning Magic
The tools and materials you need for tinning are readily available and inexpensive:
- Soldering Iron: Choose a soldering iron with adjustable temperature control to suit different soldering tasks.
- Rosin Core Solder: This type of solder contains a flux core that cleans the metal surfaces and promotes solder flow.
Tinning Your Soldering Iron: A Step-by-Step Guide
1. Prepare the Iron: Apply a small amount of flux to the heated iron tip to remove any oxidation.
2. Tinning the Iron: Melt a small amount of solder onto the tip, ensuring it covers the entire surface.
3. Remove Excess Solder: Gently tap the iron on a heat-resistant surface to remove any excess solder.
4. Shape the Tip: Use a file or sandpaper to shape the tinned tip into your desired form for optimal precision during soldering.
Tinning your soldering iron is an essential step that delivers noticeable benefits for your soldering endeavors. By preventing oxidation, enhancing heat transfer, promoting solder flow, and ensuring joint strength, tinning empowers you to create secure and reliable solder connections. Remember, a tinned soldering iron is the key to unlocking soldering perfection!
Materials and Tools: Essential Components for Tinning
To embark on the art of tinning, you’ll need to gather your essential tools. The first and foremost is the soldering iron. This trusty device comes in various types and wattages, and the right choice for you depends on your project. If you’re a beginner, a lower-wattage iron (around 25-30 watts) is a good starting point. As your skills progress, you may want to invest in a higher-wattage iron for larger or more demanding projects.
Next up is the solder. Rosin core solder is the most commonly used type for electronics, as it contains a flux core that helps clean metal surfaces and promotes solder flow. The composition of the solder is also crucial. For most electronic applications, a 60/40 tin-lead solder is a reliable choice, providing a good balance of strength and workability.
These essential components will serve as your trusty companions in the world of tinning, ensuring a smooth and successful soldering experience.
The Art of Tinning: A Step-by-Step Journey to Soldering Success
In the realm of electronics, the crucial art of tinning a soldering iron often goes unnoticed, yet it holds the key to unlocking a world of efficient and successful soldering endeavors. As we embark on this enlightening journey, let’s delving into the step-by-step tinning process, unraveling the secrets that lead to optimal soldering performance.
Preparing the Iron:
-
Step 1: Flux Appeal: Begin by applying a small amount of flux to the tip of the iron. Flux acts as a cleansing agent, removing any oxidation or impurities that may hinder the solder’s flow.
-
Step 2: Heating Up: Plug in the iron and allow it to reach its optimal operating temperature. The appropriate temperature depends on the wattage of the iron and the type of solder being used.
Tinning the Iron:
-
Step 3: Melting Magic: Once the iron is hot enough, touch a small amount of solder to the tip. As the solder melts, it will magically coat the surface, forming a protective layer.
-
Step 4: Excess Removal: Gently tap the iron against a heat-resistant surface to shake off any excess solder. This step ensures a well-shaped tip with the ideal amount of solder adhering to it.
Shaping for Success:
- Step 5: Shaping the Star: While the solder is still molten, use a damp sponge or a shaping tool to mold the tip into the desired shape. The shape depends on the specific soldering task at hand.
Remember, the key to successful tinning lies in attention to detail and patience. By following these steps diligently, you’ll equip yourself with the essential skill that will elevate your soldering prowess to new heights.
Understanding Flux: The Secret Ingredient for Soldering Success
In the world of electronics, soldering is an essential skill, and tinning your soldering iron is the key to a successful job. And flux is the unsung hero in this process, playing a crucial role in ensuring smooth and reliable solder joints.
So, what is flux? Imagine it as a magical potion that cleans and enhances the metal surfaces you want to solder. It’s a sticky substance that removes oxides and impurities from the metal, creating a pristine surface for the solder to adhere to.
The magic of flux doesn’t end there. It also promotes solder flow, acting like a bridge between the solder and the metal. By reducing surface tension, it allows the solder to spread evenly and smoothly, creating a strong and secure joint.
Without flux, soldering would be a messy and unreliable affair. The solder would struggle to grip the metal, resulting in weak and brittle joints. But with the help of flux, you can effortlessly solder components together, ensuring they stay connected for years to come.
So next time you pick up your soldering iron, remember to apply a generous amount of flux to the tip and the metal surfaces you’re joining. It’s the secret ingredient that will make all the difference in your soldering adventures.
Understanding the Essential Role of Soldering
In the realm of electronics, the process of soldering plays a vital role in connecting components and ensuring the smooth flow of electricity. Soldering involves melting a metal alloy called solder onto a metal surface, creating a strong and reliable electrical bond.
During soldering, the molten solder penetrates the surfaces of the interconnected metals, forming an intimate connection that allows electrical current to pass efficiently. This process is especially important in electronic circuits, where precise and durable connections are critical for the proper functioning of devices.
The soldering process typically involves using a soldering iron, which is an electrically heated tool that melts the solder. The soldering iron tip is coated with a thin layer of solder, known as tinning, which helps to improve heat transfer and promote the flow of solder.
Properly tinned soldering irons ensure optimal solder flow, preventing solder from balling up and creating cold joints, which are weak and can compromise the integrity of the electrical connection. Tinning also helps to prolong the life of the soldering iron tip, protecting it from oxidation and wear.
Understanding the fundamentals of soldering is essential for anyone working with electronics. By mastering the techniques of proper tinning and soldering, you can create reliable and long-lasting connections that will ensure the success of your electronic projects.
Understanding Solder: The Essential Component for Flawless Soldering
Solder plays a pivotal role in the world of electronics, acting as the bridge that seamlessly connects electrical components. Its unique composition and characteristics make it indispensable for ensuring the proper flow and adhesion of solder joints.
Composition of Solder
Solder is typically composed of two primary metals: tin and lead. The most common solder alloy for electronics is Sn63Pb37, which contains 63% tin and 37% lead. This alloy provides an optimal balance of melting point, strength, and ductility. However, due to environmental concerns, lead-free solder alloys such as Sn96Ag4, containing 96% tin and 4% silver, are becoming increasingly popular.
Melting Point
The melting point of solder is a critical factor in soldering. It determines the temperature at which the solder will become liquid and form a bond between two metal surfaces. The melting point of Sn63Pb37 solder is 183°C (361°F), while the melting point of Sn96Ag4 solder is slightly higher at 217°C (423°F).
Types of Solder
There are various types of solder available, each tailored to specific applications. Some of the most common types include:
- Solid Solder: A wire or rod of solder that requires heating to melt and flow.
- Paste Solder: A solder in a paste form that is applied to the joint area before soldering.
- Liquid Solder: A solder that is already in a liquid state and can be applied directly to the joint.
Selection of Solder
Choosing the right type and composition of solder is crucial for successful soldering. Factors to consider include the compatibility with the materials being soldered, the desired melting point, and any specific requirements of the application.
By understanding the composition, melting point, and types of solder, you can make informed choices and ensure the optimal performance of your soldering projects.