Craft a captivating paper mache bulls head with this comprehensive guide. Learn about essential materials like paper, glue, and acrylic paint, as well as the necessary tools. Discover step-by-step techniques for making and applying paper mache paste, molding the head, and painting and finishing it. Additionally, ensure a safe crafting experience with safety tips on handling materials, tools, and maintaining a clean workspace. Create a stunning bulls head masterpiece with this informative guide.
Essential Materials: The Foundation of Paper Mache
Embark on a captivating journey into the realm of paper mache, where creativity flourishes with a blend of humble ingredients and repurposed treasures. Begin by gathering the fundamental raw materials that serve as the backbone of this versatile craft:
-
Paper: The lifeblood of paper mache, torn into strips or pulp, providing both structure and texture.
-
Water: The catalyst that transforms paper into a pliable paste, allowing for molding and adhesion.
-
Glue: The binding agent, holding the fibers together to create a cohesive form.
Enrich your paper mache arsenal with additional components that enhance both aesthetics and durability:
-
Acrylic Paint: A vibrant canvas for your imagination, adding color and personality to your creations.
-
Varnish: A protective shield, sealing the finished piece to withstand the test of time.
-
Clear Glue: A finishing touch, providing a glossy sheen or enhancing adhesion for delicate details.
Essential Tools for Paper Mache: A Beginner’s Guide to Crafting Magic
Embark on a captivating journey into the world of paper mache, where imagination takes flight and creativity knows no bounds. While this enchanting craft may conjure images of complex machinery and sophisticated equipment, fear not! Paper mache welcomes you with open arms, revealing a world accessible to all. Equipped with the fundamental tools, your hands become the instruments of art, transforming humble materials into extraordinary masterpieces.
Mixing Bowl and Spoon/Whisk: The Alchemy of Paper Mache
At the heart of paper mache lies the magical mixture, a concoction that breathes life into your creations. Mixing bowls, capacious and sturdy, serve as the crucible where water, glue, and paper come together in harmonious union. Accompanying them are spoons or whisks, the alchemists’ tools, diligently stirring the mixture until it reaches the perfect consistency, ready to sculpt your artistic visions.
Scissors, Foam Brush, Palette Knife: Shaping and Embellishing
Unleash the artist within with scissors, your trusted companions for effortlessly snipping and shaping paper into desired forms. As your creations take shape, the foam brush transforms into a delicate wand, gently applying color and texture to breathe life into your masterpiece. And for intricate details that demand precision, the palette knife awaits, poised to finesse each stroke, adding depth and dimension to your work.
Simplicity at its Finest: No Specialized Machinery Required
The beauty of paper mache lies in its accessibility. Unlike other crafts that demand elaborate machinery, paper mache thrives on the simplicity of its tools. This democratic nature invites everyone to participate, regardless of skill level or technical expertise. With a few basic tools in hand, you hold the power to conjure captivating art that will captivate and inspire.
So gather your tools, embrace the magic of paper mache, and let your creativity soar. May your artistic journey be filled with joy, fulfillment, and creations that bring endless wonder to the world!
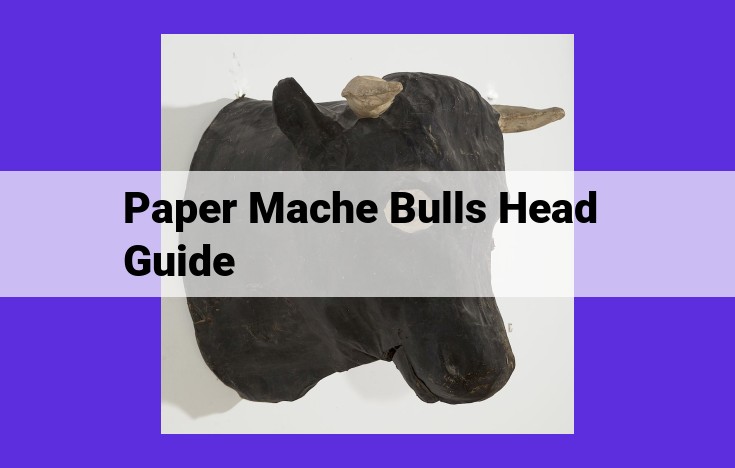
Crafting the Majestic Bulls Head: A Step-by-Step Guide
Preparing the Paper Mache Paste: The Backbone of the Head
The journey to creating a majestic bulls head begins with the preparation of paper mache paste. This basic yet essential mixture serves as the lifeblood that binds the paper layers together. To create the paste, simply combine flour and water in equal proportions. Stir until a smooth, creamy consistency is achieved. Allow the paste to rest for at least an hour to allow the flour to fully hydrate.
Molding and Shaping: Giving Form to the Bull
With the paste ready, it’s time to give life to the bull’s form. Start by creating a base structure using cardboard or wire mesh. This framework will provide the foundation on which the paper layers will be applied. Once the base is in place, tear strips of newspaper or magazines into uniform sizes. Dip each strip into the paste and apply it to the base, smoothing out any wrinkles. Repeat this process, building up layer by layer until the desired thickness is achieved.
Drying, Hardening, and Perfecting: Refining the Masterpiece
As the paper layers accumulate, allow ample time for drying. Place the head in a warm, well-ventilated area and allow it to air dry completely. Once dry, the head should be hard and sturdy. To smooth out any rough edges or imperfections, use sandpaper to gently sand the surface. This step will give the head a polished and refined look.
Painting and Finishing: Bringing the Bull to Life
With the head dried and sanded, it’s time to add color and texture. Start by applying a base coat of acrylic paint. Choose a color that best complements the desired look. Once dry, you can add details using different shades and brush sizes. To enhance the texture, consider using a variety of sponge dabbing or dry brushing techniques. Finally, seal the paint with a clear varnish to protect the surface and give it a glossy or matte finish.
Safety Tips: Ensuring a Risk-Free Paper Mache Adventure
Embarking on the creative realm of paper mache is an exciting endeavor, but it’s crucial to prioritize safety throughout your journey. Let’s explore some essential safety guidelines to safeguard your well-being while unleashing your artistic flair.
Handling Paper Mache Paste with Care
When working with paper mache paste, wear gloves to protect your skin from potential irritation. The glue used in the paste can cause skin dryness or discomfort. Always mix the paste in a well-ventilated area to avoid inhaling any fumes.
Minimizing Hazards with Sharp Tools
Sharp scissors and craft knives are essential tools in paper mache, but they can also pose risks if not handled properly. Always cut away from yourself and use sharp blades to reduce the risk of accidents. Keep tools in a designated, safe storage area when not in use.
Maintaining a Safe Workspace
A clean and well-ventilated workspace is paramount for paper mache. Clean up spills immediately to prevent slips and falls. Open windows or use fans to ensure proper air circulation, especially when working with glues or paints that may release fumes.
Responsible Tool Handling
Always handle tools with care and precision. Wear safety glasses when using power tools, and never leave tools unattended. If you encounter any difficulties or uncertainties, don’t hesitate to seek guidance from an experienced crafter or refer to reliable online resources.
By following these safety tips, you can confidently navigate the paper mache process, transforming your imagination into tangible masterpieces while ensuring your own well-being. Remember, safety should be an integral part of your creative journey, allowing you to fully appreciate the joys of paper mache.


