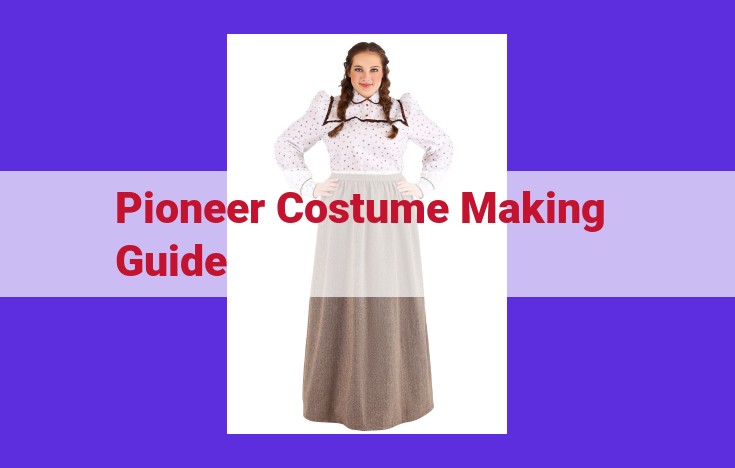
This guide provides a comprehensive understanding of pioneer costume making, covering essential terminology and techniques. It includes sections on fabric selection, pattern usage, notions, trims, embroidery, appliqué, bias tape, darts, hems, interfacing, linings, muslin, seams, serging, and tailoring. By following this guide, costume enthusiasts can confidently create authentic and detailed pioneer costumes.
Fabric: The Foundation of Your Pioneer Costume
Embark on the exciting journey of creating an authentic pioneer costume, beginning with the fundamental element: fabric. This essential material lays the foundation for your costume, defining its style, comfort, and durability.
Understanding Fabric Characteristics
The type of fabric you choose will significantly impact the aesthetics and functionality of your costume. Pioneer attire typically features natural fibers such as cotton, linen, and wool. These fabrics are breathable, allowing for comfort in various weather conditions.
Texture and Colors
The texture of the fabric adds depth and character to your costume. Rougher textures, like canvas or burlap, evoke the rugged lifestyle of pioneers. Smooth textures, such as silk or satin, add a touch of elegance.
Choosing the Right Color
The color of the fabric plays a crucial role in conveying the historical context of your costume. Neutral shades like browns, beiges, and greens reflect the earthy tones of the pioneer era. Brighter colors, such as reds or blues, were often used for special occasions.
Tips for Selecting Fabric
- Consider the climate you expect to encounter while wearing your costume.
- Pre-wash your fabric to prevent shrinkage or color bleeding.
- Test the draping of the fabric to ensure it falls gracefully.
- Experiment with different textures and colors to find the perfect match for your vision.
By carefully selecting the fabric for your pioneer costume, you lay the foundation for an authentic and comfortable garment that will bring the past to life.
Patterns: Shaping Your Garment
In the realm of costume creation, patterns emerge as the guiding light, directing the transformation of fabric into wearable artistry. These templates, meticulously crafted with precision, serve as the blueprint for garments that mirror the desired design, ensuring seamless transitions from imagination to reality.
When embarking on the adventure of pioneer costume making, understanding the terminology and mastering the techniques associated with patterns is paramount. In this comprehensive guide, we will delve into the essence of patterns, exploring their definitions, uncovering their types, and unraveling their applications.
Definition: The Guide to Shaping Fabric
A pattern is an essential companion in the costume-making journey. It serves as a pre-designed template that guides the cutting and assembly of fabric, transforming it into the desired garment or costume component. Patterns provide a roadmap, ensuring precision and consistency in the creation process.
Types of Patterns: A Spectrum of Design Possibilities
The world of patterns encompasses a diverse range of types, each tailored to specific purposes and design aesthetics. From basic patterns that serve as a foundation for simple garments to complex patterns that enable intricate and elaborate creations, the choice of pattern is a critical step in shaping the final outcome.
Commercial Patterns: These patterns, readily available in various sizes and designs, offer convenience and affordability. They provide a reliable framework for beginners or those seeking a quick and straightforward approach to costume making.
Custom Patterns: For those seeking a truly personalized fit or a design that defies the confines of pre-made patterns, custom patterns emerge as the ideal choice. These patterns are meticulously drafted to the wearer’s unique measurements, ensuring a garment that contours perfectly to their body.
Self-Drafted Patterns: For the adventurous seamstress or costumer, self-drafted patterns present an opportunity to unleash their creativity and design patterns from scratch. While requiring more time and skill, self-drafted patterns offer the ultimate level of customization and the satisfaction of creating a truly unique garment.
In the context of pioneer costume making, patterns play a crucial role in capturing the essence of the era. From simple chemise patterns to elaborate gowns, patterns serve as the foundation for authentic and visually stunning costumes that transport the wearer back in time. By understanding the terminology and mastering the techniques associated with patterns, you can confidently embark on the journey of creating your own captivating pioneer costume.
Notions: The Finishing Touches
Every pioneer costume requires a careful selection of notions—essential accessories that add polish and functionality to your creation. Think of them as the finishing touches that bring your garment to life, ensuring it’s not just a costume but a tangible piece of history.
Buttons
Buttons serve as both functional closures and decorative accents. Choose from a vast array of materials, shapes, and sizes, from simple wooden toggles to ornate metalwork. Proper placement is crucial to ensure they align neatly and securely, allowing your pioneer to button up with ease.
Thread
The thread you choose will significantly impact the strength and durability of your seams. Select a high-quality thread that matches the color and weight of your fabric. Cotton thread is a versatile choice for most projects, while silk or linen thread add a touch of elegance.
Zippers
Zippers provide a convenient and modern way to fasten your costume. Choose concealed zippers for a sleek, almost invisible finish, or exposed zippers as a decorative element. Ensure that the zipper length aligns with the opening you wish to close and that the slider glides smoothly.
Interfacing
Interfacing is a hidden layer of fabric that reinforces specific areas of your garment, providing structure and support. It comes in various weights and types, each designed for a specific purpose. A lightweight interfacing can add stiffness to collars or cuffs, while a heavier interfacing can create a sturdy foundation for a bodice.
Other Notions
A comprehensive collection of notions includes bias tape, a versatile fabric strip that binds seams and finishes edges; darts, triangular folds that enhance shape and eliminate excess fabric; and hems, the finished edges of your garment that prevent fraying and add a touch of style.
Incorporating these essential notions into your pioneer costume-making project will elevate your creation from a mere imitation to a truly authentic and functional piece of history.
Trims: Adorning Your Pioneer Costume with Decorative Flair
In the realm of pioneer costuming, trims play a pivotal role in elevating the aesthetic appeal and imbuing your creation with historical authenticity. These embellishments transform the garment from a mere piece of fabric into a masterpiece imbued with charm and character. They whisper tales of days gone by, adding a touch of whimsy and a sprinkle of elegance to your pioneer attire.
Among the plethora of trims available, lace stands out with its delicate beauty. This intricate fabric adds a touch of femininity and elegance to blouses, skirts, and bonnets. Its intricate patterns and airy texture evoke visions of Victorian ladies and genteel gatherings.
Fringe brings a touch of the Wild West to your costume. This playful embellishment adds movement and a touch of whimsy to dresses, jackets, and shawls. Imagine the swaying fringe as you twirl, adding a dash of exuberance to your pioneer spirit.
Ribbons are versatile adornments that can add both color and texture to your costume. They can be used to tie up hair, create bows, or embellish the neckline and sleeves. Their vibrant hues and intricate designs bring a touch of cheerfulness and individuality to your attire.
Beads add a touch of sparkle and sophistication to any costume. They can be sewn onto dresses, used to create necklaces and bracelets, or embellish accessories. Their shimmering surface catches the light, adding a dash of glamour to your pioneer look.
When incorporating trims into your costume, placement is key. Lace and fringe look stunning when used as accents on collars, cuffs, and hems. Ribbons can be used to create bows and embellish waistlines, while beads add a touch of elegance when sewn onto bodices or incorporated into jewelry.
Remember, trims are not merely decorative additions. They serve a practical purpose as well. Lace and fringe can help to conceal seams and raw edges, while ribbons can be used to adjust the fit of a garment. Beads, when sewn securely, can add weight and drape to fabric, creating a more flattering silhouette.
So, as you embark on your pioneer costuming journey, don’t forget the power of trims. They are the finishing touches that will elevate your creation from ordinary to extraordinary. With a judicious selection and thoughtful placement, you’ll craft a costume that not only looks authentic but also captures the spirit of the pioneer era.
Embroidery: Delicate Art in Pioneer Costumes
Embroidery, the meticulous art of embellishing fabric with intricate stitches, played a significant role in pioneer fashion. These handcrafted designs and patterns elevated simple garments, transforming them into unique expressions of artistry and personal flair.
Pioneer women, known for their resourcefulness and creativity, employed various embroidery techniques to adorn their clothing. Some favored sampler stitching, where a variety of patterns were stitched on a single piece of fabric, creating a vibrant and colorful sampler. Others excelled in crewelwork, which involved embroidering wool or silk threads onto heavy fabrics like linen or canvas.
Specific motifs and symbols held cultural and personal importance in pioneer embroidery. Floral designs were a popular choice, representing the beauty of nature and the abundance of life in the frontier. Animal figures symbolized strength and adaptability, while geometric patterns evoked the orderliness and resilience of the pioneers’ everyday lives.
Embroidered garments served both practical and social purposes. They protected against the harsh weather conditions, provided warmth, and showcased the skills and artistry of the women who created them. Intricate embroidery enhanced the status and reputation of its wearer, earning her admiration within the pioneer community.
Today, preservationists and historians meticulously restore and display antique pioneer embroidery, preserving the heritage of these skilled craftswomen and offering a glimpse into the lives and traditions of a bygone era. And so, the delicate art of embroidery continues to captivate and inspire, a testament to the creativity and resilience that shaped the pioneering spirit.
Appliqué: Decorative Flourishes in Pioneer Costumes
In the realm of pioneer fashion, appliqué stands out as a vibrant thread in the tapestry of their attire. This intricate technique involves stitching fabric shapes or motifs onto a base fabric, unleashing a symphony of colors, patterns, and symbolic designs.
The pioneer spirit embraced appliqué as a mode of self-expression and creativity. It allowed them to personalize their garments, adding unique touches that reflected their individual stories, cultural heritage, and aspirations. From intricate florals to geometric designs, each appliqué adorned a garment with a captivating narrative.
Beyond its aesthetic allure, appliqué served a practical purpose for pioneers. It could reinforce torn or worn areas, extend the lifespan of garments, and create additional warmth by adding layers of fabric. This ingenious technique embodies the resourceful spirit that defined their way of life.
Applications of Pioneer Appliqué
The versatility of appliqué allowed pioneers to adorn various garments, from simple shifts to elaborate gowns. Aprons and bonnets became vibrant canvases for floral motifs, while vests and jackets featured intricate geometric designs. Children’s clothing often showcased playful appliqué embellishments, adding a touch of whimsy and individuality.
Styles of Pioneer Appliqué
Pioneer appliqué techniques showcased a wide range of styles, influenced by their diverse cultural backgrounds and regional traditions.
- Cutwork Appliqué involved cutting away the base fabric around the appliqué shape, creating a lace-like effect.
- Reverse Appliqué reversed this concept, stitching the appliqué shape onto the base fabric and then cutting away the excess.
- Layered Appliqué involved stacking multiple layers of fabric to create a three-dimensional effect.
These techniques allowed pioneers to express their creativity and tell stories through their garments, each stitch carrying a piece of their history and cultural heritage.
The Legacy of Pioneer Appliqué
Today, the legacy of pioneer appliqué continues to inspire contemporary fashion designers and crafters. Its unique charm and symbolism evoke a sense of nostalgia and connection to the spirit of the pioneers. Whether incorporated into modern garments or preserved in historical collections, appliqué remains a timeless art form that celebrates the ingenuity and creativity of our ancestors.
Bias Tape: Shaping and Binding Your Pioneer Costume
Discover the secrets of bias tape, a versatile and essential component in creating an authentic pioneer costume. Bias tape is a strip of fabric cut diagonally, granting it a unique flexibility that makes it ideal for finishing seams, binding edges, and adding decorative flair.
Crafting with Bias Tape
To create bias tape, simply cut a strip of fabric along the diagonal. This angled cut allows the tape to stretch and conform to curved edges and intricate shapes. Use bias tape to reinforce seams, preventing fraying and creating a professional finish. It can also be used to bind exposed edges, such as on armholes or necklines, giving your costume a polished look.
Embellishing with Bias Tape
Beyond its practical functions, bias tape can also be used for decorative purposes. Add a touch of elegance by using contrasting colors or patterned fabrics. Create ruffles or frills by gathering the bias tape along one edge. You can even use bias tape to outline motifs or create geometric designs.
Techniques for Using Bias Tape
1. Finishing Seams: Fold the bias tape in half and place it over the seam allowance. Stitch down one side, then fold the tape over the other side and stitch again. This creates a strong and tidy finish.
2. Binding Edges: Fold the bias tape around the raw edge of the fabric and stitch down. Use a blind stitch to hide the stitches and create a seamless appearance.
3. Creating Ruffles: Gather the bias tape along one edge by pulling on the threads. Stitch the gathered edge to the desired surface, creating a ruffled effect.
4. Embellishing with Designs: Use different colors or patterns of bias tape to create unique designs. Stitch the bias tape onto the fabric in geometric patterns or outline motifs for a touch of pioneer flair.
Remember, practice makes perfect! Experiment with different techniques and fabrics to master the art of using bias tape. With a little patience and creativity, you’ll be able to elevate your pioneer costume to the next level.
Darts: Sculpting Your Pioneer Costume
Darts – The Magic Touch for a Sharper Look
Darts are the unsung heroes of fitted garments, offering a subtle but powerful way to sculpt fabric. These triangular folds are sewn strategically to remove excess fullness and create a more flattering silhouette.
Pioneer costumes, especially those for women, often rely on darts to accentuate the curves of the body. By carefully placing darts at the bust, waist, and back, you can create a garment that hugs your figure and highlights your best assets.
Location and Purpose of Darts
Darts are typically placed in areas where natural curves occur. For example, in a bodice, darts may be sewn at the bust to lift and shape it. Darts at the waist nip in excess fabric, creating a more defined silhouette.
Mastering the Art of Darts
Darts are a relatively simple technique to master. First, mark the location of the dart with chalk or pins. Sew the dart with a small stitch length and secure it with a backstitch at the point.
Experiment with different dart sizes and placements to find what works best for your body type and the style you’re aiming for. Darts can be shallow and subtle or deeper and more dramatic, depending on your preference.
Remember, darts are not just functional; they can also add a **touch of style to your costume. By experimenting with different thread colors or contrasting fabrics, you can create decorative darts that enhance the overall look of your garment.
Hems: The Finishing Touch of Your Pioneer Costume
In the realm of pioneer costuming, every detail matters. From the fabric to the trims, each element contributes to the authenticity and beauty of your creation. And as you embark on the rewarding journey of crafting your own pioneer costume, one crucial aspect that deserves your utmost attention is hems.
A hem is the finished edge of a garment, serving the essential purpose of preventing fraying and adding strength to the fabric. Not only does a well-executed hem enhance the durability of your costume, but it also elevates its visual appeal, creating a polished and authentic look.
There are several types of hems, each with its own unique applications and characteristics. The most common types of hems used in pioneer costumes include:
-
Blind Hem: This type of hem is virtually invisible, as it is sewn within the fold of the fabric, creating a clean and seamless finish. It is often used on sheer or delicate fabrics, such as those found in gowns and aprons.
-
Machine Hem: As the name suggests, this hem is created using a sewing machine. It is quick and easy to execute, making it an ideal choice for garments that require a simple and durable finish. Machine hems can be top-stitched or folded over and stitched down.
-
Rolled Hem: This decorative hem involves rolling the fabric edge and stitching it down. It creates a delicate and elegant finish, and is commonly used on blouses, skirts, and handkerchiefs.
-
Lace Hem: For a more feminine and ornate touch, you can opt for a lace hem. This type of hem involves attaching lace to the edge of the fabric, creating a charming and eye-catching detail.
The choice of hem ultimately depends on the fabric, the style of your costume, and your desired level of authenticity. By experimenting with different types of hems, you can create a unique and captivating pioneer costume that will turn heads wherever you go.
Interfacing: The Secret Ingredient for Structure
Imagine embarking on a sewing adventure to recreate an iconic pioneer costume. As you carefully select your fabrics and ponder over the details, there’s one essential element that elevates your creation: interfacing. This unsung hero provides the backbone your costume needs to stand tall and exude authenticity.
What is Interfacing?
Think of interfacing as the invisible force that gives shape and support to your garments. It’s a layer of fabric or material that’s sandwiched between the outer fabric and lining of your costume, acting as an invisible foundation for those delicate details that bring your creation to life.
Types of Interfacing
Just as there are countless varieties of fabrics, interfacing comes in an array of options to suit specific needs:
- Fusible Interfacing: This type melts when ironed, bonding permanently to your fabric. Perfect for collars, cuffs, and areas that require extra crispness.
- Non-Fusible Interfacing: For a more temporary or removable support, non-fusible interfacing is applied using adhesive spray or hand stitching.
- Stiff Interfacing: When you need your fabric to stand up straight, stiff interfacing is your go-to choice. Collars, hats, and corset boning all benefit from its rigid support.
- Soft Interfacing: For a more subtle, pliable effect, soft interfacing provides subtle support without overwhelming the fabric’s drape. Perfect for garments that need a little added body without sacrificing movement.
Uses of Interfacing
- Reinforcing Seams: Interfacing adds strength and stability to seams, preventing them from fraying or tearing under stress.
- Structuring Necklines: A layer of interfacing in the neckline keeps it from collapsing, maintaining a crisp and polished appearance.
- Stiffening Collars: Collar interfacing gives collars that iconic upturned shape, adding a touch of formality and character.
- Creating Boning Channels: For corsets and other garments that require shaping, interfacing provides a secure channel for boning to be inserted.
- Enhancing Buttonholes: A small patch of interfacing behind buttonholes reinforces the fabric, preventing it from stretching or tearing with repeated use.
With the right type and application of interfacing, your pioneer costume will not only look authentic but also stand the test of time. So as you stitch and create, remember the importance of this humble yet indispensable tool. Let interfacing be your secret weapon for garments that captivate and leave a lasting impression.
Linings: The Invisible Guardians of Your Pioneer Costume
Like a secret whisper under a bustling dress, linings play an crucial role in elevating the comfort, beauty, and endurance of your pioneer costume. This humble inner layer silently performs a multitude of tasks, from enhancing the drape of your gown to protecting your skin from rough seams.
Purpose of Linings
Linings serve an array of purposes that enhance the wearability and aesthetic appeal of your costume:
- Coverage: Linings provide an opaque layer underneath sheer or revealing fabrics, protecting your modesty.
- Warmth: In colder climates, linings insulate your body, trapping warm air and keeping you comfortable.
- Opacity: Linings conceal the interior of your costume, preventing visible undergarments or unfinished seams from distracting from its elegance.
- Drape: Linings allow fabrics to flow gracefully, creating beautiful silhouettes and enhancing the overall sophistication of your costume.
Materials for Linings
The choice of lining material depends on the specific requirements of your costume:
- Natural Fibers: Cotton and silk linings are breathable and comfortable against the skin, while linen linings add strength and structure.
- Synthetic Fibers: Polyester and acetate linings are wrinkle-resistant, durable, and easy to care for.
- Specialty Linings: Rayon linings provide moisture-wicking properties, and mesh linings improve ventilation for hot weather wear.
Attaching a Lining
Attaching a lining is a delicate process that requires patience and precision:
- Prepare the Fabric: Ensure the lining fabric is pressed and trimmed to the same size and shape as the outer fabric.
- Pin the Layers: Pin the lining to the outer fabric, right sides together, along the edges.
- Sew the Lining: Stitch around the edges, leaving an opening for turning.
- Turn and Press: Turn the lining right side out, through the opening, and press the seams.
- Edgestitch: Edgestitch the opening closed, creating a neat and unobtrusive finish.
Linings are the unsung heroes of pioneer costumes, quietly enhancing their beauty, comfort, and longevity. By understanding the purposes and materials of linings, you can elevate your costume to the standard of authenticity and elegance. So, as you stitch and sew, remember the importance of this humble layer, and let it transform your costume into a masterpiece that whispers of the pioneer spirit.
Muslin: The Secret Weapon for Perfect Pioneer Costumes
In the realm of costuming, muslin reigns as the unsung hero, a humble fabric that plays a pivotal role in crafting flawless pioneer outfits. As a lightweight, unbleached cotton, muslin serves as the ideal canvas for experimentation and testing, paving the way for refined and impeccably tailored costumes.
Benefits of Muslin
Muslin’s versatility lies in its ability to create mock-ups or prototypes of your costume designs. By using muslin, you can test the fit, proportions, and design elements before investing in final fabrics. This allows you to make adjustments, refine your pattern, and ensure a comfortable and flattering fit.
Furthermore, muslin is inexpensive, making it a cost-effective way to experiment with different styles and combinations without breaking the bank. Its lightweight nature also allows you to easily pin and drape the fabric, enabling you to visualize the movement and flow of the finished garment.
Importance of Using Muslin
By incorporating muslin into your costume-making process, you can significantly enhance the quality of your final product. It allows you to:
- Identify and correct fit issues: Muslin prototypes reveal any areas of tightness, looseness, or discomfort, enabling you to make necessary adjustments.
- Experiment with design elements: Muslin gives you the freedom to play with different seam lines, pleats, and embellishments, helping you refine your design and create a truly unique outfit.
- Test construction techniques: By practicing on muslin, you can perfect your sewing techniques and ensure that the final garment is well-constructed and durable.
In conclusion, muslin is an essential tool for any serious costume maker. Its ability to facilitate prototyping, testing, and experimentation makes it an invaluable asset in creating pioneer costumes that are not only historically accurate but also perfectly tailored to your body. Embrace the power of muslin and unlock the secrets to crafting stunning costumes that will transport you back in time.
Seams: The Fabric’s Silent Storytellers
In the world of sewing and costume making, seams are the unsung heroes, the invisible bonds that weave fabrics into garments and breathe life into historical attire. These lines of stitching, often hidden from view, play a crucial role in shaping the silhouette, providing strength, and adding intricate details to your pioneer costume.
Types of Seams
There’s a vast array of seam types, each with its unique purpose and aesthetic appeal.
-
Plain Seam: The simplest and most common seam, it joins two fabric pieces edge-to-edge, creating a flat and durable bond.
-
French Seam: A more refined seam, it involves enclosing raw edges within the seam allowance, resulting in a clean and professional finish.
-
Flat-Felled Seam: Ideal for heavy-duty applications, this seam creates a strong and decorative edge, commonly used in denim and workwear.
-
Gathered Seam: Adds volume and creates a ruffled effect, often seen in blouses, skirts, and curtains.
-
Blind Hem Seam: An invisible hem, it conceals stitches within the fabric fold, giving a seamless finish to garments.
Choosing the Right Seam
Selecting the appropriate seam for your project is essential to ensure both durability and aesthetic appeal. Consider the fabric weight, intended use, and desired effect. For example, a plain seam may suffice for lightweight fabrics in garments with minimal stress, while a flat-felled seam is ideal for heavy denim in workwear.
Perfecting Your Seams
Mastering seam techniques is a skill that takes practice and patience. Here are some tips to achieve professional-looking seams:
- Use a sharp needle and quality thread: Sharp needles pierce fabrics cleanly, preventing puckering or damage.
- Sew with a consistent stitch length: Even stitches create a uniform and durable seam.
- Press seams as you sew: Pressing flattens seams, prevents puckering, and enhances the overall appearance of the garment.
- Reinforce stress points: Sew additional stitches at areas that will experience strain, such as waistbands and buttonholes.
- Finish raw edges: Overlock or zigzag stitch raw edges to prevent fraying and extend the garment’s life.
Seams may be the silent heroes of costume making, but they play a vital role in creating beautiful and functional garments that stand the test of time. By understanding the different types of seams and perfecting your sewing techniques, you can elevate your pioneer costume to new heights of authenticity and excellence.
Serger: Finishing Professionally
- Definition: A specialized sewing machine that overcasts and trims fabric edges simultaneously, creating clean and durable finishes.
- Advantages and uses of serging.
Serger: The Master of Professional Finishes
In the world of sewing, precision and durability are paramount. And when it comes to finishing those raw edges, nothing beats the finesse of a serger. This specialized machine is a true game-changer for any seamstress or tailor, delivering a clean, overcasted, and trimmed seam in a single swift motion.
The key to a serger’s magic lies in its simultaneous action. It weaves multiple threads around the fabric’s edge, creating an interlocking stitch that both secures the seam and prevents fraying. The result is a professional-looking finish that will stand the test of time.
The benefits of serging are undeniable:
- Durability: Overcasting stitches create a strong and secure seam, reducing the risk of unraveling or tearing.
- Clean Appearance: The trimmed edge eliminates any excess fabric, resulting in a tidy and polished finish.
- Time-Saving: Sergers work quickly, significantly reducing the time spent on finishing seams manually.
- Versatility: Sergers can handle a wide range of fabrics, from delicate silks to sturdy denim.
When it comes to using a serger, there are a few key aspects to consider:
- Thread Tension: Proper tension is crucial for achieving an optimal stitch. Experiment with different settings to find the perfect balance that prevents puckering or loose stitches.
- Needle Selection: The right needle size and type can make a big difference in the quality of the stitch. Use a needle that is appropriate for the fabric and thread weight.
- Differential Feed: This feature allows you to adjust the feed rate of the fabric, which can be helpful for handling slippery or stretchy materials.
Whether you’re a seasoned seamstress or a novice tailor, a serger is a valuable investment that will elevate your sewing projects to professional heights. Embrace its power to create durable, pristine finishes that will make your garments shine.
Tailoring: Perfecting the Fit
- Definition: The art of altering and customizing garments to ensure an ideal fit and a tailored, polished look.
- Techniques and processes involved in tailoring.
Tailoring: The Art of Perfecting the Fit
When it comes to creating a pioneer costume, it’s not just about the fabric and patterns; it’s also about perfecting the fit. This is where tailoring comes in, the skilled craft of altering and customizing garments to achieve an ideal fit and polished look.
Tailoring involves a range of techniques and processes, all aimed at ensuring that the garment fits your body comfortably and seamlessly. These techniques include:
-
Darts: Triangular folds sewn into fabric that shape and remove excess fullness, especially in fitted garments like bodices and skirts.
-
Hems: The finished edges of a garment that prevent fraying, strengthen the fabric, and enhance its appearance. Hems can be simple or decorative, with various types to choose from.
-
Bias Tape: A strip of fabric cut diagonally that provides structure and reinforcement to edges and seams, while also adding a decorative touch.
-
Interfacing: An additional layer of fabric or material that stiffens or adds structure to specific areas, such as collars, cuffs, or waistbands.
-
Linings: An inner layer that provides coverage, warmth, and opacity, while also improving the drape and fall of the garment.
The process of tailoring a pioneer costume typically involves several steps:
-
Measuring and marking: Take precise measurements of your body to determine the necessary alterations. Mark these measurements on the garment using pins or chalk.
-
Pinning and fitting: Pin the garment to yourself and make adjustments to ensure a proper fit. This may involve taking in or letting out seams, adjusting darts, or altering the length.
-
Stitching and finishing: Once you’re satisfied with the fit, stitch the alterations securely. Finish the raw edges with bias tape, hems, or other appropriate techniques.
-
Pressing: Use an iron to press the seams and hems neatly, giving the garment a crisp and professional finish.
By employing these techniques, you can transform an ordinary garment into a tailored masterpiece. Whether you’re creating a period-accurate pioneer costume or simply want to achieve a more flattering fit, tailoring is an essential skill that will elevate your sewing projects to the next level.


