Revive grout to its original elegance with oxalic acid, a powerful bleach and stain remover. Oxalic acid effectively restores grout by removing discoloration and tough stains, leaving it like new. Simply follow the steps of cleaning, scrubbing, rinsing, and drying before applying a grout sealer for lasting protection. Oxalic acid’s safety and ease of use make it a must-have for any homeowner looking to maintain their tile surfaces.
Reviving Grout: A Comprehensive Guide to Using Oxalic Acid
Tired of dull and discolored grout? Oxalic acid can be your secret weapon to restore its pristine appearance. In this blog post, we’ll take you through a step-by-step guide to using this powerful cleaning agent to revive your grout.
Understanding Oxalic Acid
Oxalic acid is a natural cleaner and bleach commonly used in household cleaning. It’s a colorless, crystalline solid that’s highly effective at removing stains and discoloration.
Composition and Purpose of Grout
Grout is a porous material used to fill the joints between tiles. It’s typically made of a mixture of cement, sand, and water. Grout’s primary purpose is to seal the joints, preventing moisture and dirt from penetrating the underlying substrate.
Grout Restoration Process
Reviving grout involves following a few simple steps:
- Cleaning: Use a strong grout cleaner to remove surface dirt and grime.
- Scrubbing: Scrub the grout with a stiff-bristled brush to loosen deep-set stains.
- Rinsing: Thoroughly rinse the grout with clean water to remove any cleaning residue.
- Drying: Allow the grout to dry completely before sealing.
Protecting Grout with Sealers
Once your grout is clean, sealing it is essential to protect it from future stains and moisture damage. Grout sealers are available in various types, and their application methods vary depending on the product.
Using Oxalic Acid for Grout Revival
Oxalic acid is particularly effective for removing tough stains and discoloration from grout. Here’s how to use it:
- Test: Always test oxalic acid on an inconspicuous area first to ensure it doesn’t damage your tiles.
- Mix: Create a solution by mixing oxalic acid with water according to the manufacturer’s instructions.
- Apply: Apply the solution to the stained grout and let it sit for 5-10 minutes.
- Scrub: Scrub the grout gently with a soft brush to activate the cleaning action.
- Rinse: Rinse the grout thoroughly with clean water.
Advantages of Oxalic Acid for Grout Revival
- Effective: Removes stains and discoloration effectively.
- Safe: Relatively safe to use when handled with care.
- Easy to use: Simple to mix and apply.
Safety Tips and Precautions
- Wear gloves and eye protection when handling oxalic acid.
- Keep oxalic acid out of reach of children and pets.
- Never use oxalic acid on marble or other acid-sensitive surfaces.
With the right techniques and a little elbow grease, you can revive your grout to its original glory using oxalic acid. By following the steps outlined in this guide, you can maintain your tile surfaces, ensuring they remain clean, stain-free, and beautiful for years to come.
Understanding Oxalic Acid: A Powerful Cleaner for Restoring Grout
Oxalic acid is a naturally occurring organic acid that finds widespread use as a cleaning and bleaching agent. In the context of grout restoration, oxalic acid plays a vital role in removing stubborn stains and discoloration. This comprehensive guide will delve into the properties of oxalic acid and its remarkable ability to revive grout to its original pristine appearance.
Properties of Oxalic Acid
Oxalic acid is a white, crystalline solid with a slightly sour taste. It’s soluble in water, forming a colorless solution. The acid is non-toxic in small doses but can be harmful if ingested in large quantities.
Role as a Bleach and Stain Remover
Oxalic acid acts as a powerful bleach and stain remover due to its ability to oxidize stains. Oxidation is a chemical reaction that breaks down the molecular structure of the stain, lightening or removing it altogether. Oxalic acid is particularly effective against stains caused by rust, hard water deposits, and organic matter.
The Composition and Purpose of Grout
When it comes to maintaining the pristine appearance of your tiled surfaces, grout plays a crucial role. This unassuming substance, typically composed of cement, sand, and water, serves as the mortar that binds tiles together, filling the joints and creating a cohesive surface. Its primary purpose is to seal these joints, preventing moisture and dirt from seeping in and potentially damaging the underlying structure.
Grout not only adds strength to the tiled surface but also complements the overall aesthetic appeal. It comes in various colors to match different tile designs, allowing for a customized and coordinated look. Furthermore, grout provides a protective barrier against wear and tear, ensuring the longevity of your tile installation.
In addition to its functional role, grout also contributes to the hygiene of tiled surfaces. By filling the gaps between tiles, it prevents dirt and bacteria from accumulating and forming unsightly stains. Regular cleaning and maintenance of grout is essential to preserve its integrity and the overall appearance of your tiled spaces.
Grout Restoration: A Comprehensive Guide to Revive Your Tile Surfaces
Restoring grout to its original pristine condition can seem like a daunting task. But with the right techniques and a little bit of elbow grease, you can easily achieve a rejuvenated look for your tile surfaces. Follow these steps to revive your grout and enjoy a cleaner, brighter bathroom or kitchen.
Essential Cleaning Techniques
-
Identify the Stain Type: Before tackling the stains, determine their source. Common grout stains include dirt, soap scum, mold, and mildew. Different stains require specific cleaning agents, so it’s crucial to identify them accurately.
-
Choose the Right Cleaner: For general cleaning, a mild grout cleaner or a mixture of baking soda and water can be effective. For tougher stains, consider using a commercial grout stain remover or oxalic acid (explained later).
-
Apply the Cleaner: Apply the cleaner to the grout lines and allow it to sit for the recommended time. This allows the cleaner to penetrate the stains and break them down.
Scrubbing Techniques
-
Use a Grout Brush: A stiff grout brush is ideal for removing dirt and stains from the grout lines. Scrub gently to avoid damaging the grout or the tiles.
-
Consider a Toothbrush: For smaller or intricate grout lines, a toothbrush can be an effective tool for precise cleaning.
-
Steam Cleaning: Steam cleaning is a powerful way to remove deeply embedded dirt and debris. Use a steam cleaner specifically designed for grout restoration.
Rinsing and Drying Techniques
-
Rinse Thoroughly: After scrubbing, rinse the grout lines thoroughly with clean water. Use a sponge or a wet cloth to remove all traces of the cleaning solution.
-
Dry the Grout: Allow the grout to air dry completely. You can also use a hair dryer on a low setting to speed up the process, but avoid using too much heat.
With these essential techniques, you can restore your grout to its former glory. Remember to follow the instructions carefully and take necessary precautions when using cleaning solutions.
Protecting Grout with Sealers: A Shield Against Stains and Moisture
Just as we protect our skin with sunscreen to prevent damage from harsh UV rays, grout sealers serve as a protective barrier for your tile surfaces. These specialized coatings not only enhance the appearance of your grout, but they also play a crucial role in preventing stains and moisture damage.
Grout is a porous material that can easily absorb spills, dirt, and grime. Over time, this can lead to discoloration, staining, and even mold growth. Sealers create an impermeable layer on the surface of the grout, repelling liquids and preventing them from penetrating into its pores. This helps to maintain the pristine appearance of your grout and extend its lifespan.
Benefits of Grout Sealers:
- Stain Resistance: Sealers act as a shield against spills and stains, preventing them from bonding with the grout. This makes cleanup a breeze and keeps your grout looking fresh and new.
- Moisture Protection: Moisture is the enemy of grout, as it can weaken its structure and lead to deterioration. Sealers form a water-resistant barrier, preventing moisture from seeping into the grout and causing damage.
- Enhanced Appearance: Sealers not only protect your grout, but they also enhance its appearance. They can restore the original color of the grout and give it a glossy sheen, making your tile surfaces shine.
Types of Grout Sealers:
There are different types of grout sealers available, each with its own set of properties:
- Penetrating Sealers: These sealers soak into the pores of the grout, creating an invisible barrier. They are ideal for highly porous grout and provide long-lasting protection.
- Topical Sealers: These sealers form a film on the surface of the grout, providing a high level of gloss. They are easier to apply but may require more frequent reapplication.
- Water-Based Sealers: These sealers are environmentally friendly and easy to apply. They are a good choice for homeowners who prefer a non-toxic option.
- Solvent-Based Sealers: These sealers are more durable and provide a longer-lasting barrier. However, they have a stronger odor and require more ventilation during application.
Proper Application:
Applying grout sealers is a crucial step in protecting your tile surfaces. Ensure you follow the manufacturer’s instructions carefully to achieve the best results:
- Clean the Grout: Before applying a sealer, clean the grout thoroughly using a grout cleaner. This removes dirt, grime, and any existing sealers.
- Allow the Grout to Dry: Give the grout ample time to dry before applying the sealer. This ensures the sealer will adhere properly.
- Apply the Sealer: Use a brush or sponge to apply the sealer evenly to the grout. Avoid getting the sealer on the tiles.
- Allow the Sealer to Cure: The sealer will need time to cure and form a protective barrier. Refer to the manufacturer’s instructions for the recommended curing time.
Grout sealers are an essential investment for maintaining the beauty and longevity of your tile surfaces. By creating a protective barrier, they prevent stains, moisture damage, and enhance the appearance of your grout. With proper application and maintenance, you can enjoy a pristine and durable tile surface for years to come.
Restoring Your Grout’s Glory with Oxalic Acid
When the once-pristine grout between your tiles starts to show its age, don’t despair! Oxalic acid, a powerful natural whitener, can help revive your grout’s original beauty. But before you dive into the process, let’s understand this magical solution.
Oxalic Acid: The Grout’s Savior
Oxalic acid is a naturally occurring compound found in plants like spinach and rhubarb. Known for its bleaching properties, oxalic acid effectively removes stains and discoloration from various surfaces, including grout. It’s safe and easy to use, making it a popular choice for grout restoration.
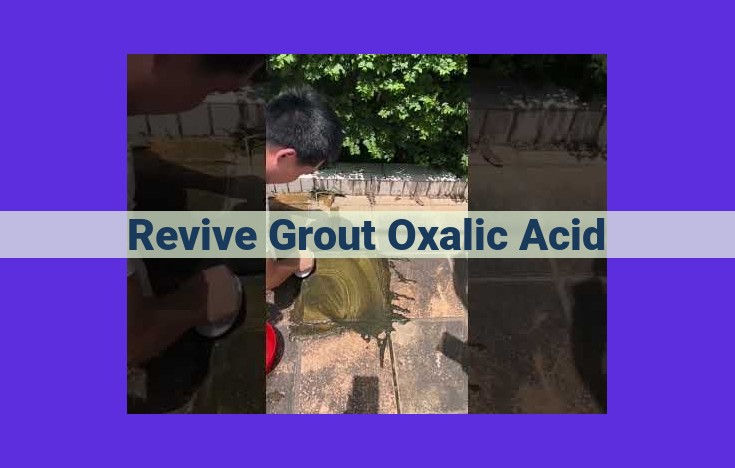
Grout Revived: The Step-by-Step Guide
Step 1: Clean the Grout
Before using oxalic acid, remove any surface dirt and grime. Use a grout cleaner designed for your tile type and follow the manufacturer’s instructions. This will help the oxalic acid penetrate the grout more effectively.
Step 2: Dilute the Oxalic Acid
Dilute oxalic acid according to the manufacturer’s recommendations. Never use it undiluted, as it can damage your grout and tiles.
Step 3: Apply the Oxalic Acid Solution
Apply the diluted oxalic acid solution directly to the grout using a brush or sponge. Avoid getting it on the tiles, as it can etch them. Scrub the grout gently to work the solution into the pores.
Step 4: Rinse Thoroughly
After allowing the solution to work for the recommended time (typically 10-15 minutes), rinse the grout thoroughly with clean water to remove any residual oxalic acid.
Step 5: Dry the Grout
Dry the grout completely using a clean towel or fan. This will prevent mold and mildew growth.
Seal It! Protect Your Revived Grout
To prevent future stains and keep your grout looking its best, seal it with a high-quality grout sealer. This will create a protective barrier against moisture and dirt, making your grout less likely to stain again.
Enjoy Your Restored Grout
Congratulations! You’ve successfully restored your grout to its former glory using oxalic acid. Remember to maintain your grout regularly to keep it looking fresh and clean for years to come.
Advantages of Oxalic Acid for Grout Revive
When your pristine grout starts to look dull and discolored, don’t despair. Oxalic acid comes to the rescue, offering a safe and effective way to revive your grout to its former glory.
Unparalleled Effectiveness
Oxalic acid is a naturally occurring acid that works wonders on grout stains. Its unique properties allow it to penetrate deep into the grout, dissolving and removing even the toughest stains. Unlike harsh chemicals, oxalic acid doesn’t damage grout, making it an ideal choice for delicate surfaces.
Effortless Application
Using oxalic acid to revive grout is a breeze. Simply dilute the acid according to the manufacturer’s instructions and apply it to the stained grout. Let it sit for the recommended time, then scrub gently with a brush to remove any loosened dirt or debris. Rinse thoroughly, and your grout will be sparkling clean.
Safety and Convenience
Oxalic acid is a relatively safe compound when handled with proper precautions. Wear gloves and eye protection to prevent skin irritation. Avoid contact with marble and other acid-sensitive surfaces. By following these simple guidelines, you can safely and easily restore your grout to its original beauty.
Handling Oxalic Acid: Safety First
Reviving your grout with oxalic acid is a safe and effective process when done correctly. However, because it’s a powerful acid, it’s crucial to follow specific safety guidelines to ensure your well-being and prevent any potential harm.
Gloves and Eye Protection: Essential Barriers
Before getting started, don gloves to protect your hands from direct contact with oxalic acid. This acid can cause skin irritation, so it’s best to keep it off your skin. Similarly, wear eye protection, such as safety goggles, to shield your eyes from any splashes or fumes that may occur while using the solution.
Avoiding Sensitive Surfaces: Marble’s Delicate Nature
While oxalic acid is excellent for restoring grout, it’s important to note that it can be harmful to certain types of tile, particularly marble. Do not use oxalic acid on marble tiles, as it can damage their delicate surface. For marble surfaces, consider using alternative cleaning methods specifically designed for natural stone.


