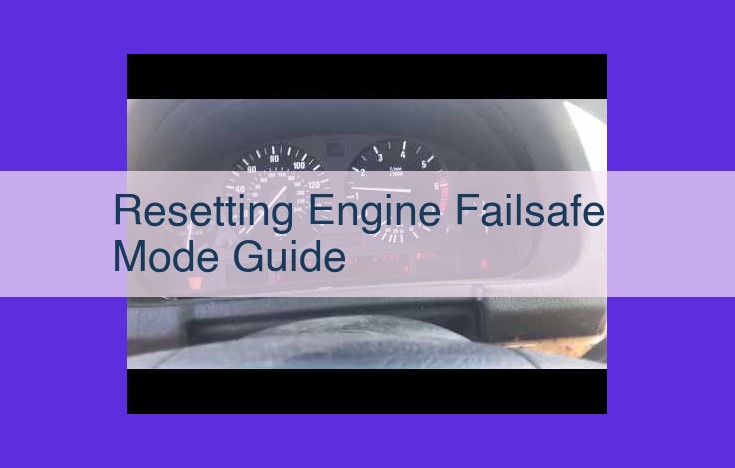
Resetting an engine’s failsafe mode involves disconnecting the vehicle battery or using a code reader to clear stored codes and restore normal engine operation. The process helps identify underlying issues through vehicle malfunction indicator lights (MILs) and diagnostic trouble codes (DTCs), which can be read using OBD-II scanners or scan tools. Consulting a repair manual and addressing the root cause of the failsafe mode is crucial for a comprehensive solution.
Understanding Engine Failsafe Mode: A Guide to Troubleshooting and Resolution
When your vehicle’s engine goes into failsafe mode, it’s an indication that something’s amiss under the hood. Failsafe mode is a built-in safety mechanism designed to protect the engine from further damage in the event of a malfunction. Understanding what triggers failsafe mode and how to reset it is crucial for any car owner.
Common Causes of Engine Failsafe Mode
Failsafe mode can be activated by a variety of issues, including:
- Faulty sensors: These monitor engine parameters like temperature, pressure, and oxygen levels. A malfunction can send erroneous signals to the engine’s control module, triggering failsafe mode.
- Actuators: These components control the throttle, valves, and other engine functions. If an actuator fails, the engine may enter failsafe mode as a protective measure.
- Software Glitches: Modern vehicles rely heavily on electronic control units (ECUs) that can occasionally experience software glitches. These glitches can disrupt engine operation and activate failsafe mode.
Resetting Engine Failsafe Mode: A Step-by-Step Guide
Engine failsafe mode is a safety feature designed to protect your vehicle from damage in the event of a sensor or component malfunction. When the engine control module (ECM) detects a fault, it activates failsafe mode, limiting engine power and preventing further damage. Resetting failsafe mode is crucial to restore normal engine operation.
Two Methods for Resetting Failsafe Mode
There are two primary methods for resetting engine failsafe mode:
- Disconnecting the battery: This simple method clears the ECM’s memory, allowing it to restart without the failsafe mode active.
- Using a code reader: This more advanced method allows you to diagnose the underlying issue and reset failsafe mode more precisely.
Resetting by Disconnecting the Battery
- Safety first: Park your vehicle on level ground, engage the parking brake, and wear safety gloves.
- Locate the battery: Pop open the hood and identify the battery. It’s usually a large, rectangular box with two terminals: positive (red) and negative (black).
- Disconnect the negative terminal: Using a wrench or socket, loosen the nut that secures the negative terminal. Carefully lift the terminal off the battery post.
- Wait 15 minutes: This allows the ECM to fully power down and clear its memory.
- Reconnect the battery: Replace the negative terminal onto the battery post and tighten the nut.
Resetting Using a Code Reader
- Acquire a code reader: This is a device that plugs into the diagnostic connector on your vehicle and reads the error codes stored in the ECM.
- Connect the code reader: Locate the diagnostic connector, usually under the dashboard or near the steering column. Plug the code reader into the connector.
- Read the error codes: Turn on the code reader and follow the prompts to read the DTCs (diagnostic trouble codes) stored in the ECM.
- Clear the codes: Once you’ve identified the fault code, select the option to clear or reset the codes. This will turn off the failsafe mode.
Important Notes
- Consult your repair manual: Before attempting any repairs, refer to your vehicle’s repair manual for specific instructions and safety precautions.
- Repair the underlying issue: Failsafe mode is a symptom of an underlying problem. Identifying and repairing the cause of the fault is essential to prevent future issues.
- OBD-II scanners and code readers: OBD-II scanners are less advanced than code readers and may not be able to clear all error codes. If you encounter any difficulties, consider using a professional code reader.
Vehicle Malfunction Indicator Lamp (MIL)
- Definition and function of the MIL
- Relationship to engine failsafe mode and when it turns on
The Vehicle Malfunction Indicator Lamp (MIL): A Guardian Angel for Your Car
When your car begins to experience an issue, it’s time for the Malfunction Indicator Lamp (MIL), also known as the check engine light, to step up. This little light serves as a warning system, alerting you to potential problems within your vehicle’s engine. It’s your car’s way of saying, “Hey, something’s not quite right.”
The MIL has a direct connection to the engine failsafe mode. When the MIL illuminates, it typically signifies that the engine has entered failsafe mode. This mode limits the engine’s performance to protect your car from further damage. It’s like putting your car on a leash, preventing it from running wild and causing more harm.
Understanding the relationship between the MIL and engine failsafe mode is crucial. When you spot the MIL shining from your dashboard, it’s essential to take action promptly. Don’t ignore it, thinking it will miraculously disappear on its own. Ignoring the MIL can lead to more severe problems and costly repairs down the road.
Diagnostic Trouble Codes: Unlocking the Secrets of Engine Health
In the realm of automotive maintenance, diagnostic trouble codes (DTCs) are like cryptic messages from your vehicle, revealing potential issues that may be lurking beneath the hood. These codes provide valuable insights into the intricate workings of your engine, allowing you to identify and resolve problems before they escalate into more costly repairs.
DTCs are generated by the Electronic Control Module (ECM) or Powertrain Control Module (PCM), the brains of your car’s engine system. When a sensor or actuator malfunctions, or a software glitch occurs, the ECM/PCM interprets these irregularities and assigns a specific code to them. This code is then stored in the vehicle’s memory, awaiting retrieval.
To access and decipher these DTCs, you’ll need the assistance of an On-Board Diagnostics (OBD) scanner or scan tool. These devices plug into the vehicle’s diagnostic connector and establish communication with the ECM/PCM. Once connected, the tool can retrieve and translate the stored codes into human-readable messages. For instance, a DTC of “P0301” may indicate a misfire in cylinder 1.
Interpreting these DTCs requires a deep understanding of the vehicle’s systems and the relationships between different components. This is where repair manuals come in handy. They provide detailed explanations of DTCs and offer guidance on the steps needed to diagnose and fix the underlying issues.
By harnessing the power of DTCs, you gain the ability to proactively maintain your vehicle’s health. With the right tools and knowledge, you can unlock these cryptic messages and empower yourself to address potential problems before they leave you stranded on the side of the road.
OBD-II Scanners: Your Vehicle’s Diagnostic Powerhouse
When your vehicle’s engine enters failsafe mode, it can be a frustrating and confusing experience. Fortunately, there’s a powerful tool that can help you diagnose and resolve the issue: the OBD-II scanner.
OBD-II (On-Board Diagnostics II) scanners are electronic devices that connect to your vehicle’s diagnostic connector. They allow you to access a wealth of information about your car’s systems, including engine performance, emission levels, and fault codes.
OBD-II scanners typically have a small display screen and a series of buttons or knobs for navigation. They can perform a variety of functions, such as:
- Reading and clearing Diagnostic Trouble Codes (DTCs): DTCs are codes that identify specific problems or malfunctions detected by the vehicle’s sensors.
- Retrieving live data from the vehicle’s sensors: This data can include information such as engine speed, coolant temperature, and fuel consumption.
- Performing diagnostic tests: Some scanners can run specific tests to check the functionality of various vehicle components.
OBD-II scanners are an essential tool for anyone who wants to maintain and repair their own vehicle. They can help you identify and fix problems quickly and easily, saving you time and money on costly mechanic visits.
Scan Tools for Advanced Diagnostics
Introduction:
Navigating the complexities of engine maintenance requires advanced tools like scan tools that provide detailed insights into your vehicle’s systems. These sophisticated devices take diagnostic capabilities far beyond basic OBD-II scanners.
Enhanced Capabilities of Scan Tools:
While OBD-II scanners offer valuable information, scan tools provide a comprehensive array of advanced features. They enable technicians to access and analyze real-time data, pinpoint specific component failures, delve into complex system controls, and even reprogram vehicle settings.
Unveiling Hidden Issues:
Scan tools possess the ability to retrieve data from various sensors and modules throughout the vehicle. This allows them to detect and diagnose issues that may not be evident to the naked eye or with basic error code readers. From intricate transmission problems to elusive electrical gremlins, scan tools empower mechanics with the means to unravel diagnostic puzzles.
Probing the Depths of Systems:
Beyond error code analysis, scan tools can dissect the intricacies of vehicle systems. They enable technicians to monitor live data streams, such as engine RPM, sensor readings, and actuator performance. By identifying abnormal values or inconsistencies, scan tools help pinpoint the root cause of issues, guiding repairs with precision.
In-depth Control and Reprogramming:
The capabilities of scan tools extend to controlling certain vehicle systems. This allows mechanics to perform component testing, reset adaptations, and even reprogram vehicle settings. This advanced functionality empowers them to make precise adjustments and optimize performance, ensuring that your vehicle operates at its best.
Repair Manual
- Importance of consulting a repair manual for specific instructions on fixing the underlying issue causing engine failsafe mode
Repair Manual: The Key to Unlocking Engine Failsafe Mode Mysteries
When your engine enters failsafe mode, it can be a daunting and frustrating experience. However, armed with the right knowledge and tools, you can navigate this automotive challenge confidently. One essential tool in your diagnostic arsenal is a repair manual.
A repair manual is a comprehensive guide that provides detailed instructions for servicing and repairing your specific vehicle. It contains step-by-step procedures, diagrams, and troubleshooting tips to help you diagnose and fix issues, including those that trigger engine failsafe mode.
How a Repair Manual Empowers You
Consulting a repair manual offers several key benefits:
- Accurate diagnosis: Repair manuals contain manufacturer-specific information that enables you to narrow down the potential causes of engine failsafe mode.
- In-depth troubleshooting: Manuals provide systematic diagnostic procedures to help you identify the exact source of the problem.
- Proper repairs: With clear instructions and specifications, you can perform repairs correctly, ensuring your vehicle’s safety and performance.
Using a Repair Manual to Address Engine Failsafe Mode
To effectively use a repair manual for engine failsafe mode troubleshooting:
- Identify your vehicle model: Refer to your vehicle’s make, model, and year to obtain the correct manual.
- Read the relevant sections: Focus on chapters covering engine management systems, sensors, and actuators.
- Follow the diagnostic procedures: Step through the detailed instructions provided in the manual to identify the underlying issue.
- Consult diagrams and specifications: Utilize the illustrations and technical data to understand components and correct settings.
By leveraging a repair manual, you gain the knowledge and guidance necessary to tackle engine failsafe mode with confidence. Whether you’re a seasoned mechanic or an automotive enthusiast, a repair manual is an indispensable tool that empowers you to diagnose and resolve this common automotive issue efficiently and effectively.
Finding and Fixing the Root Cause of Engine Failsafe Mode
When your engine enters failsafe mode, it’s like your car is raising a red flag to alert you of an underlying issue. While resetting the mode may provide temporary relief, the key lies in identifying and addressing the root cause.
Step 1: Dig into the Repair Manual
Your vehicle’s repair manual is an invaluable resource that provides specific instructions on diagnosing and repairing your car’s engine. Gather the manual and carefully review the section on engine failsafe mode. This will help you understand the potential causes related to your particular vehicle model.
Step 2: Diagnose the Problem
Armed with the repair manual, you can start the detective work to diagnose the issue. Use a code reader to retrieve any Diagnostic Trouble Codes (DTCs) stored by the vehicle’s computer. Decode the codes using a scan tool or refer to the DTC list in your repair manual.
Step 3: Address the Cause
Once you’ve identified the underlying problem, it’s time to gather the necessary tools and parts. Refer to the repair manual for detailed instructions on how to replace faulty sensors, repair worn-out components, or resolve software glitches.
Step 4: Test and Verify
After completing the repair, reconnect the battery or reset the ECM/PCM using a code reader. Restart the engine and monitor its performance. If the failsafe mode has not been triggered, you have successfully fixed the underlying issue.
Remember, failsafe mode is not a permanent solution. Use it as a warning to identify and address underlying problems that could compromise your engine’s health and safety. By following these steps, you can restore your vehicle to optimal performance and prevent future issues.
OBD-II Code Readers: Unveiling the Diagnostic Secrets
Imagine driving down the road when suddenly, your car’s engine enters failsafe mode, a protective measure that limits its power and performance. While it’s a sign of potential trouble, it’s also a window into your vehicle’s health. Enter OBD-II code readers, the budget-friendly diagnostic tools that help you decode the secret messages your car wants to convey.
OBD-II: The Rosetta Stone of Vehicle Diagnostics
Every modern vehicle is equipped with an On-Board Diagnostics (OBD-II) system, a network of sensors and modules that constantly monitor your engine and other critical components. When something goes amiss, the OBD-II system detects it, stores a diagnostic trouble code (DTC), and triggers the infamous malfunction indicator lamp (MIL), aka the check engine light.
OBD-II Code Readers: The Key to Unlocking the Codes
Unlike their more advanced counterparts, OBD-II code readers are designed to read and interpret these DTCs, providing you with valuable insights into the underlying issue. They connect to your vehicle’s diagnostic connector, a special port usually located under the dashboard, and retrieve data from the OBD-II system.
Decoding the Diagnostic Messages
Once connected, the code reader displays the DTCs, which are typically a combination of letters and numbers. By referring to a table of codes specific to your vehicle’s make and model, you can identify the potential issue, be it a faulty sensor, a malfunctioning component, or an emission problem. Some code readers also provide descriptions of the DTCs, making them even easier to understand.
Empowering the DIYer
OBD-II code readers put diagnostic power in your hands, allowing you to quickly identify and troubleshoot many common vehicle problems. With a little bit of research and the right repair manual, you can often resolve the issue yourself, saving time and money on mechanic visits. However, it’s important to remember that code readers alone cannot fix the problem; they are merely a tool to help you find the root cause.
Choose the Right Code Reader for You
When choosing an OBD-II code reader, consider features such as:
- Compatibility: Ensure it works with your vehicle’s make and model.
- LCD display: Readability is key.
- DTC descriptions: They provide valuable context.
- Additional features: Some models offer extras like live data graphing and graphing and Bluetooth connectivity for smartphone use.
With an OBD-II code reader in your toolbox, you’ll have a reliable way to decode your car’s diagnostic messages and take control of your vehicle’s health.
Electronic Control Module (ECM)
- Definition and function of the ECM, which controls various vehicle systems
What is an Electronic Control Module (ECM)?
Every modern vehicle is equipped with a brain that monitors, regulates, and controls a wide range of systems, from engine functions to transmission operations. This brain is known as the Electronic Control Module or ECM. The ECM acts as the central nervous system of your car, ensuring that everything operates smoothly and efficiently.
Definition and Function of the ECM
The ECM is typically mounted on or near the engine. It’s a small but powerful computer that receives data from various sensors throughout the vehicle. This data includes information about engine speed, coolant temperature, fuel consumption, and more. The ECM then processes this data and sends out commands to actuators and other components to control the vehicle’s performance.
Types of ECMs
There are different types of ECMs, each designed for specific vehicle models and makes. Some ECMs are responsible for controlling multiple systems, while others focus on a specific function, such as engine management or transmission control.
Importance of the ECM
The ECM is crucial for the safe and efficient operation of your vehicle. It ensures that the engine is running properly, emissions are minimized, and fuel efficiency is optimized. Without a functioning ECM, your car would be unable to start or run correctly.
TroubleshootingECM Issues
If you’re experiencing problems with your vehicle, a malfunctioning ECM could be the culprit. Symptoms of ECM issues can vary depending on the type of vehicle and the specific system affected. Common symptoms include:
- Engine problems, such as misfiring or stalling
- Transmission issues, such as delayed shifting or slipping gears
- Electronic problems, such as dashboard warning lights or inoperative components
Repairing and Replacing ECMs
Diagnosing and repairing ECM problems requires specialized knowledge and tools. If you suspect an issue with your ECM, it’s important to seek professional assistance from a qualified mechanic. In some cases, the ECM may need to be replaced. However, with proper maintenance and care, you can help extend the lifespan of your ECM and keep your vehicle running smoothly for years to come.
Powertrain Control Module (PCM): The Brain of Your Engine
In the realm of modern vehicles, the Powertrain Control Module (PCM) stands as the central brain, orchestrating the delicate balance of your engine and its intricate systems.
Nestled deep within your vehicle’s engine compartment, the PCM serves as the electronic maestro, continuously monitoring and adjusting ignition timing, fuel injection, and other critical engine functions to ensure optimal performance and fuel efficiency. Without the PCM, your engine would be akin to a ship lost at sea without a compass, unable to navigate the tumultuous waters of combustion and power generation.
So, should your vehicle fall victim to the dreaded engine failsafe mode, often accompanied by the ominous glow of the Malfunction Indicator Lamp (MIL), chances are the PCM has detected an anomaly within the engine’s operation. Armed with this knowledge, let’s delve into the depths of engine troubleshooting and explore how to identify and resolve the underlying issue.
Resetting the ECM/PCM: Restoring Engine Performance
When your engine experiences a malfunction, it may enter failsafe mode, limiting its performance and protecting vital components from further damage. To resolve this, you may need to reset the Engine Control Module (ECM) or Powertrain Control Module (PCM). Here’s a step-by-step guide to help you do just that:
Method 1: Disconnecting the Battery
This method is the simplest way to reset the ECM/PCM. Follow these steps:
- Safety First: Park the vehicle on a flat, stable surface and engage the parking brake.
- Locate the Battery: Open the hood and identify the vehicle battery.
- Disconnect the Negative Terminal: Using a wrench, loosen the bolt on the negative battery terminal and disconnect the cable.
- Wait 10-15 Minutes: Allow time for the electrical system to discharge.
- Reconnect the Battery: After the wait, reconnect the negative battery cable and tighten the bolt securely.
Method 2: Using a Code Reader
For a more advanced reset, you can use an OBD-II code reader. Here’s how:
- OBD-II Code Reader: Acquire an OBD-II code reader that supports ECM/PCM reset.
- Locate the Diagnostic Connector: Find the 16-pin diagnostic connector typically located under the dashboard.
- Connect the Code Reader: Plug the code reader into the diagnostic connector.
- Navigate to ECM/PCM Reset: Access the code reader menu and navigate to the option for ECM/PCM reset.
- Follow Prompts: Follow the on-screen prompts to complete the reset process.
Note: Some code readers may have specific instructions or require additional steps. Refer to the code reader’s user manual for detailed guidance.
By resetting the ECM/PCM, you can clear any stored diagnostic trouble codes (DTCs) and potentially restore normal engine operation. However, it’s important to address the underlying issue that caused the engine failsafe mode in the first place. Consult your vehicle’s repair manual or seek professional assistance for proper diagnosis and repair.
Disconnecting the Battery: A Simple Reset for Engine Failsafe Mode
Engine failsafe mode is an important safety feature that protects your vehicle from further damage in the event of a malfunction. However, sometimes this mode can be triggered even when there’s no real issue, leading to unnecessary frustration. One simple solution to reset this mode is by disconnecting the battery.
Safety Precautions
Before attempting to disconnect the battery, there are a few crucial safety precautions you should take:
- Park your vehicle on a flat, stable surface. Engage the parking brake to prevent it from rolling.
- Turn off the engine and allow it to cool completely. This will prevent you from getting burned by hot engine components.
- Wear gloves and safety glasses. The battery contains corrosive acid, so it’s important to protect yourself.
- Locate the negative terminal of the battery. It’s usually marked with a black (-) sign.
Disconnection Procedure
Once you’ve taken the necessary safety precautions, follow these steps to disconnect the battery:
- Loosen the nut on the negative terminal using a wrench. Do not remove the nut completely.
- Slide the insulated cover of the negative terminal to expose the post.
- Carefully lift the terminal off the post using a non-conductive tool. Be cautious not to touch the positive terminal or any other metal surfaces.
- Keep the negative terminal isolated. You can do this by placing it on a plastic or wooden block.
Resetting the ECM/PCM
With the battery disconnected, wait a few minutes to allow the ECM/PCM to reset. Then, reconnect the battery by reversing the steps outlined above. Tighten the nut on the negative terminal securely, but do not overtighten.
Recovering from Failsafe Mode
After reconnecting the battery, start your vehicle and note if the failsafe mode light has been reset. If the light remains on, it indicates an underlying issue that requires further diagnosis and repair.
By following these steps, you can safely reset your engine failsafe mode using a simple and effective method. Remember to take the necessary precautions to ensure your safety and the proper functioning of your vehicle.
Using a Code Reader to Reset the ECM/PCM
When it comes to resetting the ECM/PCM, using a code reader is an advanced method that offers more precision and control. However, before embarking on this task, it’s crucial to ensure you have the appropriate code reader for your vehicle.
Once you have the necessary tool, follow these steps to reset the ECM/PCM using a code reader:
-
Locate the Diagnostic Connector: Check your vehicle’s manual to identify the location of the diagnostic connector, typically found under the dashboard or near the steering column.
-
Connect the Code Reader: Plug the code reader into the diagnostic connector. The code reader will establish a connection with the ECM/PCM.
-
Retrieve Trouble Codes: Using the code reader’s interface, navigate the menu to find the option to retrieve trouble codes. The code reader will display a list of any stored DTCs, which can indicate the underlying issue causing ECM/PCM problems.
-
Clear Trouble Codes: Once the trouble codes are displayed, select the option to clear them from the ECM/PCM’s memory. This step will effectively reset the system and remove any stored error codes.
-
Restart the Engine: After clearing the trouble codes, restart the engine and allow it to run for a few minutes. The ECM/PCM will relearn and adapt to the current conditions, potentially resolving the issues that triggered the failsafe mode.
It’s important to note that while using a code reader can be effective in resetting the ECM/PCM, it’s only a temporary solution if the underlying cause of the problem is not addressed. If you encounter issues after resetting the ECM/PCM, it’s recommended to consult a qualified mechanic for further diagnosis and repairs.
Diagnostic Connector
- Location and function of the diagnostic connector, where diagnostic tools connect
Diagnostic Connector: The Gateway to Your Vehicle’s Health
Nestled beneath your dashboard, the diagnostic connector serves as a vital gateway to your vehicle’s inner workings. This unassuming port connects to a myriad of diagnostic tools, enabling mechanics and enthusiasts alike to delve into the depths of their automobile’s systems.
The diagnostic connector, often referred to as the OBD-II port (On-Board Diagnostics), provides a standardized interface for accessing a wealth of information about your vehicle. Through this portal, data streams containing vehicle parameters, trouble codes, and other diagnostic information can be retrieved.
By connecting a diagnostic tool to the diagnostic connector, you can gain real-time insights into your engine’s performance, emissions levels, and overall health. Technicians use this invaluable tool to quickly identify and diagnose any issues that may be lurking beneath the hood.
For the tech-savvy DIYer, the diagnostic connector opens up a world of possibilities. With the right tools, you can monitor your vehicle’s performance, read and clear trouble codes, and even adjust certain settings. By empowering you with access to your vehicle’s data, the diagnostic connector empowers you to take a proactive role in maintaining its health and longevity.
Demystifying Engine Failsafe Mode: A Comprehensive Guide
When our vehicles encounter a critical issue, they enter a failsafe mode to protect vital components from further damage. Failsafe mode limits the engine’s performance, often reducing power output to allow for limited operation.
Causes of Engine Failsafe Mode
Failsafe mode can be triggered by various factors, including faulty sensors, malfunctioning actuators, and software glitches. When these components fail, the vehicle’s Electronic Control Module (ECM) detects the issue and activates failsafe mode.
Resetting Engine Failsafe Mode
To reset failsafe mode, you have two main options. You can either disconnect the battery or use a code reader. Disconnecting the battery erases any stored error codes from the ECM’s memory. Using a code reader allows you to identify and clear specific Diagnostic Trouble Codes (DTCs) that triggered the failsafe mode.
The Vehicle Malfunction Indicator Lamp (MIL)
The MIL, commonly known as the Check Engine Light, illuminates when the ECM detects a potential issue. It can also turn on during failsafe mode, indicating the need for attention.
Diagnostic Trouble Codes (DTCs)
DTCs are codes stored in the ECM’s memory that provide specific information about a detected issue. Using an OBD-II scanner or scan tool, you can retrieve DTCs and use them to diagnose the cause of the failsafe mode.
OBD-II Scanners and Scan Tools
OBD-II scanners are devices that connect to the vehicle’s diagnostic connector and read DTCs. Scan tools go a step further by offering additional features such as data stream monitoring, allowing you to view real-time vehicle information.
Repair Manual and Specific Fix
Consulting a repair manual is crucial for identifying the exact cause of the failsafe mode. It provides detailed instructions on how to diagnose and repair the underlying issue.
Data Stream
A data stream is a continuous flow of information transmitted from the vehicle’s ECM to a diagnostic tool. It provides valuable insights into the vehicle’s operating parameters, including sensor readings and actuator commands. DTCs can be retrieved from a data stream by analyzing the recorded information.