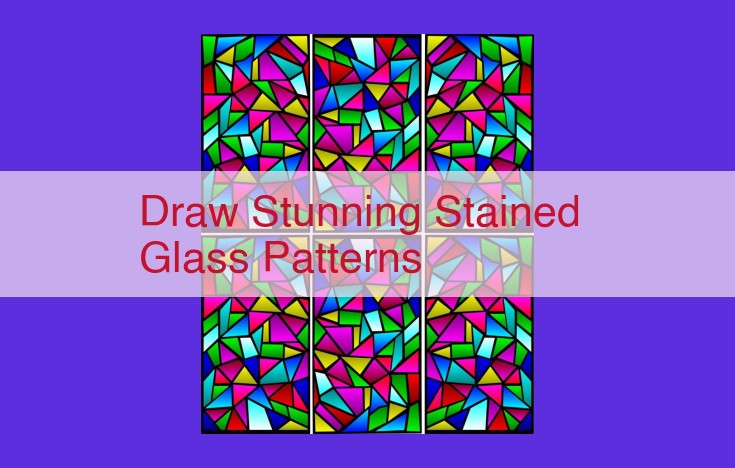
Delve into the art of creating captivating stained glass patterns with “Draw Stunning Stained Glass Patterns.” Explore the fundamentals of color theory, master glass selection and cutting techniques, and discover specialized tools for intricate work. Learn the secrets of foiling and leading to define structure, and apply design principles to craft visually stunning patterns. Sketch and draft your own designs, transfer them onto glass, and unravel the secrets of lighting effects to illuminate your creations with radiant beauty.
Color Theory: The Foundation of Harmony in Stained Glass
Step into the mesmerizing world of stained glass, where vibrant hues dance and harmonize to create ethereal beauty. Understanding color theory is the cornerstone of this enchanting art form, guiding you toward patterns that exude balance and enchantment.
The color wheel, a visual symphony of colors, serves as a roadmap for harmony in stained glass. Primary colors (red, yellow, blue) reside at its foundation, radiating their inherent brilliance. Secondary colors (green, orange, violet) emerge when two primaries mingle, forming a harmonious blend.
Colors can also be classified as warm or cool. Warm colors (red, orange, yellow) evoke feelings of energy, vitality, and warmth. Cool colors (blue, green, violet) instill a sense of serenity, coolness, and tranquility. The careful balance of warm and cool colors creates depth, dimension, and visual intrigue.
By understanding color relationships, you can orchestrate a stained glass symphony that captivates the senses. Complementary colors, positioned opposite each other on the color wheel, generate a striking contrast and vibrancy. Analogous colors, neighboring hues on the wheel, evoke a sense of harmony and unity.
Harnessing these principles, you can create stained glass patterns that resonate with emotion, atmosphere, and aesthetic delight. Let color theory be your guide as you embark on a journey of stained glass enchantment.
Glass Selection: The Canvas for Your Stained Glass Masterpiece
When embarking on the art of stained glass, choosing the right type of glass is paramount. It establishes the foundation for a harmonious and captivating masterpiece. Let’s delve into the remarkable world of stained glass and explore the diverse range of canvases that await your creative touch.
Types of Stained Glass
Opalescent Glass
- A translucent glass that glows with ethereal beauty
- Its milky, cloudy appearance creates soft, diffused light
- Ideal for creating vibrant patterns and rich textures
Clear Glass
- Transparent and allows light to pass through unimpeded
- Provides a crisp, sharp canvas for intricate designs
- Often used as a base for painting or etching
Cathedral Glass
- Thick, textured glass with a distinctive rippled surface
- Its irregularities create mesmerizing reflections and add depth
- Suitable for creating antique-style windows or enhancing dimension
Cutting Techniques for Precision and Accuracy
Mastering glass cutting is the key to shaping your masterpiece with precision. Here are a few essential techniques:
- Scoring – Gently scratch the surface of the glass along the desired cutting line using a diamond-tipped cutter.
- Breaking – Carefully snap the glass along the scored line by applying gentle pressure with pliers or a grozing wheel.
- Grinding – Smooth the edges of the cut glass using a grinder with various abrasives to create a clean and safe surface.
- Beveling – Angle the edges of the glass to create a polished, faceted effect that reflects light and enhances detail.
By understanding the properties of different glass types and mastering cutting techniques, you can transform ordinary sheets of glass into the vibrant canvas for your stained glass masterpiece.
Stained Glass Tools: The Essential Equipment for Craftsmanship
Embarking on the enchanting journey of stained glass artistry requires a diverse toolkit that empowers your creativity. From humble beginnings to meticulous details, each indispensable tool plays a pivotal role in transforming vibrant glass into breathtaking masterpieces.
Mastering the Basics: Stained Glass Cutters, Grinders, Soldering Irons, and Glaziers
The stained glass cutter is your primary weapon, scoring the glass with precision to guide its eventual break. Grinders smooth and refine the cut edges, ensuring a snug fit for foiling and leading.
Soldering irons fuse the delicate pieces together, creating a strong and elegant bond. Glaziers add additional stability by pressing lead came into place, providing structural support and defining graceful lines.
Specialized Tools: Enhancing Your Craft
As your skills advance, specialized tools elevate your artistry. Running pliers effortlessly bend lead came into intricate curves, while nippers cut it with surgical precision. Edging tools create beveled edges that refract light, adding depth and dimension to your designs.
For intricate details, diamond burrs and mini grinders carve and shape glass with finesse. Glass tacks and backing paper provide a secure foundation for your work, preventing breakage during cutting and soldering.
Choosing the Right Tools for Your Needs
Selecting the appropriate tools for your stained glass endeavors depends on several factors. Consider the size and complexity of your designs, the types of glass you’re using, and your skill level.
Invest in high-quality tools that will withstand the rigors of your craft. Look for ergonomics and comfort, as repetitive tasks can be taxing on your hands and wrists.
The arsenal of stained glass tools is your gateway to transforming ordinary glass into extraordinary art. By mastering the basics and embracing specialized techniques, you unlock the potential to create captivating, radiant masterpieces that will illuminate your world with color and beauty.
Cutting Techniques: Precision and Versatility in Stained Glass Art
In the captivating world of stained glass artistry, every stroke of light and color originates from the precise cuts that shape the masterpiece. Embark on a journey through the realm of cutting techniques, where precision and versatility intertwine to unlock the true potential of this enchanting art form.
Scoring: The First Cut
Like a skilled surgeon, the stained glass artisan begins by scoring the glass. Using a specialized cutting tool, a delicate groove is etched into the surface, guiding the subsequent breakage. The depth and angle of the score determine the finesse of the break, setting the stage for smooth edges and intricate designs.
Breaking: A Precise Snap
With steady hands and a keen eye, the artisan gently presses down on the scored line, causing the glass to snap effortlessly along the predetermined path. This technique requires precision and control to ensure clean breaks and minimize waste. Through practice and expertise, stained glass artists develop an intuitive understanding of the glass’s behavior, allowing them to break it with remarkable accuracy.
Grinding: Smoothing the Edges
Once the glass is broken, the edges reveal a slightly jagged surface. To achieve a smooth and polished finish, the artisan employs a grinder. This motorized tool gently abrades the edges, removing any imperfections and creating a uniform surface. Grinding not only enhances the aesthetic appeal but also prepares the glass for further embellishments, such as foiling or leading.
Beveling: Creating Depth and Dimension
For a touch of elegance and sophistication, stained glass artists utilize the beveling technique. Using a specialized grinder equipped with a beveled wheel, they meticulously shape the edges of the glass, creating angled facets that reflect light and add depth to the design. Beveled glass adds a luxurious touch to stained glass windows and panels, captivating the viewer with its shimmering brilliance.
Exploring Different Techniques for Unique Effects
The mastery of cutting techniques extends beyond the basic steps. Stained glass artists experiment with various methods to achieve specific effects and enhance the visual impact of their creations. Some employ controlled breakage, intentionally breaking the glass in irregular patterns to create a mosaic-like effect. Others use faceting, cutting the glass into multiple angled planes to increase light refraction and produce dazzling patterns.
Through the combined power of precision and versatility, cutting techniques form the cornerstone of stained glass artistry. From scoring to breaking, grinding to beveling, each technique plays a crucial role in shaping the glass and bringing the artist’s vision to life. By mastering these skills, stained glass artists create masterpieces that transcend time, illuminating spaces with their vibrant colors and captivating designs.
Foiling and Leading: Defining Lines and Structure in Stained Glass
In the world of stained glass artistry, foiling and leading play a crucial role in defining the lines and structure of your masterpieces. These techniques serve as the backbone that holds your colorful glass pieces together, transforming them into cohesive and enduring works of art.
Understanding Foils and Leads
- Foil: A thin, self-adhesive copper or lead strip applied around the edges of glass pieces. It provides a solderable surface and prevents sharp edges.
- Lead: A malleable metal strip used to create the framework and outlines of stained glass designs. It holds the glass pieces securely and adds strength and durability.
Mastering the Techniques
- Foiling: Wrap the foil around the edges of the glass pieces, overlapping slightly. Use a tool or your fingers to smooth and secure the foil.
- Leading: Cut the lead strips to the desired lengths and shapes. Bend and mold them to fit around the glass pieces, forming the framework and outlines. Solder the lead joints to create strong connections.
Artistic Applications
Foiling and leading not only secure your stained glass designs but also offer endless artistic possibilities:
- Define intricate shapes: Use lead to create elaborate patterns and outlines, adding depth and dimension to your artwork.
- Highlight key elements: By foiling and leading specific areas of the glass, you can draw attention to focal points and create visual hierarchy.
- Create geometric patterns: Leading can be used to form precise geometric shapes, such as triangles, squares, and hexagons, adding a modern and architectural touch.
Tips for Success
- Choose the right materials: Select high-quality foil and lead that are compatible with the glass and your solder.
- Practice your skills: Experiment with different leading and foiling techniques before tackling complex projects.
- Secure your joints: Solder the lead joints thoroughly for a strong and durable bond.
- Protect your artwork: Apply a protective coating such as wax or varnish to preserve your stained glass masterpiece for years to come.
With patience, precision, and an eye for detail, you can master the art of foiling and leading, unlocking a world of creative possibilities in stained glass artistry.
Design Principles: Crafting Visually Enchanting Patterns
In the realm of stained glass artistry, design principles serve as the compass, guiding you towards captivating creations that resonate with harmony and visual appeal. These principles, akin to the threads that weave a vibrant tapestry, intertwine to orchestrate a symphony of colors, shapes, and textures.
Composition: Creating a Balanced and Harmonious Whole
Composition, the foundation of any successful stained glass design, orchestrates the arrangement of elements within the window. It dictates the placement and interplay of colors, shapes, and lines to create a cohesive and aesthetically pleasing composition. By carefully considering balance, you can ensure that the weight of each element is distributed evenly, preventing the design from feeling lopsided or unbalanced.
Balance: Establishing a Sense of Equilibrium
Balance is the art of creating visual harmony by distributing the elements of your design evenly. This can be achieved through symmetrical balance, where the design is mirrored on both sides of a central axis, or asymmetrical balance, where the weight of the elements is distributed unevenly but still feels harmonious.
Rhythm: Creating a Sense of Movement and Flow
Rhythm, like a heartbeat, brings a sense of movement and flow to your stained glass designs. It’s created by repeating elements or patterns at regular or varying intervals. This repetition creates a visual cadence, guiding the viewer’s eye through the artwork and adding a dynamic element to the composition.
Emphasis: Highlighting the Focal Point
Emphasis is the technique of drawing attention to a specific element or area of your design. This can be achieved through the use of contrast, where you juxtapose different colors, values, or textures to create a visual hierarchy. By employing emphasis, you can guide the viewer’s eye towards the most important elements of your composition.
Contrast: Creating Visual Interest and Depth
Contrast is the spice that adds visual interest and depth to your stained glass designs. By playing with differences in color, value, texture, or size, you can create a sense of visual hierarchy and depth. For example, placing a vibrant blue element against a neutral background will make the blue element stand out and create a sense of visual interest.
Utilizing these design principles as your guiding stars, you can craft stained glass patterns that exude harmony, balance, and captivating visual appeal. By understanding these principles and skillfully wielding them, you will elevate your stained glass creations to the realm of true artistry.
Pattern Creation: From Sketch to Glass
The world of stained glass is a tapestry of colors, shapes, and light, woven together with artistry and precision. At the heart of this intricate craft lies the creation of patterns that bring life to stunning masterpieces. In this chapter of our stained glass journey, we delve into the art of sketching and drafting designs, transforming abstract ideas into tangible works of art.
Sketching is the birthplace of stained glass patterns. It allows you to explore your imagination and experiment with different compositions. Whether you’re an experienced artist or a novice just starting out, the key to successful sketching is observation and practice. Study stained glass windows, note the interplay of colors and shapes, and let your creativity soar.
Once your sketch is complete, it’s time to draft a full-scale pattern. This is where precision becomes paramount. Accurate measuring and sharp lines are essential for cutting the glass precisely. Utilize drafting tools such as rulers, protractors, and French curves to ensure that your pattern is flawless.
The next step is to transfer the pattern onto the glass. Glass transfer paper is a transparent material that allows you to trace your pattern directly onto the glass. By using a stylus or a pencil, you can meticulously reproduce every line and curve with immaculate accuracy.
Pattern creation is not merely a technical exercise; it’s an act of artistic expression. As you refine your skills, you’ll discover the nuances of design that make each stained glass window a unique masterpiece. Remember, the beauty of stained glass lies in the harmony of colors, the precision of cutting, and the artistry of pattern creation. So embrace the journey, let your imagination guide you, and create stunning stained glass patterns that will illuminate your world with color and grace.
Lighting Effects: Illuminating Your Stained Glass Masterpiece
Unveiling the Magic of Light Interaction
The essence of stained glass artistry lies not only in the vibrant hues and intricate patterns but also in the interplay of light and glass. Natural and artificial light sources dance upon the translucent surface, casting an ethereal glow that transforms the window into a captivating work of art.
Natural Light – A Divine Canvas
Sunlight, the primary celestial illuminator, holds an unparalleled power to awaken the colors within stained glass. As the sun’s rays penetrate the window, the different wavelengths interact with the pigments, creating a symphony of hues that shifts and dances throughout the day. The changing angles of the sun cast distinct shadows and highlights, accentuating the delicate details and textures of the glass.
Artificial Light – A Stage for Brilliance
When darkness descends, artificial light takes center stage, offering a different but equally enchanting experience. Incandescent bulbs, with their warm and inviting glow, lend a cozy ambiance to the space, while LED lights, with their cool and precise illumination, showcase the intricate details with exceptional clarity.
Design Considerations
To harness the full potential of lighting effects, meticulous planning is essential. Consider the orientation of the window within the building to maximize natural light exposure. Choose glass colors that will complement both sunlight and artificial light sources. Utilize leading and foiling techniques to create shadow lines and borders that enhance the overall visual impact.
Transforming Spaces with Light
The interplay of stained glass and light has the power to transform ordinary spaces into extraordinary sanctuaries. A dimly lit room adorned with a stained glass window becomes a contemplative haven, where the soft glow casts a calming aura. A grand cathedral bathed in sunlight illuminates with vibrant colors, creating an awe-inspiring spectacle that transcends mere aesthetics.
Lighting effects are an integral aspect of stained glass artistry, bringing life and vibrancy to the intricate patterns and colors. By understanding the interaction between light and glass, you can create stained glass creations that captivate the imagination and illuminate spaces with a mesmerizing beauty that transcends time.


