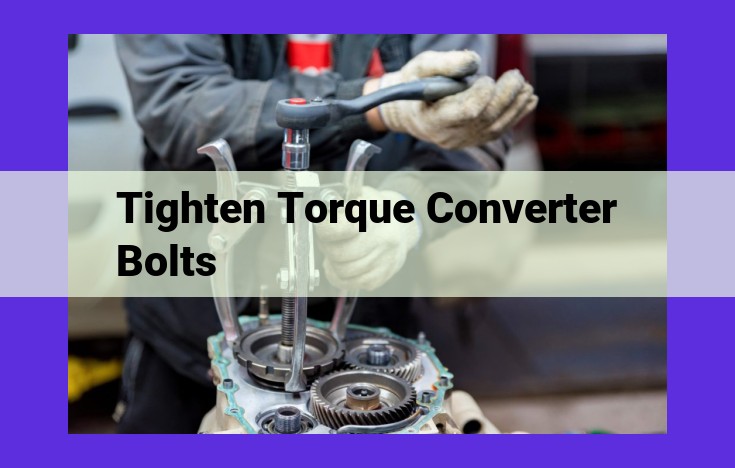
Tightening torque converter bolts is crucial for maintaining optimal engine and transmission performance. Using a calibrated torque wrench and following specified torque values ensures proper tightness. Safety precautions include disconnecting the battery and wearing protective gear. After accessing the bolts and removing obstructing components, tighten them using proper techniques. Retorque the bolts after a few days of operation to ensure tightness. Reassemble the components carefully, aligning and connecting them to the torque converter with precise bolt tightening. Proper disposal of materials and restoration of the vehicle to its original condition are essential for a successful repair.
Understanding the Importance of Torque Converter Bolts
Every car owner has experienced that satisfying moment when their vehicle seamlessly shifts gears, delivering a smooth and effortless driving experience. Behind this flawless performance lies a crucial component: torque converter bolts. These bolts play an indispensable role in ensuring optimal engine performance, transmission operation, and power transfer.
The torque converter is a vital component located between the engine and transmission. Its function is to transmit power from the engine’s crankshaft to the transmission’s input shaft while simultaneously multiplying torque. This process is essential for smooth gear changes and efficient power delivery.
Torque converter bolts are responsible for securely fastening the torque converter to the transmission, maintaining the proper alignment and preventing any slippage. Improperly tightened or loose bolts can result in serious problems, including transmission damage, compromised power transfer, and even safety hazards. Therefore, it is imperative to ensure that torque converter bolts are tightened to the manufacturer’s specified torque values.
By understanding the critical role of torque converter bolts, you can appreciate the importance of properly maintaining them. Regular inspections and timely replacement can help prevent costly repairs and extend the lifespan of your vehicle’s transmission system.
Essential Tools and Materials for Successful Torque Converter Bolt Replacement
Replacing torque converter bolts requires a precise and methodical approach, and having the right tools is crucial for ensuring a smooth and safe process. Here’s a comprehensive list of the essential tools and materials you’ll need:
- Wrenches and Sockets: You’ll need a variety of wrenches and sockets to remove and tighten the torque converter bolts. Make sure you have the correct sizes for your specific vehicle model.
- Bolt Sizes: It’s important to use the exact bolt sizes specified in your vehicle’s service manual. Using the wrong size bolts can compromise the integrity of the connection and lead to potential issues.
- Torque Wrench: A torque wrench is an essential tool for tightening the torque converter bolts to the exact specifications. Calibrating your torque wrench ensures accurate tightening, preventing overtightening or undertightening.
Remember, the quality of your tools matters. Investing in high-quality tools will not only make the job easier but also ensure the longevity of your vehicle. Before starting any repair, ensure your tools are in good condition and have been properly calibrated.
Ensuring Your Safety: Prioritizing Precaution While Replacing Torque Converter Bolts
Working on a vehicle’s engine and transmission system demands utmost safety and care. Before embarking on the task of replacing torque converter bolts, it’s imperative to establish a secure and cautious work environment.
-
Hot Engine Beware: Wait for the engine to cool down before beginning any work. Hot components can cause severe burns, so give the vehicle ample time to dissipate heat.
-
Protective Gear Essential: Always don protective gear such as gloves, safety glasses, and overalls. These will shield you from potential hazards like cuts, flying debris, and fluids.
-
Battery Disconnection Crucial: To eliminate the risk of electric shock, disconnect the battery’s negative terminal before proceeding with any repairs or replacements.
-
Secure Vehicle Positioning: Park the vehicle on a stable and level surface. Engage the parking brake and place the transmission in Park. This will prevent the vehicle from rolling or moving during the repair process.
Preparing Your Vehicle For Torque Converter Bolt Tightening
Before embarking on the task of tightening torque converter bolts, it’s crucial to ensure your vehicle is properly prepared. Here’s a step-by-step guide to set you up for success:
1. Park Your Vehicle Safely:
Choose a level and stable surface to park your vehicle. Engage the parking brake firmly to prevent any unexpected movement.
2. Engage Your Transmission:
Shift your transmission into Park (for automatic transmissions) or Neutral (for manual transmissions). This will disconnect the torque converter from the engine, allowing you to work on it safely.
3. Allow the Engine to Cool:
If you’ve recently driven your vehicle, the engine and surrounding components will be hot. Allow ample time for the engine to cool down to avoid burns or other injuries.
By following these preparatory steps, you’ll create a safe and stable environment for tightening the torque converter bolts. This will ensure the job is done correctly and minimize the risk of any complications.
Accessing the Torque Converter Bolts
Approaching the torque converter bolts presents its own set of challenges. Before you can even catch a glimpse of them, you need to clear a path through a labyrinth of obstructing undercarriage components. Caution is key as you navigate around hot exhaust pipes and sharp edges.
To gain access, you’ll need the right tools. A sturdy wrench and appropriate sockets are essential. Use a pry bar to gently push aside any components that are blocking your way. Patience and finesse are your allies here.
Once you’ve cleared a path, you may encounter bolts that are tucked away in awkward positions. Don’t panic! An extension bar or universal joint can be your savior. These handy tools allow you to reach even the most elusive bolts without breaking a sweat.
Remember, safety first! Wear protective gloves and eye gear to guard against potential hazards. And never work under a raised vehicle without proper support from jack stands.
Tightening Bolts with Precision: Ensuring Optimal Performance and Longevity
As you approach the crux of your torque converter bolt tightening endeavor, meticulous attention to detail and adherence to proper techniques are paramount. Begin by aligning the bolts precisely with their designated holes in the torque converter.
Next, tighten the bolts using a calibrated torque wrench. It’s not just about wrenching with all your might – precise torque is crucial. Refer to your vehicle’s service manual for the recommended torque specifications for your specific application. Over-tightening can damage bolts and cause vibration, while under-tightening can lead to loose components and premature failure.
When tightening the bolts, follow a star pattern. This helps distribute the force evenly and prevents warping or misalignment. Tighten the bolts in multiple stages, gradually increasing the torque until you reach the specified level. This allows the bolts to stretch and seat properly.
Double-Checking for Peace of Mind
Once all bolts are tightened, it’s time for a retorque. Allow a few days for the bolts to settle under normal driving conditions. Then, recheck the torque using the torque wrench. This ensures that the bolts have maintained their tightness and that there are no loose connections that could compromise performance or safety.
Ensuring Bolt Tightness: A Vital Step for Vehicle Longevity
Maintaining the tightness of torque converter bolts is crucial for optimal engine performance and transmission operation. After the initial tightening process, retorquing the bolts a few days later is a necessary step to ensure their continued effectiveness.
Retorquing involves applying additional force to the bolts using a torque wrench. This process ensures that the bolts remain at the recommended torque specifications, which is essential for preventing loosening and potential damage to the torque converter.
To verify the tightness of the bolts, torque-checking tools can be used. These tools measure the amount of torque applied to the bolts and indicate whether they meet the required specifications. By using these tools, you can be certain that the bolts are adequately tightened and that your vehicle is operating safely.
Here’s how to retorque torque converter bolts and ensure their tightness:
- Once the initial tightening process is complete, allow the vehicle to sit for a few days.
- Use a torque wrench to apply the recommended torque specifications to each bolt.
- Double-check the bolts using a torque-checking tool to verify their tightness.
- If any bolts are found to be loose, retorque them to the proper specifications.
By following these steps, you can ensure the longevity and integrity of your torque converter bolts, guaranteeing optimal vehicle performance for many years to come.
Reassembling the Components
Aligning the Torque Converter:
With the torque converter bolts securely fastened, it’s time to carefully align the torque converter with the transmission. Gently guide the converter into place, ensuring that it is properly seated. Double-check that the converter pilot is fully engaged to prevent any misalignment issues.
Reconnecting Transmission and Undercarriage Components:
Now, reconnect the transmission to the torque converter and steadily tighten its mounting bolts. Remember to use the appropriate torque wrench to ensure the bolts are tightened to the manufacturer’s specifications. Once the transmission is securely attached, reinstall all the undercarriage components that were removed earlier. Use proper fastening techniques to ensure a firm and stable reassembly.
Final Bolt Tightening:
After reassembling the components, double-check all the bolts you tightened, including the torque converter bolts and the transmission mounting bolts. Use your torque wrench to make sure each bolt is properly tightened to prevent any leaks or performance issues in the future.
Restoring Vehicle Condition:
With all the bolts tightened and components reconnected, you can safely lower the vehicle. Reconnect the battery and check if any warning lights appear on the dashboard. If everything looks good, your vehicle is ready to go. Take it for a short drive to ensure smooth operation and listen for any unusual noises.
Tidying Up and Cleanup: Restoring Your Vehicle
Proper Disposal of Used Materials
Once you’ve successfully replaced your torque converter bolts, it’s essential to dispose of the used materials properly. This includes any bolts, nuts, washers, and other small components. Never discard these items in your regular trash. They may contain hazardous substances that can harm the environment. Instead, dispose of them at a local recycling center or hazardous waste disposal facility.
Restoring the Vehicle to Its Original Condition
With all the components back in place, it’s time to restore your vehicle to its original condition. Carefully inspect all removed components to ensure they’re in good condition before reinstalling them. Reconnect any electrical connectors or hoses that were disconnected during the process.
Once everything is back in place, tighten all bolts and nuts to the manufacturer’s specifications. Double-check the transmission fluid level and add fluid as necessary. Start the vehicle and listen for any unusual noises or vibrations. If everything sounds and feels normal, you’ve successfully replaced your torque converter bolts.
Tips for Tidying Up
- Use a contractor bag to collect all used materials and keep your work area tidy.
- Clean up any spills or drips with a rag or paper towels.
- Inspect the work area for any lost bolts or nuts before leaving.