Fixing your rear vision system involves calibrating lenses, cleaning camera lenses, inspecting electrical connections, updating software, resolving power supply issues, securing the camera mount, addressing display problems, repairing the wire harness, replacing blown fuses, and seeking technical support when necessary. By following these steps, you can ensure optimal image quality and functionality of your rear vision system.
A Comprehensive Guide to Fixing Your Rear Vision System: Lens Calibration
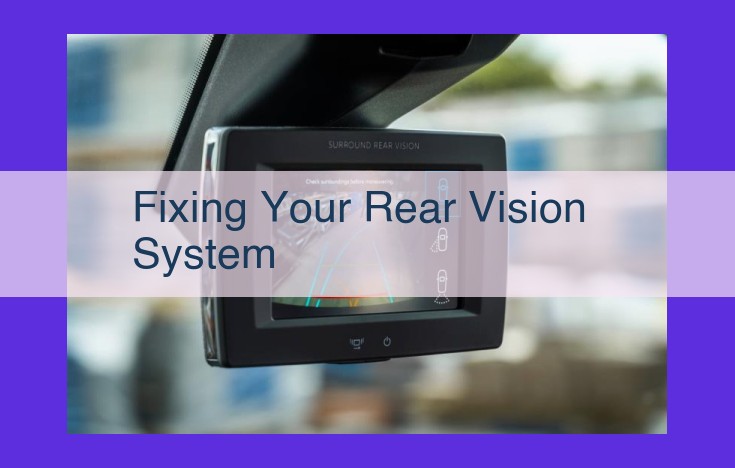
In the realm of driving, a rear vision system is your indispensable eye to the road behind you. But when it falters, it can leave you feeling lost and vulnerable. Don’t let a faulty rear vision system compromise your safety and driving experience. This comprehensive guide will equip you with the knowledge and steps to restore its crystal-clear vision.
Lens Adjustment for Optimal Clarity
The lenses of your rear vision system are the gatekeepers of crisp and undistorted images. If they’re out of focus, you’ll be driving with a blurred view, which is as dangerous as it sounds. To adjust the lenses for optimal clarity, carefully follow these steps:
- Identify the adjustment screws: Locate the small screws on the camera housing that control lens focus.
- Use a small screwdriver: Arm yourself with a precision screwdriver and gently rotate the screws clockwise or counterclockwise.
- Observe the image quality: While turning the screws, keep an eye on the display. Adjust until the image becomes sharp and in focus.
Precise Lens Alignment for Accurate Capture
Misaligned camera lenses can create an image that’s tilted or off-center. This not only affects your field of vision but also compromises the accuracy of the system’s safety features. To align the lenses, follow these steps:
- Find the alignment screws: Similar to the focus screws, there will be adjustment screws for lens alignment.
- Use a screwdriver or wrench: Carefully turn the alignment screws to adjust the angle of the camera lenses.
- Check the image: Observe the display to ensure the image is centered and level.
Lens Cleaning
- Maintain camera to preserve image quality and prevent distortion
- Remove smudges or scratches for clear images
Lens Cleaning: Maintaining Clarity in Your Rear Vision System
In the realm of automotive safety, a clear and reliable rear vision system is paramount. However, over time, lenses can accumulate smudges, scratches, and dirt, compromising image quality and hindering your ability to safely navigate the road. To ensure optimal performance, regular lens cleaning is crucial.
Preserving Image Quality
A clean lens is essential for capturing crisp and detailed images. Dust, dirt, and smudges can obscure the camera’s view, causing blurry or hazy images. By regularly cleaning the lens, you eliminate these obstructions, enhancing the system’s ability to deliver a clear and accurate representation of your surroundings.
Preventing Distortion
Scratches on the lens can distort images, making it difficult to accurately judge distances and objects. Even minor scratches can create subtle distortions that can impair your safety. Regular cleaning helps prevent the accumulation of scratches and ensures that your rear vision system remains free of image distortions.
How to Clean Your Rear Vision Lens
- Use a Microfiber Cloth: Gently wipe the lens with a clean, soft microfiber cloth. Avoid using abrasive materials like paper towels or tissues, as these can scratch the surface.
- Use Lens Cleaner: If there is stubborn dirt or smudges, use a lens cleaner specifically designed for camera lenses. Apply a small amount to the microfiber cloth and wipe gently in circular motions.
- Avoid Overcleaning: While it’s important to keep your lens clean, overcleaning can also damage the surface. Aim to clean the lens regularly, but not excessively.
- Protect Your Lens: Once cleaned, consider using a lens protector or cover to prevent future scratches or smudges.
By following these simple steps, you can effectively clean your rear vision lens, maintaining its clarity and ensuring the optimal performance of your rear vision system.
Electrical Connections: Restoring the Lifeline of Your Rear Vision System
The rear vision system is a crucial safety component in modern vehicles, providing drivers with a clear view of the surroundings behind their vehicle. However, like any electronic system, it can encounter occasional glitches or malfunctions. When electrical connections falter, the rear vision system can exhibit a range of issues, from intermittent display to complete loss of functionality.
Inspecting the Wiring Harness
The wiring harness is the backbone of the electrical connections in your rear vision system. Thoroughly inspect it for any signs of damage or loose connections. Pay special attention to areas where wires may have been pinched or frayed due to excessive bending or impact.
Ensuring Power Supply Stability
A stable power supply is essential for the proper operation of the rear vision system. Check the voltage output of the battery or other power source to ensure it meets the system’s requirements. Inspect the wiring connections to the power terminals for any signs of corrosion or loose contacts.
Verifying Signal Transmission
Proper signal transmission between the camera and the display is vital for clear and real-time images. Use a multimeter or a suitable diagnostic tool to verify the continuity of the signal wires and the integrity of the connections. Ensure that the ground wires are properly connected to provide a stable reference point for the electrical system.
By addressing electrical connection issues, you can restore the functionality of your rear vision system, ensuring safe and confident driving. If you encounter any difficulties or require further assistance, do not hesitate to seek the guidance of trained technicians for customized support and specialized knowledge.
Software Updates: A Crucial Component for Rear Vision System Maintenance
For any rear vision system, software updates play a pivotal role in ensuring its smooth operation and optimal performance. These updates serve a threefold purpose: enhancing system stability, addressing bugs, and boosting overall performance.
Firstly, software updates stabilize the system’s operation. They iron out any kinks or glitches that may have crept in over time, ensuring that your rear vision system remains reliable and dependable in all conditions.
Secondly, updates are often essential for fixing software malfunctions. These malfunctions can manifest as image quality issues, such as distortion or reduced clarity. By implementing the latest software, you can resolve these glitches, restoring your rear vision system to its pristine functionality.
Finally, software updates optimize the system’s operation. They introduce improvements that enhance the seamlessness of viewing and recording. For instance, updates may improve the rear camera’s field of view, making it easier to maneuver in tight spaces or reducing blind spots.
In conclusion, regularly updating your rear vision system’s software is crucial for maintaining its performance, resolving issues, and maximizing your driving safety. By keeping your system’s software up-to-date, you can ensure that it remains a valuable and reliable companion on the road.
Troubleshooting a Rear Vision System: Power Woes
When your rear vision system starts acting up, you’d be wise to check its power supply. A lack of electricity or unreliable power can quickly disrupt your system’s operation.
First, ensure stable power flow from the battery or other power source. Make sure connections are secure and the power supply is functioning properly. If you suspect the battery is at fault, try charging or replacing it.
Next, check for blown fuses. Fuses are safety devices designed to protect the system from electrical damage. If a fuse has blown, it will need to be replaced with one of the same amperage rating.
By following these power supply troubleshooting steps, you can restore your rear vision system to optimal performance. Remember, if you encounter any difficulties or uncertainties, do not hesitate to seek assistance from a qualified technician.
Secure Your Camera Mount for Clear and Stable Images
Your rear vision system’s camera mount plays a crucial role in ensuring stable and distortion-free images. A secure mount keeps the camera steady, preventing vibrations or movements that can compromise image quality.
Inspect the Mount and Fasteners
Regularly check the camera mount for any signs of looseness or damage. Tighten any loose bolts or screws using the appropriate tools. Ensure that the fasteners are securely in place to prevent the camera from shifting or moving.
Choose the Right Mounting Location
The mounting location of the camera should be carefully considered to minimize vibrations. Avoid mounting the camera on surfaces that are prone to shaking or movement, such as the trunk lid or bumper. Instead, consider mounting it on a more stable structure like the frame of the vehicle.
Use Dampeners to Absorb Vibrations
If the mounting surface is subject to vibrations, consider using dampeners to absorb the impact. These dampeners can be made from rubber or other shock-absorbing materials and placed between the camera mount and the mounting surface.
Test the Mount
After securing the camera mount, test the stability of the camera by gently shaking the vehicle or moving the camera by hand. Ensure that the camera remains steady and that there are no noticeable vibrations or movements.
By following these guidelines, you can ensure that your camera is securely mounted, providing clear and stable images for enhanced rear visibility.
Display Issues: Troubleshooting and Resolution for Optimal Image Quality
When your rear vision system displays image artifacts, color distortions, or blurry images, it can be frustrating and potentially dangerous. But don’t worry, troubleshooting these issues can be relatively straightforward by following a few simple steps:
Evaluate Display Brightness, Contrast, and Viewing Angles
First, check the brightness and contrast settings on your display. Insufficient brightness or incorrect contrast can make it difficult to see the image clearly, leading to misperceptions. Additionally, the viewing angle can also affect image quality. Ensure that you’re viewing the screen from an appropriate angle to avoid glare or distortion.
Troubleshoot Image Artifacts
Image artifacts are visual distortions that appear on the display. They can manifest as lines, dots, or patterns that interfere with the image quality. These artifacts can be caused by:
- Damage to the camera lens or display
- Loose connections in the wiring harness
- Software issues
- Electrical interference
Identify and Resolve Display Malfunctions
If the image is blurry or the colors are distorted, there may be a malfunction in the display itself. Examine the screen for any physical damage or loose connections. Additionally, software updates can sometimes resolve display-related glitches. Ensure that your system is running the latest software version.
Consider External Factors
Sometimes, display issues can be caused by factors outside of the rear vision system. For example, excessive sunlight or glare can interfere with image clarity. Electrical interference from other devices can also cause display problems.
Seek Professional Help if Needed
If you’ve tried the above troubleshooting steps but continue to experience display issues, it’s recommended to consult with a trained technician. They can diagnose the problem more accurately and provide specialized solutions.
Ensuring Reliable Signal Transmission: A Guide to Troubleshooting Wire Harness Issues
A critical component of your rear vision system is the wire harness, responsible for transmitting signals between the camera and the display. When this intricate network fails, it can lead to a compromised viewing experience. Here’s a comprehensive guide to troubleshooting wire harness issues:
Inspecting for Physical Damage
Begin by visually examining the wire harness for any noticeable damage. Look for cuts, corrosion, or loose connections. A damaged wire can disrupt signal transmission, resulting in image distortions or complete system failure. If you identify any physical defects, isolate the affected area and proceed with repairs.
Testing for Electrical Integrity
Once the wire harness has been visually inspected, it’s crucial to test its electrical integrity. Using a multimeter, measure the resistance and continuity of each wire. A high resistance value indicates a break in the wire, while a lack of continuity confirms a complete disconnect. Replace any faulty wires to restore proper signal transmission.
Checking for Loose Connections
Loose connections can also cause signal interference within the wire harness. Ensure all connectors are securely fastened and free from corrosion or debris. Poor connections can lead to intermittent signal transmission or complete system failure. Tightening or replacing loose connectors can often resolve the issue.
Protecting Against Environmental Factors
The wire harness is often exposed to harsh environmental conditions that can compromise its performance. Moisture and temperature fluctuations can lead to corrosion or insulation damage. Ensure that the wire harness is properly routed and protected from these elements to ensure its long-term reliability.
Seeking Professional Assistance
If you encounter any complex wire harness issues that you cannot resolve independently, do not hesitate to consult a qualified technician. They possess the necessary expertise and equipment to diagnose and repair wire harness problems efficiently. Professional assistance can save you time, effort, and potential safety hazards.
By following these troubleshooting steps, you can identify and resolve wire harness issues that may be affecting your rear vision system. Maintaining a well-functioning wire harness is essential for ensuring a clear and reliable viewing experience, enhancing your driving safety and peace of mind.
Electrical Essentials: Unveiling the Role of Fuses in Your Rear Vision System
When it comes to the intricate network of your rear vision system, there exists a silent guardian, an unsung hero – the fuse. These humble devices are the gatekeepers of electrical safety, ever-watchful, protecting the delicate components within your system from the perils of power surges and short circuits.
The primary role of a fuse is to act as a sacrificial safeguard, breaking the electrical circuit when it detects an excessive flow of current. By doing so, fuses prevent the buildup of hazardous heat that could damage or even destroy your expensive camera, display, and other critical components.
Fuses are designed to melt and break the circuit at a specific current threshold. This threshold is carefully calibrated to allow the safe operation of your system under normal conditions while swiftly intervening in the event of an electrical anomaly.
Identifying and Addressing Fuse-Related Issues
Electrical issues can manifest in various forms, from flickering displays to complete system failure. If you encounter any such disruptions, it’s crucial to inspect the fuses as they may hold the key to resolving the problem.
Begin by locating the fuse box, typically situated in an easily accessible area near the battery or under the dashboard. Once located, carefully examine each fuse for any visible signs of damage, such as burns or melted filaments.
If you discover a blown fuse, replace it with a fuse of the same amperage. Never use a fuse with a different amperage rating, as this could compromise the safety of your system.
Proactive Maintenance for Fuse Longevity
While fuses are designed to protect against electrical hazards, they can also fail prematurely due to factors such as corrosion or loose connections. To ensure the optimal performance of your rear vision system, it’s advisable to follow these proactive maintenance tips:
- Regularly clean the fuse box to remove any dirt or debris that may interfere with electrical connections.
- Tighten loose fuse connections to prevent arcing or overheating.
- Replace fuses that are showing signs of wear or aging to enhance system reliability.
By adhering to these simple steps, you can extend the lifespan of your fuses and maintain the seamless operation of your rear vision system for years to come.
Technical Support: A Lifeline for Rear Vision System Woes
When your rear vision system gives you trouble, it can be frustrating and potentially dangerous. But don’t despair! Technical support is here to save the day.
Consulting with trained technicians is like having a mechanic for your rear vision system. They possess the specialized knowledge and experience to diagnose and fix any issue you may encounter. Whether it’s a software glitch, electrical malfunction, or hardware defect, technicians can guide you through troubleshooting steps and provide customized solutions.
One of the key benefits of seeking technical support is that you can access specialized knowledge directly from the manufacturer. This means you get the most up-to-date information and guidance from the experts who designed and built your rear vision system. They can provide insights and solutions that may not be immediately apparent to you, ensuring a timely and efficient resolution to your issue.
Technical support is more than just a helpline. It’s a lifeline that connects you to a wealth of expertise and support. So, if your rear vision system is acting up, don’t hesitate to reach out to trained technicians. They’re ready and waiting to help you get back on the road with clear visibility and peace of mind.