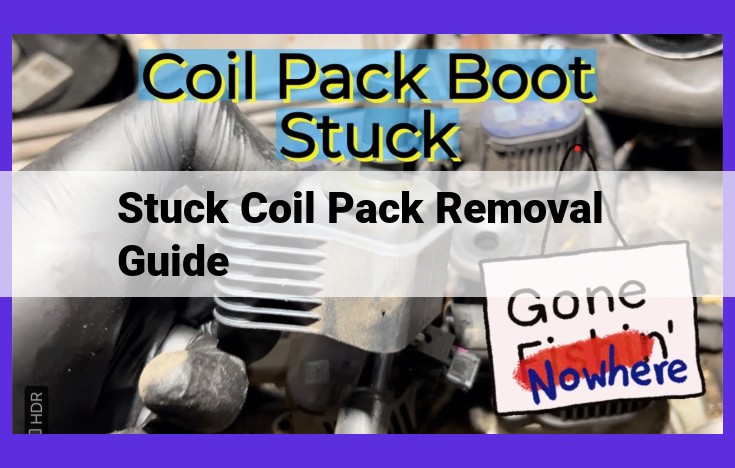
- Stuck Coil Packs: Understand why coil packs can get stuck and follow safety precautions.
- Tools and Materials: Gather necessary tools such as spark plug socket, wrench, and feeler gauge.
- Step-by-Step Removal: Disconnect spark plug wires, remove coil pack bolts, and carefully extract the coil pack.
- Inspection and Testing: Check the coil pack bolt for damage, set spark plug gap, and use an ohmmeter to test resistance.
- Troubleshooting: Diagnose and resolve common coil pack issues based on symptoms.
Unraveling the Mystery of Stuck Coil Packs
When your engine sputters and stutters, it can be a harrowing experience that leaves you stranded. One common culprit behind these frustrating episodes is a stuck coil pack. Like an unruly apprentice refusing to budge, a stuck coil pack can bring your vehicle’s performance to a screeching halt. But understanding the reasons behind this automotive conundrum is the key to unlocking a swift and effective solution.
Coil packs, the vital intermediaries between your spark plugs and the ignition system, send electrical impulses to the plugs, igniting the fuel-air mixture and propelling your engine forward. However, over time, wear and tear can take their toll, causing these coil packs to become trapped within their engine bay homes.
The accumulation of corrosion on the bolt heads can be the orchestrator of this mechanical standoff. Exposure to the elements and the relentless cycles of heating and cooling can cause corrosion to form, obscuring the bolt head and making removal a seemingly insurmountable task. This corrosion acts like a tenacious glue, binding the coil pack to its engine mount with a stubborn grip.
Safety Considerations: Prioritizing Your Well-being When Working on Your Engine
Tackling engine repairs can be a rewarding endeavor, but it’s crucial to prioritize your safety throughout the process. Engines house a myriad of potential hazards, making it essential to approach the task with the utmost caution.
Before embarking on any engine-related work, always refer to your vehicle’s owner’s manual and familiarize yourself with the specific safety guidelines outlined therein. Donning appropriate safety gear, such as gloves, safety glasses, and if necessary, a face shield, is paramount to protecting your hands, eyes, and face from fluids, sparks, and other potential risks.
Additionally, ensuring your work area is well-ventilated is essential. Engines emit harmful gases such as carbon monoxide, which can accumulate in enclosed spaces, posing a health risk. Thus, always work in an area with proper ventilation or consider using a fan to circulate the air.
Before disconnecting any electrical components or manipulating the engine’s various parts, it is imperative to disconnect the battery. This simple precaution prevents the occurrence of accidental electrical shocks or fires caused by short circuits.
Furthermore, allow ample time for your engine to cool down before attempting any work. Hot engine components pose a burn risk, so wait until the engine is cool enough to touch comfortably before proceeding.
Essential Tools and Materials for Removing a Stuck Coil Pack
When it comes to automotive repairs, having the right tools can make all the difference. For removing a stuck coil pack, you’ll need a specialized kit that includes the following:
1. Spark plug socket: This socket is designed to fit the unique shape of spark plugs, allowing you to remove them without damaging the threads.
2. Extension bar: An extension bar provides extra reach when needed, especially if the coil pack is located deep within the engine bay.
3. Torque wrench: A torque wrench ensures that you tighten bolts and nuts to the correct specification, preventing overtightening or undertightening.
4. Coil pack puller: This specialized tool is designed to safely remove stuck coil packs without damaging the surrounding components.
5. Dielectric grease: Dielectric grease is applied to the spark plug wire connectors to prevent arcing and improve electrical conductivity.
6. New coil pack bolt (if needed): If the bolt is damaged or corroded, you may need to replace it with a new OEM replacement bolt.
7. Feelers gauge: A feelers gauge is used to measure the spark plug gap, ensuring that it is within the specified range for your engine.
8. Ohmmeter: An ohmmeter is used to test the electrical resistance of the coil pack, helping you identify any electrical issues.
Step-by-Step Guide to Removing Stuck Coil Packs
Coil packs are crucial components of your engine’s ignition system. However, they can sometimes become stuck in place, leading to ignition problems. Here’s a detailed guide to removing stuck coil packs safely and effectively:
Safety Considerations:
First and foremost, remember that working on your engine requires proper safety precautions. Wear appropriate clothing, gloves, and eye protection. Disconnect the battery’s negative terminal to prevent electrical shocks.
Tools and Materials:
Gather the necessary tools, including a spark plug socket, wrench, feeler gauge, ohmmeter, and clean rags.
Spark Plug Wire Removal:
Start by disconnecting the spark plug wires from the coil pack connectors. Use a twisting motion to gently remove the wires.
Coil Pack Bolt Removal:
Locate the bolts holding the coil pack in place. Using the appropriate socket or wrench, carefully loosen and remove the bolts.
Coil Pack Extraction:
Once the bolts are removed, gently rock the coil pack back and forth to loosen it. Carefully pull the coil pack straight up to extract it from its location.
Additional Tips:
- Stuck Bolt: If the coil pack bolt is stuck, apply a penetrating oil and let it sit for a few minutes before attempting to remove it.
- Spark Plug Gap: Before reinstalling the coil pack, check the spark plug gap and adjust it to the manufacturer’s specifications using a feeler gauge.
- Coil Pack Resistance: Use an ohmmeter to measure the resistance of the coil pack. A faulty coil pack may have high resistance or no continuity.
- Troubleshooting: If the coil pack continues to malfunction, consult with an experienced mechanic to diagnose and resolve the underlying issue.
Navigating the Perplexing World of Stuck Coil Packs
In the intricate symphony of your engine, coil packs play a crucial role in igniting the spark plugs, triggering the combustion process that powers your vehicle. However, like any mechanical component, coil packs can occasionally become stubborn and refuse to budge from their rightful place. This guide will equip you with the knowledge and tools to overcome this automotive challenge.
Safety First:
Before delving into the task of removing a stuck coil pack, prioritize your safety by following essential precautions. Disconnect the battery’s negative terminal to prevent electrical shocks, and wear appropriate safety gear to protect your hands and eyes. Remember, your well-being is paramount.
Tools and Materials:
Gather the necessary tools for this operation, including:
- Socket set
- Wrench
- Feeler gauge
- Ohmmeter
- Gloves
- Safety glasses
An Illustrated Guide to Coil Pack Anatomy:
Visualize the engine components involved in this adventure with an exploded view diagram. It will highlight the coil pack, a small, cylindrical device that sits atop the spark plug. The coil pack is responsible for generating a powerful electrical charge that travels through the spark plug wire and into the spark plug, creating the spark that ignites the fuel-air mixture in the combustion chamber.
Step-by-Step Coil Pack Removal:
- Disconnect spark plug wires: Carefully unplug the spark plug wires from the coil packs.
- Remove coil pack bolts: Using an appropriate socket or wrench, loosen and remove the bolts that secure the coil packs to the engine.
- Extract coil packs: Gently lift and remove the coil packs from their sockets. If they’re stuck, tap them lightly with a rubber mallet.
Troubleshooting Coil Pack Issues:
Diagnose and resolve common coil pack problems:
- Inspect coil pack bolt: Check for damage or corrosion on the bolt head or threads. Replace the bolt if necessary.
- Measure spark plug gap: Use a feeler gauge to ensure the correct spark plug gap. Adjust the gap if needed.
- Test coil pack resistance: Utilize an ohmmeter to measure the resistance of the coil pack. A faulty coil pack will exhibit abnormal resistance readings.
Remember, if you encounter any difficulties or uncertainties, don’t hesitate to consult a qualified mechanic. Together, we can ensure that your engine runs smoothly, powering you toward your automotive adventures.
Inspecting the Coil Pack Bolt
As you embark on the mission to free the stuck coil pack, it’s imperative to give the coil pack bolt a thorough examination. This small but crucial component holds the coil pack securely in place, and any damage or corrosion can hinder its removal.
Begin by仔细检查using a flashlight and a magnifying glass. Look for any signs of damage to the bolt head, such as rounding, stripping, or corrosion. Pay special attention to the threads, as corrosion or deformation can make it difficult to unscrew the bolt.
If you notice any damage to the bolt head or threads, don’t panic. Use a fine wire brush or steel wool to gently remove any corrosion or dirt, taking care not to damage the bolt further. If the damage is severe, you may need to replace the bolt with a new one.
Once you’re satisfied with the condition of the bolt, it’s time to move on to the next step: measuring the spark plug gap.
Measuring Spark Plug Gap: A Crucial Step for Optimal Ignition
One of the most critical aspects of maintaining a healthy ignition system is ensuring the spark plug gaps are correctly set. The spark plug gap refers to the precise distance between the spark plug’s center electrode and the side electrode. This gap determines the size of the spark that jumps between the electrodes, which directly affects the engine’s performance.
Why is the Spark Plug Gap Important?
A properly set spark plug gap is essential for several reasons:
- Optimal ignition: The spark gap determines the strength of the spark. If the gap is too narrow, the spark will be weak and may struggle to ignite the air-fuel mixture, leading to misfires and poor engine performance. On the other hand, if the gap is too wide, the spark will be too strong and can damage the spark plug or other ignition system components.
- Fuel efficiency: A correct spark plug gap ensures that the spark ignites the fuel efficiently, reducing fuel waste and improving gas mileage.
- Engine longevity: Properly gapped spark plugs help prolong the life of the engine by preventing premature wear and tear on its components.
Measuring the Spark Plug Gap
Measuring the spark plug gap requires a special tool called a feeler gauge. The feeler gauge consists of a series of thin, flat blades of different thicknesses. To measure the gap, slide the feeler gauge between the spark plug’s center electrode and the side electrode. The blade that cannot be inserted without forcing the gauge is the correct thickness for the gap.
Setting the Spark Plug Gap
If the measured gap is not within the manufacturer’s specifications, you will need to adjust it. To do this, gently bend the side electrode of the spark plug until the correct gap is achieved. Be careful not to overbend the electrode, as this can damage the spark plug.
Measuring and setting the spark plug gap is a simple yet crucial step in maintaining a well-functioning ignition system. By ensuring the gap is correctly adjusted, you can improve engine performance, enhance fuel efficiency, and extend the life of your vehicle’s engine. Remember to refer to your vehicle’s owner’s manual for the recommended spark plug gap specifications and seek professional assistance if you encounter any difficulties.
Testing Coil Pack Resistance: A Guide to Troubleshooting Ignition Issues
Identifying Coil Pack Malfunctions through Resistance Measurement
When your engine falters, stutters, or refuses to start, a faulty coil pack could be the culprit. One diagnostic technique to identify these issues is to measure coil pack resistance. Using an ohmmeter, you can determine if the coil pack is functioning correctly.
Step-by-Step Resistance Measurement
Materials required:
- Digital multimeter or ohmmeter
- Coil pack connector diagram
Steps:
- Disconnect the coil pack connector. Refer to the connector diagram to locate the correct wires.
- Set the ohmmeter to 200 ohms.
- Touch one probe to the positive terminal and the other probe to the negative terminal of the coil.
- Read the resistance value.
Interpreting Resistance Values
Primary (input) circuit resistance should be within the specifications provided by the vehicle manual. If the resistance is too low, it indicates a short circuit. If it’s too high, there may be an open circuit.
Secondary (output) circuit resistance should also be within specific ranges. A low resistance suggests a short circuit, while high resistance indicates an open circuit.
By accurately measuring coil pack resistance, you can pinpoint specific issues, such as internal coil damage, winding shorts, or faulty connections. This valuable diagnostic tool enables you to diagnose and repair coil pack problems, restoring your engine to optimal performance.
Troubleshooting Coil Pack Problems: A Comprehensive Guide
Imagine your car suddenly sputtering and losing power, leaving you stranded on the road. The culprit may be a malfunctioning coil pack, an essential component in your engine’s ignition system. This guide will equip you with the knowledge and steps to diagnose and resolve coil pack issues, ensuring a smooth ride ahead.
Common Symptoms of a Malfunctioning Coil Pack:
- Engine misfires: Irregular engine operation, often accompanied by jerking or hesitation.
- Check Engine Light: The illuminated light on your dashboard indicates a problem with the engine, including possible coil pack issues.
- Reduced fuel efficiency: A misfiring engine burns fuel inefficiently, leading to decreased gas mileage.
- *Poor acceleration:** The coil pack provides the spark needed for ignition, and a faulty one can hinder engine performance.
- Engine stalling: In severe cases, a malfunctioning coil pack can cause the engine to stall or refuse to start.
Diagnosis:
-
Visual Inspection: Check for cracks, burns, or other physical damage on the coil pack.
-
Ohmmeter Test: Use an ohmmeter to measure the resistance between the terminals on the coil pack. Refer to your vehicle’s repair manual for the specified resistance values.
-
Spark Plug Gap Measurement: Ensure the spark plug gap is within the manufacturer’s specifications using a feeler gauge. An incorrect gap can affect ignition.
Resolution:
-
Coil Pack Replacement: If the coil pack is damaged or fails the ohmmeter test, it must be replaced. Follow the step-by-step guide above to safely remove and install the new coil pack.
-
Spark Plug Replacement: A faulty spark plug can also cause coil pack problems. Check the spark plugs and replace them if necessary.
-
Wiring Repair: Inspect the wiring connected to the coil pack for damage or loose connections. Repair or replace any faulty wiring as needed.
-
ECM Reset: The Engine Control Module (ECM) may need to be reset to recognize the new coil pack. Disconnect the battery and reconnect it after a few minutes.
By understanding the common symptoms, diagnosis, and resolution methods for coil pack problems, you can confidently address this issue and restore your vehicle’s performance. Remember to always prioritize safety and consult your vehicle’s repair manual for specific details. With this guide, you are equipped to troubleshoot coil pack problems like a seasoned mechanic, ensuring a smooth and reliable ride every time you hit the road.