Unleash your creativity with our step-by-step sugar sculpture guide! Learn the tools, materials, and techniques to transform sugar into captivating creations. Master sculpting, shaping, and coloring techniques, troubleshooting any challenges along the way. From basic tools to advanced glazing, this guide empowers you to elevate your culinary masterpieces with stunning sugar sculptures.
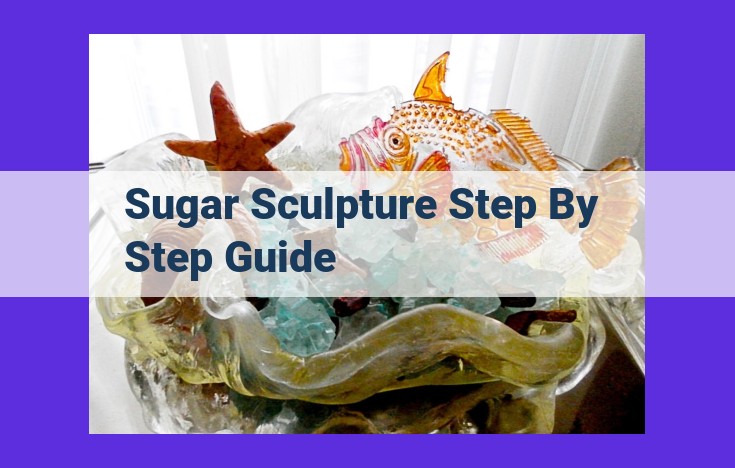
Step-by-Step Sugar Sculpture Guide: Transform Sugar into Captivating Creations
Ever wondered how those exquisite sugar sculptures grace the top of delectable pastries? Sugar sculpting, an art form that transforms ordinary sugar into breathtaking creations, is a skill that can elevate your culinary presentations to new heights. This comprehensive guide will equip you with the knowledge and techniques to master the art of sugar sculpting, leaving your family and friends in awe.
Embark on a Sweet Adventure
Sugar sculpting is a journey that combines creativity, precision, and a touch of magic. By learning this art, you’ll discover the joy of crafting edible masterpieces that add a whimsical and artistic touch to your culinary creations. Whether you’re a seasoned baker or an aspiring artist, sugar sculpting offers a rewarding and enriching experience.
Chapter 1: Embark on a Sweet Journey with Tools and Materials
As you venture into the captivating world of sugar sculpting, a realm where imagination takes flight and sugar transforms into enchanting creations, it’s essential to equip yourself with the right tools and materials. Embrace these as your artistic companions, guiding you on this sugary adventure.
Essential Sugary Allies
Dive into the world of sugar sculpting tools, where each instrument plays a pivotal role in shaping your sugary masterpieces. Molds, the sculptors of form, await your touch to imprint intricate designs onto your sugar canvas. Decorating tools, your loyal companions, assist you in carving and sculpting, bringing life to your sugary creations. And cake decorating tips, the masters of precision, enable you to pipe delicate details, adding a touch of finesse to your designs.
Materials for a Sweet Symphony
Now, let’s explore the delectable materials that form the foundation of sugar sculptures. Sugar, the sweet protagonist, provides the malleable base for your artistry. Sugar paste, a pliable delight, grants you the freedom to mold and shape, transforming into intricate figures. Fondant, like a blank canvas, invites you to paint and embellish, adding color and life to your creations. And paste colors, vibrant pigments, become your palette, allowing you to infuse your sculptures with the hues of your imagination.
Chapter 2: Preparing the Sugar – The Magic Ingredient
Step into the enchanting world of sugar sculpting, where the ordinary transforms into the extraordinary. As you embark on this sugary adventure, mastering the preparation of sugar becomes your first culinary conquest. Allow us to guide you through the step-by-step process that will turn mere sugar crystals into a palette of vibrant hues and pliable textures.
Kneading and Rolling: The Dance of Sugar
Begin by kneading the sugar, a rhythmic motion that awakens its hidden potential. Work the sugar, much like a baker works dough, until it achieves a smooth and pliable consistency. This kneading process expels trapped air, ensuring a flawless foundation for your sugar sculptures.
Next, roll out the sugar into a flat sheet, akin to preparing pastry for a gourmet meal. Use a rolling pin to evenly distribute the sugar, creating an even thickness. This step not only enhances the pliability of the sugar but also prepares it for the heat that awaits.
Heating and Cooling: A Sugar Symphony
Now, it’s time to introduce heat into the equation. Heat the sugar gently, ever so gently, until it resembles a warm, pliable honey. Too much heat can scorch the sugar, while too little can leave it crumbly. Patience is key, as the sugar slowly transforms under the watchful eye of the culinary artist.
Once the sugar has reached its desired warmth, allow it to cool. This cooling process is crucial for stabilizing the sugar and preventing it from becoming overly sticky or brittle. As the sugar cools, its structure gradually solidifies, laying the groundwork for intricate sculpting and molding.
Coloring the Canvas: A Vibrant Symphony
With the sugar prepared, it’s time to infuse it with vibrant hues. Paste colors emerge as the secret weapon in your sugar sculpting arsenal. These concentrated food colorings, available in a spectrum of shades, will breathe life into your sugar creations.
Knead the paste colors into the warm sugar, carefully blending them until the desired hue is achieved. Experiment with different colors and combinations to create a kaleidoscope of sugar shades that will make your sculptures a visual feast.
Sculpting Techniques: Embarking on the Sugar Canvas
Carving: Precision and Artistry
Take your sharp tools and transform the malleable sugar into intricate shapes. Carving allows you to sculpt fine details, etch patterns, and create delicate textures. Surgical precision and a steady hand will guide you as you shape sugar like a seasoned sculptor.
Modeling: Dreams Take Form
Unleash your imagination with freehand modeling. Create figures, objects, and whimsical designs directly from your mind’s eye. Knead and shape the sugar with your artistry, blending and smoothing until your creations come to life.
Molding: Replicating Perfection
Harness the power of pre-made molds to replicate intricate designs with ease. Press the softened sugar into the molds and let it set. Patience is key, as the results will be worth the wait when you unveil your perfectly replicated sugar masterpieces.
Piping: Intricate Details, Effortless Elegance
Extrude sugar paste through a variety of piping tips to create intricate details and embellishments. Swirls, borders, and delicate flowers are just a taste of the possibilities. Piping adds a nuanced touch to your sugar sculptures, elevating them to the extraordinary.
Texturing: Adding Depth and Storytelling
Bring your sugar sculptures to life by incorporating texture. Use tools to create the illusion of wood grain, wrinkles, or any other surface you desire. Texturing adds depth and realism, making your sculptures tell a captivating story.
Chapter 4: Shaping and Molding
Unleashing the Artistry of Sugar
As we delve into the realm of sugar sculpting, it’s time to shape and mold our sweet creations into exquisite masterpieces. This chapter will guide you through the techniques of using cutters, templates, and even armatures to achieve precise and stable sugar structures.
First, let’s master the art of precise shaping. Cutters and templates are your allies in creating uniform shapes, from intricate petals to elegant bows. The key is to apply firm pressure and use a sharp cutter for clean cuts. Alternatively, templates can be used as guides for rolling out sugar paste into desired shapes.
However, when larger or more complex sculptures are on your mind, armatures become your unsung heroes. These wire or wooden frameworks provide support and stability to your sugar structures, allowing you to create taller and more ambitious works of art. Simply attach the sugar paste to the armature using melted chocolate or edible glue.
Finally, let’s explore the transformative power of shaping techniques. Pinching allows you to refine edges and create delicate details. Folding creates pleats and ruffles, adding an extra layer of texture and movement. And sculpting, with the help of specialized tools, enables you to carve and shape sugar into lifelike figures and objects.
Mastering the Art of Molding
As you progress in your sugar sculpting journey, you’ll encounter the magical world of molds. These pre-made molds allow you to replicate intricate designs with ease. To use them effectively, prepare your sugar paste as usual, press it firmly into the mold, and allow it to set. Once firm, gently remove the sugar from the mold, revealing a perfectly shaped masterpiece.
With the skills acquired in this chapter, you’ll be equipped to transform humble sugar into enchanting sculptures that bring your culinary creations to life. So, embrace the power of shaping and molding, unlock your creativity, and prepare to dazzle the world with your edible masterpieces.
Chapter 5: Coloring and Finishing: Bring Your Sugar Art to Life
In the world of sugar sculpting, color is the brushstroke that transforms your edible masterpiece from mere confection to an eye-catching work of art. This chapter will guide you through the secrets of coloring your sugar creations, adding vibrant hues and intricate details that elevate them to new heights of artistry.
Food Coloring Techniques: A Rainbow on Your Palette
Unleash your inner artist with a vibrant palette of food coloring techniques. Airbrushing grants you precise control, allowing you to gently mist colors over your sculptures for smooth, even coverage. Painting offers a more intimate touch, enabling you to add intricate patterns and delicate brushstrokes. And for a touch of shimmer and elegance, don’t forget dusting with powdered pigments.
Enhancing Details: Paintbrushes and Luster Dust
Fine-tune your sugar masterpieces with the precision of a painter. Use paintbrushes to dot, stripe, and highlight your sculptures, bringing life to even the smallest features. And to add a touch of star quality, sprinkle your creations with luster dust—a shimmering powder that transforms ordinary sugar into iridescent works of art.
Glazing: The Glossy Touch
Elevate your sugar sculptures to culinary royalty with a final layer of glaze. This transparent, edible coating not only protects your artwork from moisture but also gives it an irresistible high-gloss shine. Brush or spray on a thin layer of glaze, allowing it to dry for a polished, professional finish.
By mastering the art of coloring and finishing, you unlock the potential to create sugar sculptures that captivate the eye and tantalize the taste buds. Embrace the magic of sugar and transform your cakes, pastries, and desserts into edible masterpieces that will leave a lasting impression on your guests.
Chapter 6: Common Mistakes and Troubleshooting
In the world of sugar sculpting, mistakes are an inevitable part of the journey. But don’t let these setbacks discourage you; they hold valuable lessons that can elevate your artistry. Here’s how to troubleshoot the most common sugar sculpting pitfalls:
Too Sticky: The Sticky Situation
If your sugar paste resembles a stubborn glue, don’t panic. Sprinkle powdered sugar or add cornstarch gradually until it becomes manageable. Remember, a little goes a long way to avoid making the mixture excessively dry.
Too Dry: The Sahara of Sugar
On the flip side, if your sugar paste resembles the Sahara Desert, don’t despair. Add a few drops of water or glycerin to restore its pliability. Work the mixture until it reaches a smooth, malleable consistency. The key is to find the perfect balance, ensuring your sugar paste is neither too sticky nor too dry.
Cracking: A Tale of Patience
Cracking can be a heartbreaking moment for sugar sculptors. To prevent this, avoid overworking the sugar paste. Knead and roll it gently, allowing it to cool sufficiently before shaping it. Remember, patience is crucial in the art of sugar sculpting.
Melting: A Sugar Meltdown
Heat is the enemy of sugar sculptures. Avoid excessive heat sources, such as direct sunlight or ovens. Store your sculptures in a cool environment to maintain their integrity. If melting occurs, don’t fret. Quickly place the sculpture in the refrigerator or freezer to stabilize it.
Fading: Preserving the Hues
To ensure your sugar sculptures retain their vibrant colors, use high-quality food coloring. Store them properly, away from direct light and moisture. This will prevent fading and preserve their beauty.


